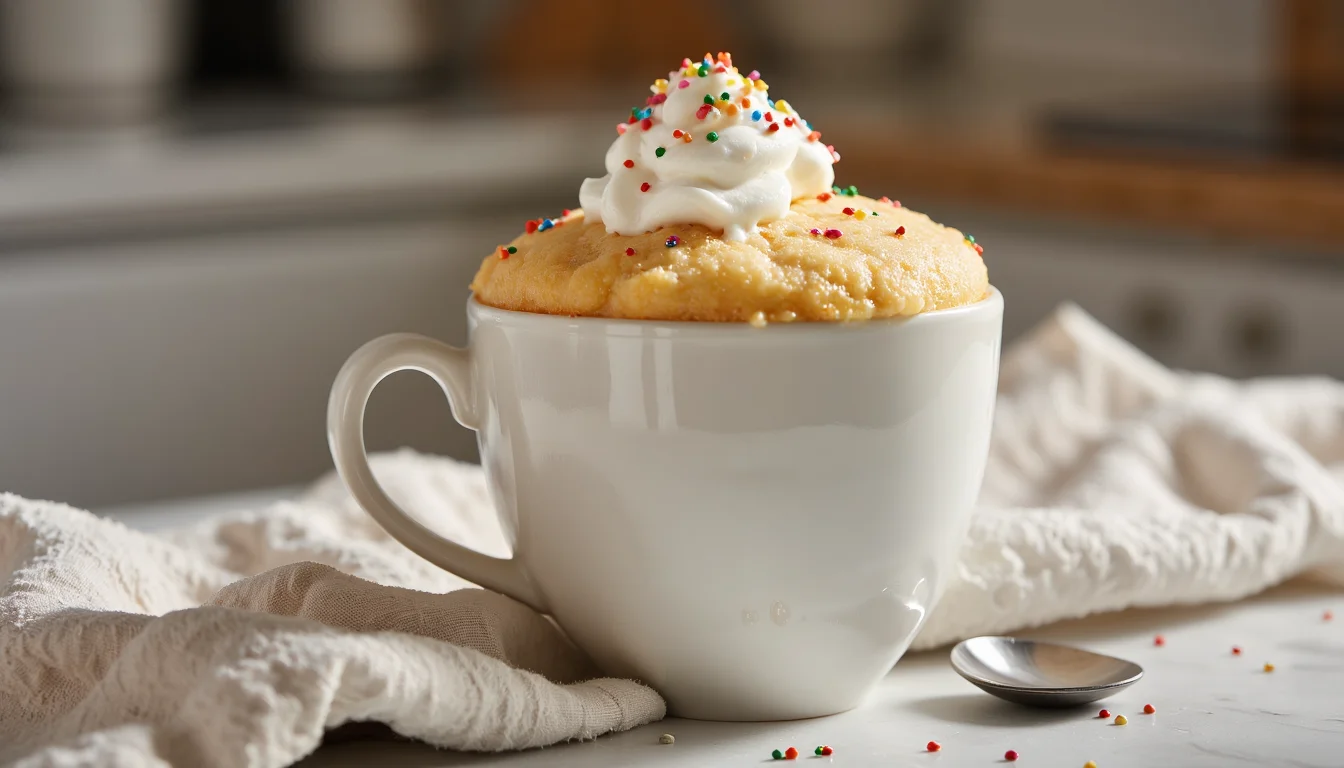
Fluffy Vanilla Mug Cake (No Egg & Ready in 2 Minutes)
Why you’ll love this vanilla mug cake
It’s 10:37 pm, the dishes are “soaking,” and your sweet tooth suddenly wakes up. You don’t want to preheat an oven. You definitely don’t want a sink full of extra bowls. You just want warm vanilla cake you can eat with a spoon.
That’s exactly what this vanilla mug cake does. No egg to crack, no weird rubbery texture, and no leftover cake staring at you tomorrow morning. Just melt, whisk, microwave, done. Two minutes, tops.
I use butter for real cake flavor and skip the egg so it stays soft and fluffy, not bouncy or spongey. It tastes like a slice of vanilla birthday cake, shrunk down into a cozy little mug. And you mix everything right in that mug, so when you’re finished? Rinse, done, back to the couch.
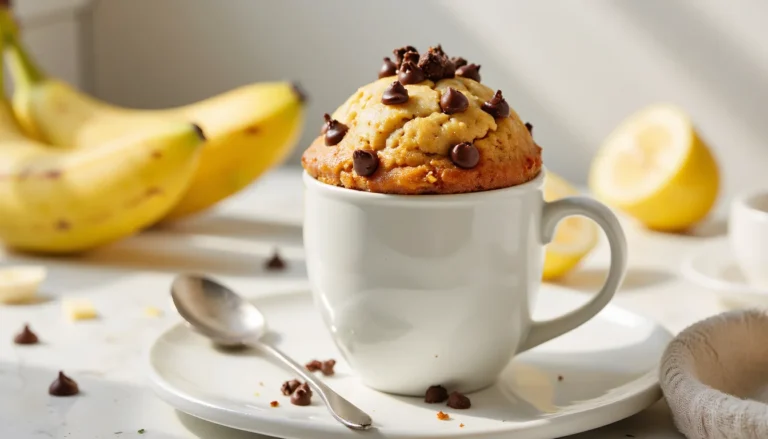
Craving more cozy single-serve desserts? Head over to The Ultimate Guide to Mug Cakes for flavor ideas, timing tricks, and troubleshooting all in one place.
What is a mug cake?
A mug cake is exactly what it sounds like: cake batter mixed and cooked right in a mug, then “baked” in the microwave instead of the oven. One mug. One fork. One serving. It’s the fastest way I know to turn a random craving into an actual dessert.
Because the cake is so small and cooks so fast, it behaves a little differently than a regular oven cake. The microwave heats from the inside out, so the batter puffs up in seconds and keeps cooking even after the timer beeps. That’s why you’ll see lots of warnings about not overcooking. Ten extra seconds can be the difference between moist and hockey puck.
You’ll notice this vanilla mug cake is egg-free on purpose. In a full-sized cake, an egg adds structure and richness. In a tiny mug under high microwave heat, that same egg can turn everything dense and rubbery, almost like a sweet omelet. Not cute. Skipping the egg keeps the texture soft, fluffy, and more “real cake.”
Instead, we rely on baking powder for lift, melted butter for tenderness and flavor, and milk to keep the crumb moist. The result is a cozy little vanilla cake you can make any time you’ve got five minutes, a mug, and a microwave.
Ingredients you need
You only need a handful of pantry staples for this little cake. Nothing fancy, nothing that requires a special grocery run. If you bake even once in a while, you probably have everything already.
Pantry staples
- All-purpose flour
Regular all-purpose flour is perfect here. You’ll use about 1/4 cup, which is just enough to give the cake structure without making it dry. Be sure to spoon the flour into your measuring cup and level it off. If you scoop and pack it in, the cake can turn out dense. - Sugar
Plain white granulated sugar keeps the flavor light and classic. Two tablespoons sweeten the cake without making it cloying, so you can still add ice cream or whipped cream on top. - Baking powder
This is the lift. Half a teaspoon helps the batter puff up quickly in the microwave. If your baking powder is old, the cake may not rise much, so it’s worth checking that date. - Salt
Just a pinch. It seems tiny, but it makes the vanilla pop and keeps the flavor from tasting flat. - Butter
Two tablespoons of melted butter give this mug cake that “real cake” flavor and a soft crumb. You’ll melt it right in the mug, so there’s no extra dish. Salted or unsalted is fine; if yours is salted, you can skip the extra pinch of salt. - Milk
Three tablespoons of milk bring everything together into a smooth batter. Whole milk gives the richest texture, but 2% or your favorite non-dairy milk also works. - Vanilla extract
The star. Half a teaspoon gives the cake that cozy bakery smell and flavor. Use the good stuff if you can; you really taste it here.
Optional fun extras
- Sprinkles
Stir in a teaspoon or two of rainbow jimmies for a funfetti vibe. They’re sturdy and won’t bleed color as quickly as tiny nonpareils. - Chocolate chips
Add a tablespoon of chocolate chips for little melty pockets throughout the cake. So good with vanilla ice cream. - Flavor twists
A pinch of cinnamon, a spoonful of Nutella or peanut butter in the center, or a splash of almond extract can totally change the mood of your mug cake without changing the base recipe at all.
Choosing the right mug
The mug you grab actually matters more than you’d think. Too small and the batter can bubble up and spill over the sides. Too tall and skinny and the center can stay gooey while the edges overcook. Been there. Scraped that off the microwave plate.
For this recipe, aim for a 12 ounce mug or larger. That’s the size of a standard big coffee mug, not the tiny teacup from the back of the cabinet. When you pour in the batter, the mug should only be about half full, with at least 1.5 inches of space at the top. That headroom gives the cake space to rise without overflowing.
Shape matters too. A wider mug with straight sides cooks more evenly than a super tall, narrow one. The microwave energy can reach the batter more evenly, so you get a fluffy cake all the way through, not a dried-out top and gooey bottom.
And please make sure your mug is microwave safe. No metallic trim, no cracks. If you’re not sure, check the bottom or test with water in the mug for 30 seconds. The mug will be hot coming out of the microwave, so use a towel or oven mitt to grab it. Hot cake. Hot handle. Handle with care.
How to make vanilla mug cake (step-by-step)
You’re about 3 minutes away from cake, so grab your mug and let’s go.
1. Melt the butter
Add 2 tablespoons butter directly into your microwave-safe mug (12 oz or larger). Microwave for about 30 to 40 seconds, just until melted. It shouldn’t be sizzling like crazy. If it is, let it sit for a few seconds to cool slightly so it does not scramble your milk.
2. Whisk in the wet ingredients
Pour in 3 tablespoons milk and 1/2 teaspoon vanilla extract. Use a fork or mini whisk to stir everything together until smooth. This “tempers” the mixture so it is warm, not boiling hot.
3. Add the dry ingredients
Stir in 2 tablespoons sugar, 1/2 teaspoon baking powder, and a small pinch of salt. Mix just to combine. Then add 1/4 cup all-purpose flour. Gently stir until you no longer see streaks of flour. The batter should be smooth and pourable, like a thick pancake batter. If it seems very runny, you can sprinkle in an extra teaspoon of flour. Fold in sprinkles or chocolate chips now if you are using them.
Try not to overmix. Once the flour is in and mostly smooth, you are done. Overmixing can make the cake tough.
4. Microwave the cake
Place the mug in the center of the microwave. Cook on High for:
- About 60 seconds in a powerful microwave (1000–1200 watts).
- About 75 to 90 seconds in a smaller, lower watt microwave (around 700 watts).
Watch near the end. The cake will rise up, look set around the edges, and the very center may still look slightly shiny or a tiny bit damp. That is what you want. If it is still obviously liquid, microwave in 5 to 10 second bursts until just set.
Remember, the cake keeps cooking from the residual heat after the beep. If you wait for it to look completely dry on top in the microwave, it will be overbaked and dry in the mug.
5. Let it rest, then serve
Carefully remove the mug. The handle and sides will be hot, so use a towel or oven mitt. Let the mug cake sit on the counter for 1 full minute. This quick rest lets the center finish cooking and the crumb set so it is soft, not gummy.
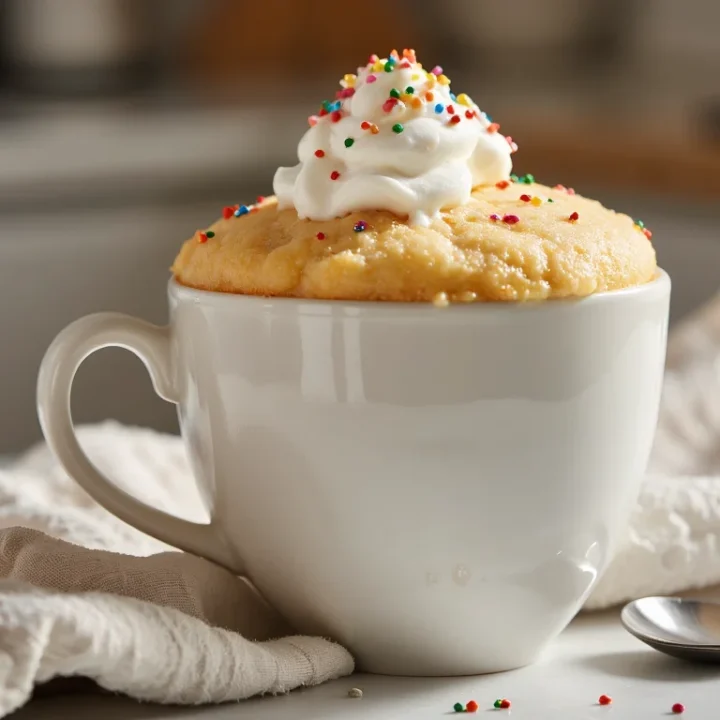
Top with whipped cream, a scoop of ice cream, or a drizzle of chocolate or caramel sauce. Then grab a spoon and enjoy it warm, exactly how mug cake is meant to be eaten.
3 secrets to avoid a rubbery mug cake
If you’ve ever taken a bite of mug cake and thought, “Wow, this tastes like a sweet sponge,” you’re not alone. Microwave cakes are picky. A few tiny tweaks make all the difference between fluffy and rubbery.
1. Don’t overmix the batter
Once the flour goes in, treat the batter gently. Stir just until you don’t see dry pockets of flour. That’s it. Extra stirring develops the gluten in the flour and makes the texture chewy instead of soft. So when you’re tempted to keep whisking until it’s perfectly silky, don’t. A few small lumps are completely fine.
2. Don’t overcook it
This is the big one. The microwave keeps cooking the cake even after the timer beeps. If you cook it until the top looks completely dry and firm while it’s still in the microwave, it will turn out dry and rubbery in the mug.
Instead, stop when the edges look set and the very center still looks a little shiny or slightly underdone. If it’s still obviously liquid, add just 5 to 10 seconds at a time. Tiny bursts. You’re sneaking up on done, not blasting it.
3. Eat it right away
Mug cakes are not make-ahead desserts. They’re “right now” desserts. As they sit, they keep cooking and can turn dense or dry. After that 1-minute rest, grab your spoon and go for it.
And remember, skipping the egg is a secret all on its own. No egg means less rubbery, more fluffy, and no weird omelet vibes in your midnight cake.
Variations & mix-ins
Once you’ve nailed the basic vanilla version, it’s way too easy to turn this into a whole lineup of mini desserts. Same base batter, different add-ins. No extra dishes, no new recipe to memorize.
The Birthday Cake
Stir 1 to 2 teaspoons of rainbow sprinkles (jimmies) into the batter right before microwaving. Top the warm cake with whipped cream and a few extra sprinkles. Instant birthday vibes, even if it’s just a random Tuesday night.
Chocolate Chip Vanilla Mug Cake
Add 1 tablespoon mini or regular chocolate chips to the batter. You can also sprinkle a few on top before cooking so they stay visible and a little gooey. This one loves a scoop of vanilla ice cream on top.
Cinnamon Roll Mug Cake
Whisk 1/4 teaspoon ground cinnamon into the dry ingredients. After cooking, drizzle the warm cake with a quick icing made from powdered sugar and a few drops of milk. It tastes like the center of a cinnamon roll, but way less work.
Vegan / Dairy-Free Option
Swap the butter for 2 tablespoons neutral oil or melted coconut oil, and use almond milk, oat milk, or your favorite plant milk instead of dairy. The cake stays soft and fluffy, and the vanilla still shines.
Gluten-Friendly Twist
Use a 1:1 gluten-free baking blend in place of the all-purpose flour. The texture may be slightly more delicate, so avoid overcooking and let it rest the full minute so it sets.
Play around with extracts too: a drop of almond extract, a tiny splash of coconut, or a swirl of Nutella in the center can make this tiny cake feel completely new.
Topping bar ideas
Half the fun of a mug cake is what you pile on top. The cake is simple on purpose, so you can dress it up however your cravings say. Think of your mug as a tiny dessert bowl just waiting for a topping “menu.”
Ice cream dreams
- Vanilla ice cream + warm caramel sauce
- Chocolate ice cream + chocolate chips
- Strawberry ice cream + fresh berries
Drop the scoop on while the cake is still warm so it melts into the top and makes its own sauce. Messy in the best way.
Whipped cream & fruit
- Whipped cream + sliced strawberries (strawberry shortcake vibes)
- Whipped cream + blueberries + lemon zest
- Whipped cream + bananas + drizzle of peanut butter
You don’t need a full fruit salad. Even a few slices of whatever’s in the fridge can make it feel fancy.
Chocolate lover combos
- Nutella + chopped hazelnuts
- Chocolate syrup + mini chocolate chips
- Crushed Oreos + vanilla ice cream
Spoon a little Nutella or chocolate spread on top, then let the warmth of the cake soften it into a glossy puddle.
Crunchy toppings
- Crushed pretzels + caramel
- Chopped nuts (pecans, walnuts, almonds)
- Granola or crushed cookies
That bit of crunch on a soft, warm cake makes it feel like a full dessert, not just a quick microwave experiment. Mix and match a few ideas and you’ve basically created your own personal mini sundae bar, no scoops required.
Troubleshooting & pro tips
Microwave desserts are a tiny bit dramatic. One extra spoonful of flour or 10 extra seconds in the microwave and suddenly things get weird. Here’s how to fix the most common mug cake problems before they happen.
“Why is my mug cake rubbery?”
Two main culprits: egg and overcooking. We already ditched the egg, so if yours turns rubbery, it’s almost always cooked too long. Next time, shave off 5–10 seconds and stop when the center still looks a tiny bit shiny. Remember, it keeps cooking as it rests.
“Why did my cake sink in the middle?”
A little dip in the center is normal and honestly kind of nice for toppings. But if it collapses hard, your cake was probably undercooked or your baking powder is old. Make sure you’re using 1/2 teaspoon fresh baking powder, and if the middle is still very wet, add another quick 5 seconds in the microwave.
“Why is it hard as a rock?”
Overcooked + too much flour. Spoon your flour into the measuring cup, level it off, and don’t pack it down. About 30–35 grams of flour is ideal if you like to weigh. And stick to the timing: 60 seconds for a powerful microwave, up to 90 seconds for a lower watt one, checking as you go.
Metric & measuring tips
If you’re using grams, keep the ratios: around 30–35g flour, 25g sugar, 28g butter, plus your milk and flavorings. Close is good enough here. This is dessert, not a chemistry exam.
Pro tip: know your microwave
If your microwave is a little beast and always nukes food fast, start low with 45–50 seconds and add time in tiny bursts. If it’s older or lower watt, expect closer to 80–90 seconds total. Stay nearby the first time you make it so you learn your perfect sweet spot. Once you know that timing, future mug cakes are basically foolproof.
Storage & make-ahead
Here’s the honest truth: mug cakes are meant to be eaten right away. The texture is best in that window right after it rests for a minute or two. Warm, soft, fluffy. After that, it slowly starts to dry out. Still edible. Just not magic.
If you do end up with leftovers (rare, but it happens), let the cake cool completely, then cover the mug tightly with plastic wrap or transfer the cake to a small airtight container. Store it at room temperature for up to 1 day or in the fridge for 2–3 days.
To reheat, microwave in 5–10 second bursts just until warm. Too long and it dries out fast, so go gently. You can also crumble a cold leftover mug cake over yogurt or ice cream instead of reheating it. Zero waste, still dessert.
The best make-ahead move here is prepping a DIY mug cake mix. In a small jar or bag, combine the dry ingredients: flour, sugar, baking powder, and salt. When a craving hits, dump it into your mug, add the melted butter, milk, and vanilla, stir, and cook. You get all the speed of a store-bought mix, but with ingredients you actually recognize.
Vanilla Mug Cake Printable Recipe Card
Easy Vanilla Mug Cake (No Egg)
Warm, fluffy vanilla mug cake you can make in the microwave in about 1 minute. Egg-free, super soft, and perfect for late-night cravings or quick single-serving desserts.
Ingredients
- 2 tablespoons butter (unsalted or salted; skip added salt if salted)
- 3 tablespoons milk (whole, 2%, or plant based)
- 1/2 teaspoon vanilla extract
- 2 tablespoons granulated sugar
- 1/4 cup all-purpose flour, spooned and leveled (about 30–35 g)
- 1/2 teaspoon baking powder
- Small pinch of salt
- 1–2 teaspoons sprinkles or 1 tablespoon chocolate chips (optional)
Instructions
- Add the butter to a microwave-safe 12 oz mug. Microwave for about 30–40 seconds, just until melted.
- Whisk in the milk and vanilla until smooth and combined.
- Stir in the sugar, baking powder, and salt. Add the flour last and gently mix just until you don’t see dry flour. The batter should be like thick pancake batter. Fold in sprinkles or chocolate chips if using.
- Make sure the mug is no more than half full, with at least 1.5 inches of space at the top for the cake to rise.
- Microwave on High for about 60 seconds in a powerful (1000–1200W) microwave or 75–90 seconds in a lower watt microwave. Stop when the edges look set and the center looks slightly shiny but not liquid. Add extra time only in 5–10 second bursts if needed.
- Carefully remove the mug. It will be hot, so use an oven mitt or towel. Let the cake sit for 1 minute to finish setting, then top as desired and enjoy warm.
Notes
- For a softer texture, err on the side of slightly undercooked; the cake keeps cooking as it rests.
- If you like to weigh ingredients, use roughly 30–35 g flour and 25 g sugar.
- To make it dairy free, use neutral oil or melted coconut oil instead of butter and your favorite plant milk in place of dairy milk.
- Microwaves all cook differently, so the first time is your “test run.” Once you know your perfect timing, your little cake will come out just the way you like it every time.
Nutrition Information:
Yield: 1 Serving Size: 1 mug cakeAmount Per Serving: Calories: 430Total Fat: 24gSaturated Fat: 15gUnsaturated Fat: 9gCholesterol: 70mgSodium: 250mgCarbohydrates: 50gNet Carbohydrates: 49gFiber: 1gSugar: 27gProtein: 5g
Nutrition values are estimates and will vary based on ingredients and brands.
Frequently asked questions
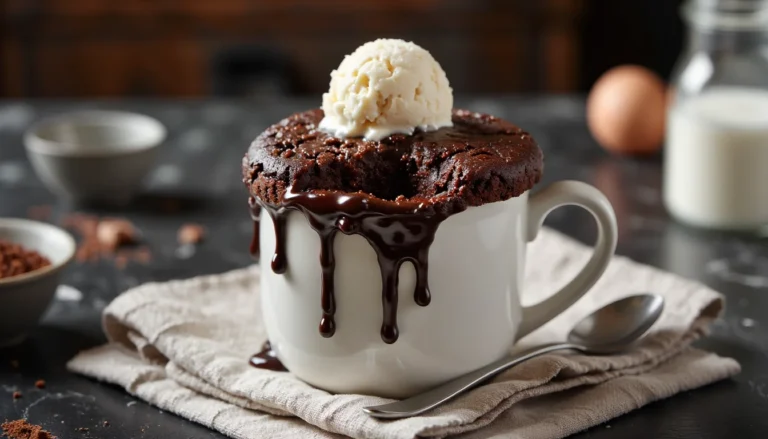
Love This Recipe? Discover More Mug Cake Favorites
If this mug cake hit the spot, don’t miss The Ultimate Guide to Mug Cakes. Inside you’ll find small-batch classics, over-the-top flavor combos, and quick fixes for every rubbery or overflowed mug moment. From brownie-style chocolate to bright lemon and gooey cookie dough, there’s a microwave treat for every craving.