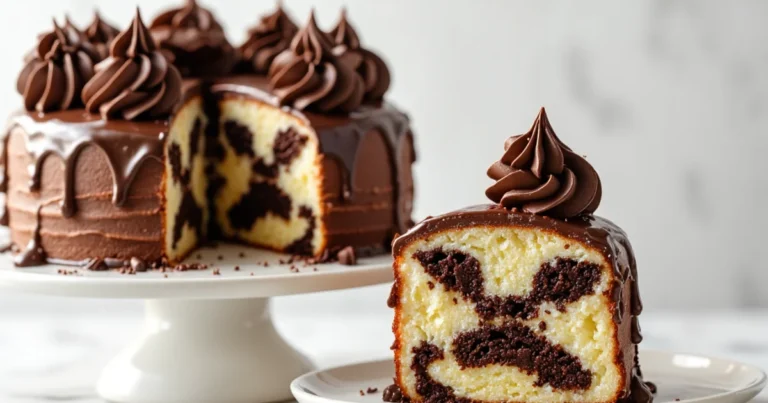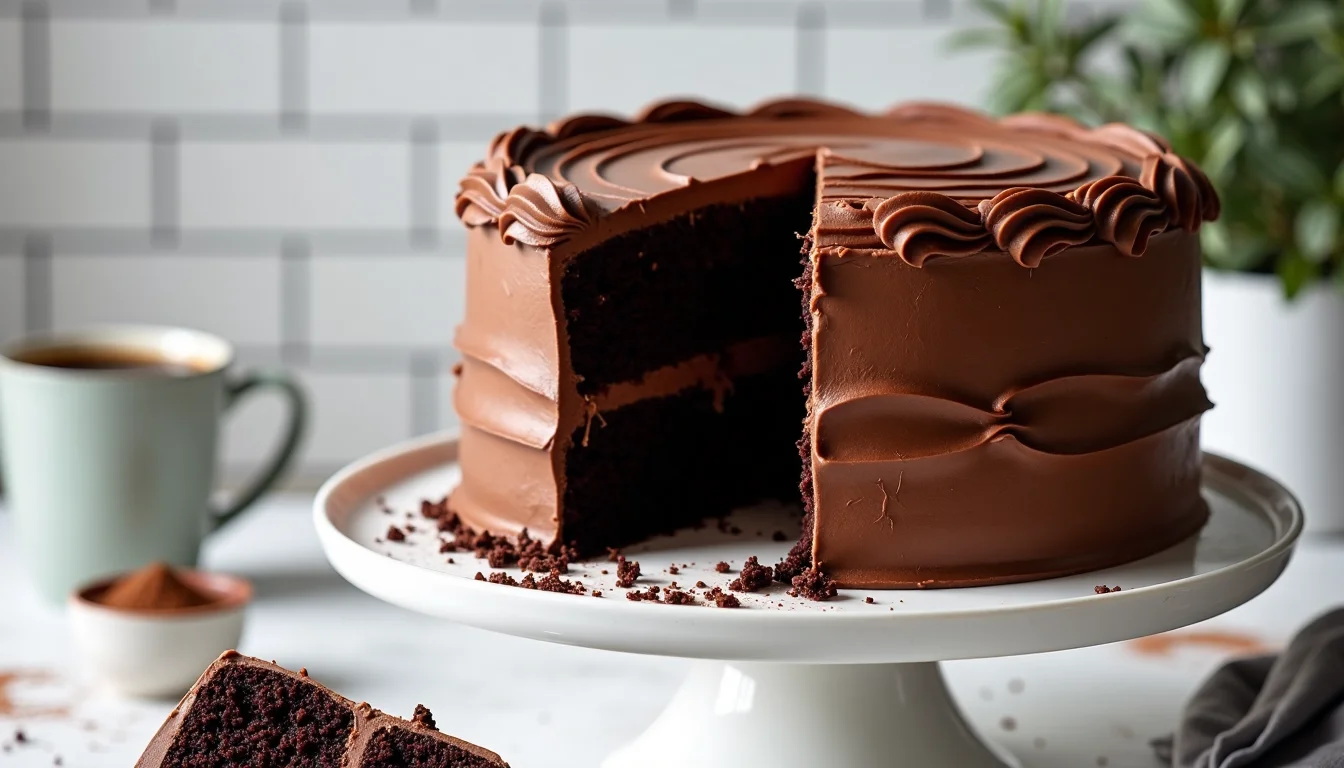
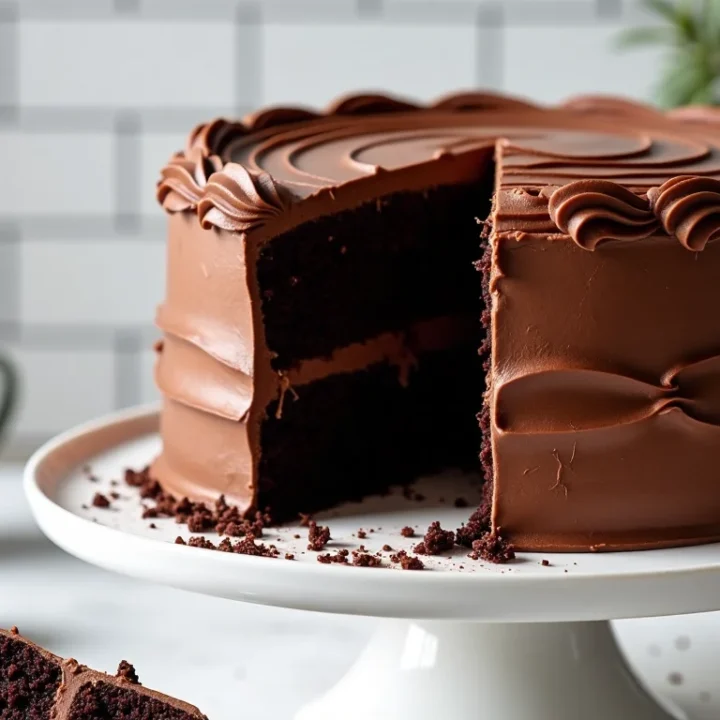
The Best Devil’s Food Cake Recipe (Moist & Fudgy)
Why you’ll love this devil’s food cake
Picture this: it’s 9 pm, you’re still in jeans, and suddenly everyone in the house “needs” chocolate cake. Not polite chocolate. Deep, dark, fork-dragging chocolate with fudgy crumbs stuck to the plate. That’s exactly what this devil’s food cake does.
It’s built with butter for flavor, oil for guaranteed moisture, and a hit of sour cream so the crumb stays plush for days. The cocoa gets whisked with hot coffee first, so the chocolate flavor blooms and tastes extra intense without turning the cake into a mocha situation. Just pure, grown-up chocolate.
I love it because it’s fancy enough for a birthday, but simple enough to throw together on a random Tuesday when the kids are arguing over the last brownie. One batter, two pans, big payoff. No dry slices.
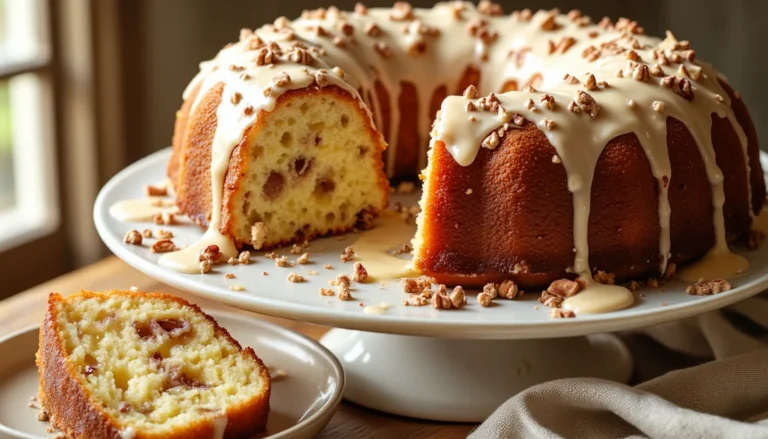
Craving more tall, bakery-style cakes? Head over to The Ultimate Guide to Classic Layer Cakes for step-by-step stacking tips, crumb coat secrets, and seven must-bake classics.
What is Devil’s Food Cake?
Devil’s food cake is the darker, moodier cousin of classic chocolate cake. It’s a super soft chocolate layer cake made with cocoa powder, extra leavening, and usually some kind of tangy dairy (like sour cream or buttermilk). The result is a cake that’s more intense in flavor, a bit looser in crumb, and incredibly moist.
Traditional versions relied on natural cocoa and baking soda for that deep color. Modern versions, like this devil’s food cake recipe, lean on Dutch-process cocoa for an even richer, almost black-brown crumb. Either way, it’s meant to feel a little over-the-top. In the best way.
Devil’s food cake vs. chocolate cake
So what actually makes it different from “regular” chocolate cake? A few things.
Devil’s food uses more cocoa and usually more liquid, so the batter is thinner and bakes up with a fluffier, more open crumb. Chocolate cake is often denser and milder, sometimes with melted chocolate in the batter instead of just cocoa.
There’s also the leavening and acid. Devil’s food typically includes baking soda plus something acidic (like sour cream, buttermilk, or vinegar), which reacts and helps the cake rise high and stay light while deepening the color. Chocolate cake can be as simple as cocoa + baking powder + milk. Still good. Just not quite as dramatic.
Devil’s food cake vs. red velvet cake
Red velvet and devil’s food get mixed up a lot, but they’re not the same. Red velvet has less cocoa, more buttermilk or sour cream, and a signature hit of red food coloring. The flavor is lighter and a bit tangier, with just a hint of chocolate.
Devil’s food skips the food coloring and goes all in on the cocoa. It’s chocolate-first, tang-second. Think of red velvet as creamy and romantic, while devil’s food is dark, bold, and unapologetically chocolaty.
Why is it called “devil’s food” cake?
The name is basically 1900s marketing drama. Angel food cake was the light, pale, fluffy sponge. This was its opposite: dark, rich, and “sinfully” indulgent. So bakers called it devil’s food.
No secret ritual. Just a cake that felt a little too delicious to be wholesome. And honestly, that tracks.
Why this recipe works (the chocolate science)
I didn’t want a “pretty good” chocolate cake here. I wanted the one you remember three days later while you’re making coffee. So this recipe leans on a few nerdy baking tricks that make a very real difference in how the cake tastes and feels. Nothing fancy to do. Just smart ingredient choices.
Butter + oil for flavor and moisture
All-butter cakes taste great but dry out faster. All-oil cakes stay moist but can taste a little flat. So we use both.
Butter brings that rich, classic bakery flavor. It also traps air when you cream it with the sugars, which helps the layers rise tall and fluffy. Oil, on the other hand, stays liquid even when the cake is cool, so the crumb stays soft instead of turning into chocolate cornbread on day two.
Together you get the best of both worlds: big flavor, no dry edges. No sad leftovers.
Bloomed Dutch cocoa + hot coffee
Instead of just tossing cocoa into the flour, we whisk Dutch-process cocoa with very hot coffee. That step “blooms” the cocoa, which basically wakes up all the fat-soluble flavor compounds hiding in the powder. The mixture turns glossy and smell-it-from-the-hallway fragrant.
And the coffee? It doesn’t make the cake taste like a latte. It just deepens the chocolate so it tastes darker and more complex. If you absolutely hate coffee, you can use hot water, but you’ll lose a bit of that wow factor. Your choice.
Sour cream, baking soda and baking powder
Sour cream adds fat and a gentle tang that keeps the crumb tender and velvety. It also brings acidity, which reacts with the baking soda. That reaction gives the batter an extra lift and helps develop the signature deep color of devil’s food.
Baking powder is in there too, as backup. It makes sure the cake rises evenly and doesn’t sulk in the center if your oven runs a little cool. The trio of sour cream, soda, and powder means high, plush layers that stay moist for days. Even the last slice my husband sneaks from the fridge at midnight.
Ingredients & substitutions
Here’s a quick look at what you’ll need and how each ingredient earns its spot. Nothing wild. Just smart pantry choices.
For full amounts, check the recipe card, but I’ll give rough grams here too so you can bake like a pro.
Cocoa powder: Dutch-process vs natural
For that deep, almost black crumb, use Dutch-process cocoa powder. It’s been treated to mellow the acidity, so the flavor is smoother and more “dark chocolate” than sharp or dusty. You’ll need about 75 g, which is roughly ¾ cup.
Can you use natural cocoa? Technically yes, but the cake will be lighter in color and a bit more tangy. If you swap, keep in mind the leavening is balanced for Dutch cocoa, so results can vary. I recommend sticking with Dutch here. It’s worth hunting down.
Coffee options (or how to skip it)
You’ll whisk the cocoa with 1 cup hot coffee to bloom it. Freshly brewed is great; instant works too as long as it’s nice and hot. Medium strength. No need for espresso.
Worried about a coffee taste? Don’t be. It only deepens the chocolate flavor. You won’t bite in and think “latte.” If you truly dislike coffee, use very hot water instead and add a tiny extra splash of vanilla. Still delicious. Just a bit less intense.
Sour cream, milk and egg notes
Sour cream is our moisture and tang MVP. Use ½ cup full-fat sour cream (about 120 g), and make sure it’s at room temperature so it blends smoothly into the batter. No cold blobs.
No sour cream? Thick Greek yogurt works in the same amount. You can also use buttermilk, but the batter will be slightly thinner, so line your pans well.
You’ll also need 3 large eggs, room temperature again, plus vanilla. Cold eggs don’t mix as easily and can make the batter look curdled. So just set them out while you preheat the oven and prep the pans. Easy fix.
Other pantry ingredients
- All-purpose flour: about 250 g (2 cups), measured by fluffing, spooning into the cup, and leveling. Too much flour is the fastest way to a dry cake.
- Granulated sugar + light brown sugar: 1½ cups white sugar (300 g) and ½ cup brown (100 g). The brown sugar adds moisture and a caramel note.
- Unsalted butter + neutral oil: ½ cup (113 g) butter and ½ cup (120 ml) oil. Butter for flavor, oil for that soft crumb even on day three.
- Baking soda, baking powder, salt: these keep the cake tall, tender, and balanced. Don’t skip the salt. It makes the chocolate pop.
That’s it. Just regular ingredients working a little harder together.
How to make devil’s food cake (step-by-step)
This whole batter comes together in about 20 minutes once your ingredients are room temp. It looks thin. That’s correct. Thin batter = plush crumb.
Step 1: Prep the pans and dry ingredients
Preheat your oven to 350°F (175°C). Grease two 9-inch round cake pans, line the bottoms with parchment, then grease the parchment too. Dust the sides and bottoms with cocoa powder instead of flour so you don’t get pale streaks on the edges.
In a medium bowl, whisk together the flour, baking soda, baking powder, and salt until everything looks even. No visible clumps. Set that bowl aside so it’s ready when you need it. Tiny bit of prep now saves scrambling later.
Step 2: Cream the fats and sugars
In a large mixing bowl (or stand mixer with the paddle), beat the butter, oil, granulated sugar, and brown sugar on medium-high speed for about 3 to 4 minutes. The mixture should look lighter in color and a little fluffy. If it still looks dense and greasy, keep going.
Add the eggs one at a time, mixing well after each and scraping down the bowl. Stir in the vanilla. If the mixture looks slightly curdled, don’t panic. It’ll smooth out when you add the dry ingredients.
Step 3: Bloom the cocoa with hot coffee
In a heatproof jug or bowl, whisk the Dutch-process cocoa with the hot coffee until it’s smooth and glossy with no dry pockets. It should smell like pure chocolate heaven.
Whisk in the sour cream until combined. The mixture will be thick and pourable, and just warm, not scorching hot anymore. That’s perfect. If it’s piping hot, let it sit a few minutes so it doesn’t shock the batter.
Step 4: Bring the batter together
Turn the mixer to low. Add about one third of the dry ingredients to the butter mixture. Mix just until you can’t see flour. Pour in about half of the cocoa-coffee mixture. Repeat: dry, wet, dry, mixing gently between each addition.
Stop as soon as the last streaks of flour disappear. Then grab a spatula and give the bowl a slow fold, scraping the bottom and sides to make sure everything is combined. The batter will be thin and silky. And that’s exactly what you want.
Whatever you do, don’t keep beating “for good measure.” That’s how you end up with tough cake.
Step 5: Bake, test for doneness and cool
Divide the batter evenly between the two pans. I like to weigh them so the layers bake at the same pace, but eyeballing is fine. Smooth the tops gently.
Bake for 30 to 35 minutes, until a toothpick in the center comes out with a few moist, fudgy crumbs. Not wet batter. Not totally clean either. Clean usually means overbaked.
Let the cakes cool in the pans for 15 to 20 minutes so they can set. Run a thin knife around the edges, flip onto a cooling rack, peel off the parchment, and let them cool completely before frosting. Waiting is the hardest part.
Decorating & frosting ideas
Once your devil’s food cake layers are cool, the fun really starts. This is where you decide if you’re going full-on “chocolate blackout” or doing that pretty bakery-style contrast with white frosting and dark crumbs. Honestly, there’s no wrong choice here. Just whatever makes you happiest holding a spatula.
My favorite chocolate fudge frosting
For peak chocolate-on-chocolate drama, I love a classic fudge-style frosting. It’s thick, glossy, and sets just enough to slice cleanly while staying soft when you bite in. Think somewhere between a buttercream and a poured fudge.
You’ll start with softened butter, plenty of cocoa powder, and powdered sugar, then thin it with a mix of cream and a splash of vanilla until it’s spreadable and silky. If you like things extra dark, you can use Dutch cocoa here too. A tiny pinch of salt makes the chocolate pop.
Pile it on generously between the layers, then swoop it over the top and sides. Don’t stress about perfect bakery swirls. Rustic looks delicious.
Classic white or vanilla frosting
If you grew up on grocery-store “black and white” cakes, try pairing this with a fluffy vanilla frosting. The contrast of dark crumb and pale frosting is so pretty, and kids go wild for it.
A simple American buttercream works great: butter, powdered sugar, vanilla, and a little cream or milk. Beat it until it’s light and airy and just a bit off-white. You can even add a touch of almond extract for that nostalgic bakery vibe. Just a drop.
Spread a thin crumb coat first to catch any chocolate crumbs, chill briefly, then add a thicker, smoother final layer. Instant showpiece.
Easy garnish ideas
You don’t need piping bags or fancy tools to make this cake look special. Try one or two of these:
- Crumble a little cake scrap (or trim from leveling) over the top edge for that classic crumb border.
- Shower the top with chocolate curls or shavings made from a bar and a vegetable peeler.
- Add a ring of sprinkles, mini chocolate chips, or crushed chocolate cookies around the top edge.
- For a slightly dressier look, pile fresh berries in the center and dust lightly with powdered sugar right before serving.
Simple touches. Big “wow” factor when you carry it to the table.
Variations you can try
Once you’ve got the base batter down, you can spin it into a bunch of different desserts without relearning anything. Same ingredients. Same method. Just a few tweaks so you don’t end up with overflowing pans or dry cupcakes.
Devil’s food cupcakes
For cupcakes, line a standard 12-cup muffin pan with paper liners. You’ll get about 24 cupcakes from one full batch of batter. Fill each liner just over halfway; this batter rises a lot. Too full and they’ll mushroom and stick to the pan.
Bake at 350°F, but shorten the time to about 18 to 22 minutes. Start checking early. A toothpick should come out with a few moist crumbs, not totally clean. Overbaked chocolate cupcakes are heartbreak in paper liners.
Let them cool completely before frosting. This is a great option for birthdays or school treats when you don’t want to wrestle with slicing a layer cake in front of a crowd.
Easy devil’s food sheet cake
If you’re feeding a crowd or just don’t feel like stacking layers, turn this into a sheet cake. Pour the batter into a greased and parchment-lined 9×13 inch pan.
Bake at 350°F for roughly 30 to 35 minutes. The center should spring back lightly when touched and pass the toothpick-with-moist-crumbs test. Cool it right in the pan, then slather the top with fudge frosting or a simple pourable icing.
No leveling, no fancy decorating. Just slice and serve straight from the pan at potlucks, Sunday dinners, or when your neighbor “just happens to stop by.”
Making it without coffee
If coffee is a no-go in your house, you can absolutely still make this devil’s food cake recipe. Swap the hot coffee for very hot water or hot milk. Keep the amount the same.
You’ll lose a little depth of flavor, so I like to add a tiny bit more vanilla (about ½ teaspoon extra) to make up for it. The texture will still be moist and plush, and kids won’t taste anything suspicious.
So yes, you can skip the coffee. But if you’re on the fence and even slightly curious, try it once with the coffee. You might be surprised how much richer the chocolate tastes.
Troubleshooting common problems
Even with a solid recipe, cakes have moods. Ovens run hot, kids slam doors, we get distracted. If your devil’s food cake throws a little tantrum, here’s how to decode what happened and fix it next time.
Why did my devil’s food cake sink?
A shallow dip in the center is usually from one of three things: underbaking, too much leavening, or opening the oven door too early. Sometimes a combo.
If the middle looks set but the toothpick still has wet batter, it needed a few more minutes. The cake structure wasn’t strong enough yet, so it collapsed as it cooled. Next time, bake until you see moist crumbs, not shiny batter.
Another culprit: cranking the mixer after you add the flour and liquids. Overmixing can whip in too much air, which then deflates. Mix on low and stop as soon as the flour disappears, then fold gently by hand.
If your sump is serious and gummy, don’t toss it right away. Level the top, cube the fudgy center, and turn it into a “trifle” with whipped cream. No one at my house has ever complained.
Why is my cake dry or crumbly?
Dry devil’s food usually means too much flour or too much time in the oven. Flour is sneaky. Scooping straight from the bag packs it down and can give you 25–30% more than you think.
To fix it, fluff your flour, spoon it into the measuring cup, and level it off with a knife. Or use grams if you have a scale. Instant upgrade.
In the oven, remember that clean toothpick = slightly overbaked for chocolate cakes. Pull the cake when the tester comes out with moist crumbs. It’ll keep cooking a bit as it cools in the pan.
If you already have a dry cake on your hands, you can brush the layers with a little simple syrup or even cooled coffee before frosting. It won’t be perfect, but it will be much softer and totally save-able.
My cake domed or stuck to the pan
A little dome is normal. A big hill? That usually means your oven runs hot or the pans are too close to the heating element. Try baking on the center rack and, if your oven runs wild, lowering the temp by 25°F next time. Bake a few minutes longer.
You can also level a domed cake with a serrated knife once it’s completely cool. Snack on the scraps or use them as decorative crumbs on top of the frosting. Win-win.
If the cake sticks to the pan, it’s almost always a prep issue. Make sure you’re greasing the sides, lining the bottoms with parchment, and greasing the parchment, too. A light dusting of cocoa helps, especially with nonstick pans.
And don’t rush the release. Let the cake cool 15 to 20 minutes in the pan so it sets, then run a thin knife around the edges and flip. Too hot or too cold, and it’s more likely to tear.
Storage, freezing & make-ahead
You know what’s better than a fresh chocolate cake? A fresh chocolate cake you quietly made yesterday. Future you will be very happy about this part.
How long devil’s food cake lasts
Unfrosted layers keep really well. Once completely cool, wrap each layer tightly in plastic wrap and keep at room temperature for up to 2 days. The crumb actually relaxes and tastes even more chocolaty on day two.
A fully frosted cake can sit, covered, at cool room temperature for about 1 to 2 days if your kitchen isn’t hot and the frosting is butter-based. Use a cake dome or an upside-down large bowl so the cut edges don’t dry out. Exposed crumb is the enemy.
After that, you can move it to the fridge for another couple of days, but chill it well wrapped so the fridge air doesn’t pull out moisture. And always let chilled cake sit at room temp for 30 to 45 minutes before serving so the texture softens again.
How to freeze cake layers or slices
If you want maximum flexibility, freeze the layers unfrosted. Cool completely, then wrap each layer in a double layer of plastic, followed by a layer of foil or a large freezer bag. Label it so you’re not guessing later.
They’ll keep nicely for up to 2 months. When you’re ready to use them, thaw the layers (still wrapped) at room temperature until soft. Keeping the wrap on while they thaw traps condensation on the outside instead of soaking the cake.
You can also freeze leftover slices. Wrap each slice tightly, then freeze in a container so they don’t get squished. Instant emergency chocolate cake.
Simple party prep schedule
Here’s an easy timeline if you’re baking for a birthday or dinner:
- 1–2 days before: Bake the layers, cool completely, wrap and keep at room temp. You can even make the frosting and store it in the fridge.
- Morning of the event: Bring frosting to room temp and re-whip if needed. Fill and frost the cake, then chill briefly to set the sides if you like a cleaner look.
- 1–2 hours before serving: Let the cake stand at room temp so the crumb and frosting are soft and luscious again. Add any fresh berries or last-minute decorations right before you bring it out.
No last-minute meltdown. Just you, a calm kitchen, and a ridiculously good chocolate cake waiting in the wings.
Devil’s Food Cake Printable Recipe Card
The Best Devil’s Food Cake
A dark, moist devil’s food cake made with Dutch-process cocoa, hot coffee, and sour cream for a plush, fudgy crumb that stays soft for days. Perfect for birthdays, holidays, or any serious chocolate craving.
Ingredients
For the Devil’s Food Cake:
- 1/2 cup (113 g) unsalted butter, at room temperature
- 1/2 cup (120 ml) vegetable oil (neutral flavored)
- 1 1/2 cups (300 g) granulated sugar
- 1/2 cup (100 g) light brown sugar, packed
- 3 large eggs, at room temperature
- 2 teaspoons vanilla extract
- 2 cups (250 g) all-purpose flour, spooned and leveled
- 1 1/2 teaspoons baking soda
- 1 teaspoon baking powder
- 1 teaspoon fine sea salt
- 3/4 cup (75 g) Dutch-process cocoa powder
- 1 cup (240 ml) hot brewed coffee (or very hot water)
- 1/2 cup (120 g) full-fat sour cream, at room temperature
For the Chocolate Fudge Frosting:
- 1 cup (226 g) unsalted butter, at room temperature
- 3/4 cup (65 g) unsweetened cocoa powder (Dutch-process or natural)
- 3 1/2 to 4 cups (420–480 g) powdered sugar
- 1/2 teaspoon fine sea salt
- 1/2 cup (120 ml) heavy cream or whole milk, plus more as needed
- 2 teaspoons vanilla extract
- Optional garnish: chocolate curls, sprinkles, or cake crumbs
Instructions
- Prepare the pans and oven. Preheat the oven to 350°F (175°C). Grease two 9-inch round cake pans. Line the bottoms with parchment rounds, grease the parchment, then dust the sides and bottoms with cocoa powder. Tap out any excess.
- Mix the dry ingredients. In a medium bowl, whisk together the flour, baking soda, baking powder, and salt until well combined. Set aside.
- Cream the butter, oil, and sugars. In a large mixing bowl or the bowl of a stand mixer fitted with the paddle, beat the butter, vegetable oil, granulated sugar, and brown sugar on medium-high speed for 3 to 4 minutes, until lighter in color and slightly fluffy. Scrape down the bowl as needed.
- Add the eggs and vanilla. Beat in the eggs one at a time, mixing well after each addition. Add the vanilla extract and mix just until combined. If the mixture looks slightly curdled, that is okay; it will smooth out once the dry ingredients and liquids are added.
- Bloom the cocoa in hot coffee. In a heatproof bowl or large measuring jug, whisk the Dutch-process cocoa powder with the hot coffee until completely smooth and glossy with no dry pockets. Whisk in the sour cream until fully combined. The mixture should be thick, pourable, and warm but not piping hot; let it cool a few minutes if needed.
- Combine the batter. With the mixer on low speed, add about one third of the dry ingredients to the butter mixture and mix just until you no longer see streaks of flour. Pour in about half of the cocoa-coffee mixture and mix on low until mostly combined. Repeat with another third of the dry ingredients, the remaining cocoa mixture, and finish with the last third of the dry ingredients.
- Finish mixing gently. As soon as the last bit of flour disappears, stop the mixer. Use a spatula to gently fold the batter, scraping the bottom and sides of the bowl to make sure everything is evenly combined. The batter will be fairly thin and silky. Do not overmix or the cake can turn tough.
- Bake the cakes. Divide the batter evenly between the two prepared pans. Smooth the tops. Bake for 30 to 35 minutes, or until a toothpick inserted in the center of each cake comes out with a few moist crumbs attached but no wet batter. The tops should spring back lightly when touched.
- Cool the layers. Let the cakes cool in their pans on a wire rack for 15 to 20 minutes. Run a thin knife around the edges, then carefully invert each cake onto the rack. Peel off the parchment and let the layers cool completely before frosting.
- Make the chocolate fudge frosting. In a large bowl, beat the softened butter on medium-high speed until smooth and creamy, about 1 minute. Sift in the cocoa powder and beat until well combined and dark. Add 3 1/2 cups (420 g) of the powdered sugar, the salt, 1/4 cup (60 ml) of the cream, and the vanilla.
- Beat until fluffy. Beat the frosting on low speed until the sugar is mostly incorporated, then increase to medium-high and beat for 2 to 3 minutes, until light, fluffy, and spreadable. If the frosting seems too thick, add more cream 1 tablespoon at a time. If it is too thin, add the remaining powdered sugar a little at a time until it holds soft peaks.
- Level and fill the cake. If the cake layers are domed, use a serrated knife to level the tops once they are completely cool, saving any scraps for garnish. Place one layer on a serving plate or cake stand. Spread a generous layer of fudge frosting over the top.
- Stack and frost the outside. Place the second layer on top, cut side down for a flat surface. Spread a thin crumb coat of frosting over the top and sides of the cake to trap any loose crumbs. Chill for 15 to 20 minutes if you want a cleaner finish, then add a thicker final coat of frosting, swirling or smoothing as desired.
- Decorate and serve. Garnish the top with chocolate curls, sprinkles, berries, or cake crumbs if you like. Let the frosted cake sit at room temperature for at least 20 to 30 minutes before slicing so the crumb and frosting soften. Slice with a sharp knife, wiping the blade between cuts for neat slices.
Notes
- Use room temperature eggs, butter, and sour cream so the batter emulsifies easily and bakes up with an even, tender crumb.
- For the darkest color and smoothest flavor, use Dutch-process cocoa powder; natural cocoa will work but the cake will be lighter and a bit sharper in taste.
- If you prefer to skip coffee, replace the hot coffee with the same amount of very hot water or hot milk and add an extra 1/2 teaspoon of vanilla.
- Measure flour by fluffing, spooning into the measuring cup, and leveling off, or use 250 g by weight; too much flour is the most common cause of a dry cake.
- This recipe makes two 9-inch layers; you can also bake it as a 9x13-inch sheet cake at 350°F (175°C) for about 30 to 35 minutes, or as about 24 cupcakes baked 18 to 22 minutes.
- Unfrosted cake layers can be wrapped tightly in plastic and kept at room temperature for up to 2 days or frozen for up to 2 months; thaw layers still wrapped at room temperature.
- A fully frosted cake keeps well covered at cool room temperature for 1 to 2 days; for longer storage, refrigerate, then bring to room temperature before serving.
Nutrition Information:
Yield: 12 Serving Size: 1 sliceAmount Per Serving: Calories: 600Total Fat: 30gSaturated Fat: 17gCarbohydrates: 80gSugar: 55gProtein: 6g
Nutrition values are approximate and will vary based on frosting thickness, slice size, and specific brands of ingredients used.
Devil’s Food Cake FAQ
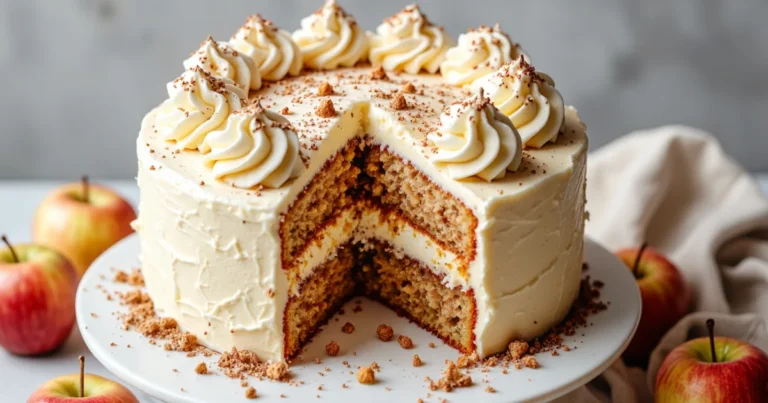
Love This Recipe? Discover More Classic Layer Cake Favorites
If this layer cake hit the spot, don’t miss The Ultimate Guide to Classic Layer Cakes where you’ll find more timeless flavors, smart frosting pairings, and easy fixes for every leaning, crumbly slice.