The Best Southern Red Velvet Cake Recipe (Moist & Authentic)
There’s a moment when you slice into a red velvet cake and everyone leans in. Bright scarlet crumbs, snowy frosting, that first tangy bite. If you’ve ever been disappointed by a dry, brownish “red velvet,” you’re in the right kitchen.
I grew up watching red velvet show up for big deal days: church potlucks, graduations, that one aunt who always brought hers in a cake carrier with a crack in the handle. It was never just cake. It was tradition. And when I started baking on my own, I learned real fast that tradition needs good science or you end up with sad, dry layers.
This southern red velvet cake recipe uses a specific mix of butter for flavor and oil for moisture, so it actually stays soft for days. Not kidding. And we lean into the classic vinegar and baking soda “fizz” so the crumb bakes up fine and velvety, not dense or gummy.
Craving more tall, bakery-style cakes? Head over to The Ultimate Guide to Classic Layer Cakes for step-by-step stacking tips, crumb coat secrets, and seven must-bake classics.
Why You’ll Love This Southern Red Velvet Cake
You get the best of both worlds here. Deep buttery flavor and plush, moist texture that doesn’t dry out on day two. Or even day four, if it lasts that long.
The batter is simple to mix: basic pantry ingredients, one stand mixer (or a sturdy hand mixer), and clear cues for when to stop mixing. No mysterious “until ready” instructions. You’ll know what “light and fluffy” actually looks like.
There’s just enough cocoa to give that subtle chocolate note without turning the cake into a full-on chocolate layer. Tangy buttermilk and a splash of vinegar balance the sweetness and give you that classic Southern bakery taste. It’s rich, but not heavy.
You also get options. Want to use liquid coloring like Grandma did? Cool. Prefer modern gel color for a bold red without thinning the batter? Covered. I’ve tested both so you don’t have to guess.
And of course, we finish it with a thick, swoopy cream cheese frosting that’s sturdy enough to stack but soft enough to swipe with a finger when no one’s looking. Total crowd-pleaser.
What Actually Is Red Velvet Cake?
Red velvet is one of those cakes that people argue about at the table. Is it chocolate? Is it vanilla? Is it just a vehicle for cream cheese frosting?
At its core, red velvet is a light cocoa cake with a fine, plush crumb and a gentle tang from buttermilk and vinegar. Not brownie-rich. Not plain yellow-cake sweet. Somewhere right in the middle. You taste soft chocolate, a little vanilla, and that bakery-style tang that keeps each bite from feeling too heavy.
What does red velvet cake taste like?
Imagine a chocolate cake that went to charm school. The cocoa is subtle, more of a background note than a punch in the face. You get:
- Mild chocolate
- Creamy vanilla
- A little tangy zip from the buttermilk and vinegar
The texture is the star. When it’s done right, every slice feels almost velvety on your tongue, with very fine, tender crumbs. No dry chunks. No crumbling disaster when you cut it.
Is red velvet just chocolate cake dyed red?
Short answer: nope. If you add a bottle of red food color to your favorite chocolate cake, you’ll just get red chocolate cake. Still tasty. Not red velvet.
A true southern red velvet cake uses much less cocoa, plus acidic ingredients like buttermilk and vinegar. That balance of cocoa + acid + fat is what makes the crumb so soft and gives it that classic flavor. The color is important for the look, sure, but the chemistry is what makes it special.
A tiny bit of history
Old-school “velvet” cakes showed up in the early 1900s as a way to describe cakes with a super fine crumb. Some early versions turned a reddish hue naturally when cocoa powder reacted with acidic ingredients. Later, bakers started boosting that color with bottled red dye, and the showstopper we know now was born.
So when you’re making this cake, you’re not just mixing batter. You’re participating in a very delicious little piece of Southern dessert history.
Key Ingredients For That Classic Southern Texture
Red velvet isn’t a “throw whatever in the bowl” kind of cake. The ingredients all have jobs. When you understand what they’re doing, you get that tight, velvety crumb every single time.
We’re using simple pantry staples, just in very intentional ratios. Butter plus oil, a little cocoa, plenty of acid, and the right flour. Nothing fancy. But together? Magic.
Buttermilk & Vinegar: The tang and the chemistry
Buttermilk is the backbone here. It brings gentle tang, helps keep the cake moist, and works with the baking soda for lift. You really want full-fat buttermilk at room temperature so it blends smoothly into the batter instead of shocking the butter and causing it to curdle.
Vinegar is like buttermilk’s backup dancer. You only need a spoonful, but it kicks the baking soda into high gear so the cake rises tall and bakes up extra tender. That quick “fizz” at the end is our insurance policy against dense layers.
Butter + Oil: Flavor vs. moisture
Butter gives you flavor and structure. Oil brings serious moisture that sticks around for days. Using both means you don’t have to choose between “tastes amazing” and “stays soft.”
We cream the butter with sugar for airiness, then stream in the oil so it emulsifies right into that fluffy base. No greasiness. Just a plush, moist crumb.
Cocoa Powder: Just enough chocolate
Red velvet only needs a couple tablespoons of natural cocoa powder. Too much and the cake turns brown and starts tasting like regular chocolate cake. Too little and you lose that subtle cocoa flavor.
Natural cocoa also plays nicer with the acidic ingredients, helping the crumb stay tender.
Red Food Coloring: Gel vs. liquid
You can use old-school liquid red or modern gel color here. Liquid is nostalgic and easy to find, but you’ll need more of it. Gel is stronger, so a teaspoon or two gives you a bold, deep red without thinning the batter.
Either way, add it with the wet ingredients so the color disperses evenly and you don’t end up with streaky layers.
Flour & Leavening: The cake structure
All-purpose flour keeps things accessible and sturdy enough for stacking, but you can swap in cake flour for an even softer crumb if you like. Whichever you use, measure lightly and whisk with the cocoa, baking soda, and salt to remove lumps.
Baking soda is the main leavener here, relying on the buttermilk and vinegar for its full lift. Too much and the cake can taste soapy or rise then collapse. Just the right amount, and you get tall, even layers that slice like a dream.
How To Make Southern Red Velvet Cake (Step-By-Step)
Once your ingredients are at room temperature, this cake comes together fast. Think of it as three mini jobs: prep, mix, and bake. You’ve got this.
Prep the pans & equipment
Start by preheating your oven to 350°F. Ovens love a warm-up.
Grease two 9-inch round pans or three 8-inch pans. I like a thin coat of shortening, a dusting of flour, and a parchment circle on the bottom of each pan for extra insurance. You do not want this cake sticking. Total heartbreak.
Set out your stand mixer (or hand mixer), and grab two mixing bowls: one for dry ingredients, one for wet.
Mix the dry and wet ingredients separately
In a medium bowl, whisk together the flour, cocoa powder, baking soda, and salt until everything looks uniform and smooth. This gets rid of cocoa clumps and helps the leavener spread evenly.
In the mixer bowl, beat the softened butter and sugar on medium-high until light and fluffy, about 4 to 5 minutes. It should look pale and a little creamy.
Pour in the oil and beat again until the mixture looks silky. Then add the eggs one at a time, mixing well after each. Stir in the vanilla and your red food coloring of choice. The batter will look very bright here. That’s good.
Now lower the mixer speed. Add the dry ingredients in three additions, alternating with the buttermilk. Start and end with the flour mix. Mix just until you don’t see streaks of flour. Stop the mixer and give the bowl a quick scrape with a spatula.
The “Fizz” Step: Activating vinegar and baking soda
Right before baking, stir the vinegar into the batter. For maximum drama, you can also mix the vinegar with a tiny pinch of extra baking soda in a small cup, let it fizz, then fold it in quickly.
Either way, work fast here. Once that reaction starts, you want the batter in the oven so it can rise in the heat, not on your counter.
Divide, bake & test for doneness
Divide the batter evenly between your prepared pans. A kitchen scale keeps the layers perfectly even, but eyeballing works in a pinch. Smooth the tops with a spatula.
For two 9-inch pans, bake about 25 to 30 minutes. For three 8-inch pans, start checking around 20 to 24 minutes since the layers are thinner.
The cakes are done when the centers spring back lightly to the touch, the edges just start pulling from the sides, and a toothpick comes out with a few moist crumbs, not wet batter.
Cooling the layers so they don’t dry out
Let the cakes cool in their pans on a wire rack for about 10 minutes. This helps them set so they don’t break when you flip them.
Run a thin knife around the edges, turn the layers out onto the rack, peel off the parchment, and let them cool completely. Totally cool.
If you have time, wrap the cooled layers in plastic and chill or freeze them for 20 to 30 minutes before frosting. Cold cake crumbs less, stays moist, and makes your frosting job a whole lot easier.
The Best Frosting For Southern Red Velvet Cake
You’ve got this gorgeous red cake. Now it needs its white sweater moment. Cream cheese frosting is the classic for a reason: tangy, creamy, and just sweet enough to wrap around those cocoa notes.
We’re going for a frosting that’s smooth and spreadable but sturdy enough to stack layers and pipe simple swirls. No sliding top tier. No goopy mess.
Why cream cheese frosting wins
Cream cheese adds that tangy richness that balances the sweetness of both cake and sugar. Without it, red velvet can feel a little flat. With it, every bite hits that sweet-tangy-creamy trifecta.
You’ll use full-fat cream cheese that’s slightly softened but still cool to the touch. Too soft and the frosting gets soupy. Pair it with real butter for structure and flavor, then beat in powdered sugar until it’s fluffy and cloud-like. A pinch of salt and a splash of vanilla keep it from tasting one-note.
It’s simple, but when you get the temperature and ratios right, it tastes like bakery frosting… only better.
How to make stable, pipeable cream cheese frosting
Start by beating the butter on its own until it’s smooth and a little lighter in color. Then add the cream cheese and beat just until completely blended and no lumps remain. Scrape the bowl. Don’t skip that.
Next, add the powdered sugar a cup at a time on low speed so it doesn’t puff everywhere, then increase the speed to medium and whip until the frosting is thick, fluffy, and holds soft peaks. Add vanilla and a pinch of salt to taste. If it feels too loose, chill it for 15 to 20 minutes, then re-whip briefly.
Keep the frosting slightly cool while you work, and if your kitchen is warm, pop the bowl back into the fridge between steps. Cool frosting + cool cake layers = neat, clean sides.
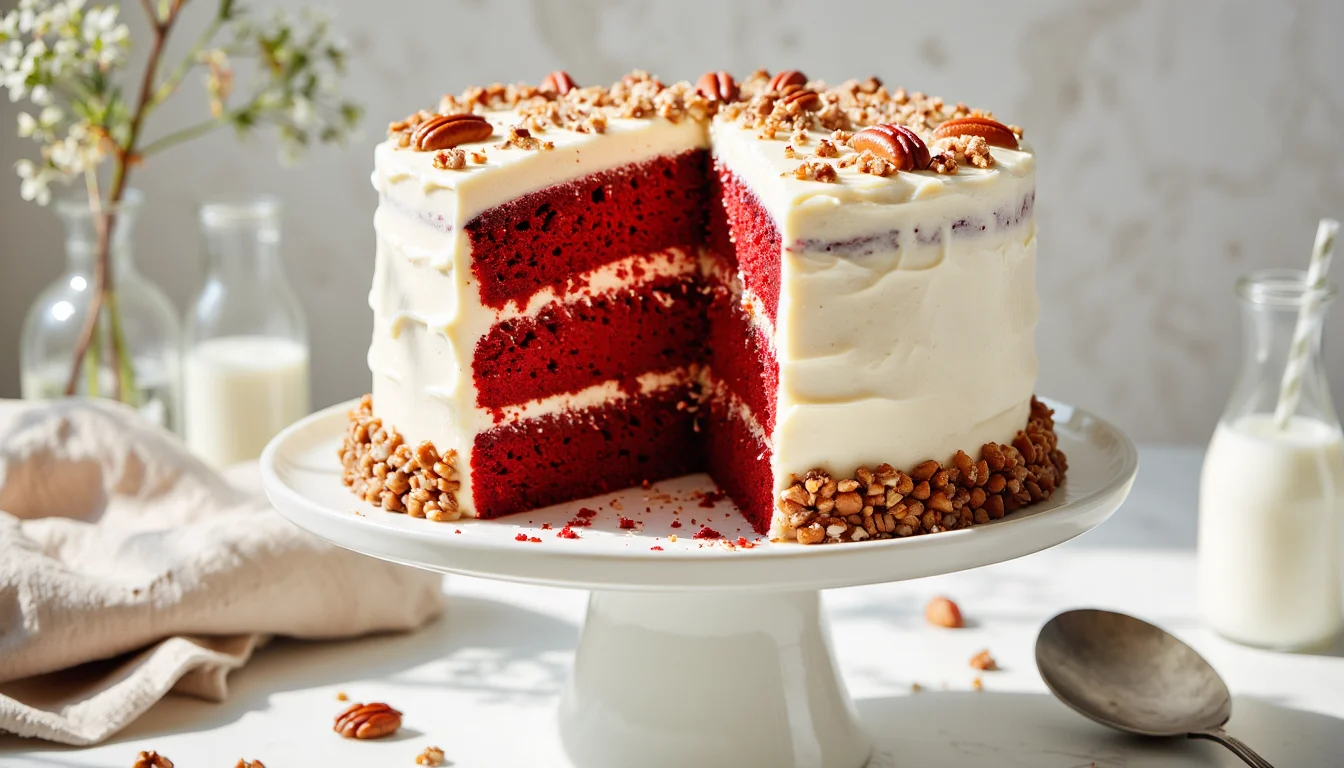
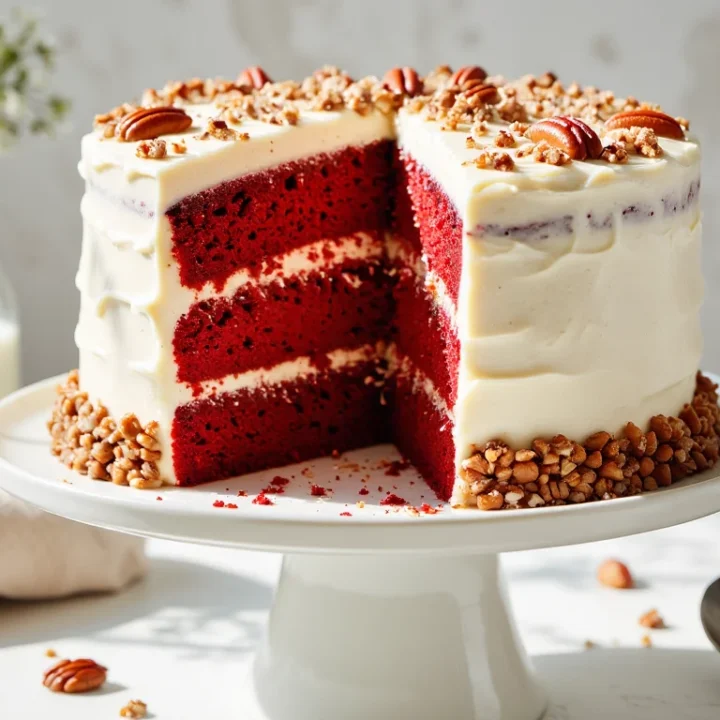
Optional pecan garnish & decoration ideas
For a classic Southern look, press finely chopped toasted pecans around the sides of the cake after you’ve frosted it. They add crunch, a toasty flavor, and conveniently hide any frosting imperfections.
You can also pipe simple rosettes or swoops on top, then leave the sides semi-naked or fully frosted. Either way, that contrast of bright red crumbs and creamy white frosting will look incredible on your dessert table.
Pro Tips & Troubleshooting
Red velvet has a dramatic personality, but the actual baking can be calm and predictable if you know what to watch for. A few small tweaks make the difference between “wow” and “why is this so dry?”
Why is my red velvet cake dry?
Most dry red velvet comes down to three things: too much flour, overmixing, or overbaking.
Spoon and level your flour instead of packing it into the cup, or use a kitchen scale if you have one. Packed flour = dense, dry layers. Once you add the dry ingredients, mix just until you don’t see streaks anymore. The batter doesn’t need a workout.
In the oven, start checking a few minutes before you think it will be done. If the toothpick is bone dry, it’s probably already a touch overbaked. You want a few moist crumbs clinging to it.
Why isn’t my red velvet cake red enough?
Two main culprits: not enough color, or the cocoa + oven browning out the red.
If you’re using liquid food coloring, you’ll likely need close to a full 1-ounce bottle. With gel, start with 1 teaspoon, then add up to 2 teaspoons for a deeper shade. Remember that the color will darken slightly as it bakes and cools.
Also, keep your oven at 350°F and avoid using too much cocoa. Extra cocoa deepens the brown tones and can mute the red.
Why did my red velvet cake turn brown or taste too chocolatey?
If your cake looks more mahogany than red and tastes like a light chocolate cake, you probably used more cocoa than the recipe calls for or swapped in Dutch-process cocoa.
Stick to natural unsweetened cocoa for this one and measure carefully. It feels weird to use “just” a couple tablespoons, but that’s what keeps red velvet in its own lane and lets the color shine.
How to frost without getting red crumbs everywhere (crumb coat method)
Crumbs in white frosting are a classic red velvet hazard. The fix is easy: crumb coat.
Spread a very thin layer of cream cheese frosting over the cooled, stacked cake. Think of it like spackle, not decoration. It should catch and trap all the loose crumbs. Chill the cake for 20 to 30 minutes until that layer firms up.
Then add your final, thicker layer of frosting on top and around the sides. Because the crumbs are locked in, your outer layer stays smooth and clean. No red freckles in sight.
Storage, Freezing & Holiday Make-Ahead Timeline
One of the best things about this cake is how well it holds up. That butter-and-oil combo keeps it moist, and cream cheese frosting actually does great after a chill. Perfect for holidays when your oven is already overbooked.
How to store frosted and unfrosted layers
Unfrosted cake layers:
Once completely cool, wrap each layer tightly in plastic wrap. You can add a layer of foil if you’re storing them more than a day. Leave them at room temperature for up to 24 hours, or stash them in the fridge if your kitchen runs warm.
Frosted cake:
Because of the cream cheese frosting, this cake needs to be refrigerated after about 2 hours at room temp. Cover it with a cake dome or an inverted large bowl so the frosting doesn’t dry out.
In the fridge, it stays delicious for about 4 days. Let slices sit at room temperature for 20 to 30 minutes before serving so the crumb softens and the frosting isn’t icy-cold. Huge difference.
Can I freeze red velvet cake layers?
Yes, and honestly, I recommend it if you’re frosting for a big event. Cold, slightly frozen layers are much easier to handle and crumb-coat.
To freeze, wrap each cooled layer in plastic wrap, then a layer of foil, and freeze for up to 2 months. When you’re ready, thaw in the fridge (still wrapped) overnight or let them sit at room temp, wrapped, for about an hour before unwrapping and frosting.
You can also freeze leftover frosted slices. Just freeze on a tray until solid, then wrap and keep for up to a month. Great for future you.
Sample holiday make-ahead timeline
Here’s a simple Christmas or birthday game plan:
- Two days before serving: Bake the cake layers, cool completely, wrap, and refrigerate or freeze.
- One day before serving: Make the cream cheese frosting. Fill and crumb-coat the cake with cold layers, chill, then add the final coat of frosting. Keep refrigerated.
- Day of serving: Pull the cake out of the fridge 30 to 45 minutes before dessert so it can soften slightly. Slice, serve, and enjoy the “You made this?!” comments.
Less chaos. Same showstopper.
Southern Red Velvet Cake Printable Recipe Card
Authentic Southern Red Velvet Cake Recipe
Ultra-moist Southern red velvet cake made with a butter-and-oil batter, tangy buttermilk, and classic cream cheese frosting, perfect for holidays and celebrations.
Ingredients
For the Red Velvet Cake:
- All-purpose flour 2 1/2 cups (312 g), spooned and leveled
- Natural unsweetened cocoa powder 2 tablespoons (10 g)
- Baking soda 1 teaspoon
- Fine sea salt 1 teaspoon
- Unsalted butter, softened to room temperature 1/2 cup (113 g)
- Granulated sugar 1 1/2 cups (300 g)
- Neutral oil (vegetable or canola) 1/2 cup (120 ml)
- Large eggs, room temperature 2
- Pure vanilla extract 2 teaspoons
- Red liquid food coloring 1 ounce (about 2 tablespoons / 30 ml) OR red gel food coloring 1 to 2 teaspoons
- Full-fat buttermilk, room temperature and well shaken 1 cup (240 ml)
- White distilled vinegar 1 teaspoon
For the Cream Cheese Frosting:
- Full-fat cream cheese, cool but slightly softened 16 oz (454 g)
- Unsalted butter, softened to room temperature 1 cup (226 g)
- Powdered sugar, sifted 4 to 5 cups (480 to 600 g)
- Pure vanilla extract 2 teaspoons
- Fine sea salt, to taste Pinch
- Finely chopped toasted pecans for decorating, optional 1 cup (120 g)
Instructions
- Preheat oven to 350°F (175°C). Grease two 9-inch or three 8-inch round cake pans, line the bottoms with parchment, then grease and lightly flour the sides or use baking spray with flour.
- In a medium bowl, whisk together flour, cocoa powder, baking soda, and salt until well combined and lump-free; set aside.
- In a large mixing bowl, beat softened butter and granulated sugar on medium-high speed until pale, light, and fluffy, about 4 to 5 minutes.
- With the mixer on medium, slowly pour in the oil and beat until the mixture looks smooth and emulsified.
- Add the eggs one at a time, mixing well and scraping the bowl after each addition, then mix in vanilla extract.
- Add red food coloring and mix until the color is evenly distributed and the batter looks brightly red.
- Turn mixer to low speed and add one-third of the flour mixture, followed by half of the buttermilk, mixing just until combined.
- Add another third of the flour, then the remaining buttermilk, and finish with the last third of the flour mixture, mixing only until no dry streaks remain.
- Stop the mixer, scrape the sides and bottom of the bowl, and gently fold the batter with a spatula to ensure everything is evenly mixed without overworking it.
- Stir the vinegar into the batter by hand until fully incorporated, working fairly quickly so the reaction happens mostly in the oven.
- Divide the batter evenly between the prepared pans and smooth the tops with a spatula.
- Bake two 9-inch layers for about 25 to 30 minutes or three 8-inch layers for about 20 to 24 minutes, until the centers spring back lightly and a toothpick comes out with a few moist crumbs.
- Cool cakes in pans on a wire rack for 10 minutes, then run a thin knife around edges, invert onto the rack, peel off parchment, and allow layers to cool completely.
- For easier frosting, wrap cooled layers in plastic wrap and chill or freeze for 20 to 30 minutes.
- To make frosting, beat softened butter in a large bowl on medium speed until smooth and slightly lighter in color.
- Add cream cheese and beat just until the mixture is completely smooth and lump-free, scraping down the bowl as needed.
- On low speed, add powdered sugar 1 cup at a time until you reach your desired thickness, then increase speed to medium and beat until fluffy, 1 to 2 minutes.
- Mix in vanilla extract and a pinch of salt, then taste and adjust sweetness or salt if needed; chill briefly if frosting seems too soft.
- Place the first cake layer on a serving plate or cake board and spread an even layer of cream cheese frosting over the top.
- Add the second (and third, if using) layer, spreading frosting between each layer to create a stable stack.
- Spread a thin crumb coat of frosting over the top and sides of the cake, then chill for 20 to 30 minutes until the frosting is firm.
- Apply a thicker final coat of frosting over the chilled cake, smoothing the top and sides or creating swoops as desired.
- If using pecans, gently press chopped toasted pecans around the bottom edge of the cake and sprinkle some on top for garnish.
- Refrigerate the finished cake until ready to serve, then let sit at room temperature for 20 to 30 minutes before slicing for the best texture.
Notes
- For the softest crumb, make sure all cold ingredients (butter, eggs, buttermilk, cream cheese) are at room temperature before you start mixing.
- Spoon and level your flour or use a kitchen scale to avoid packing in extra flour, which can make the cake dry.
- Use natural unsweetened cocoa powder, not Dutch-process, so it reacts properly with the buttermilk and vinegar and keeps the red color vibrant.
- Liquid food coloring usually needs close to the full 1-ounce bottle, while gel color is stronger and often only needs 1 to 2 teaspoons.
- Chilling or lightly freezing the cake layers before frosting makes them easier to handle and helps prevent red crumbs from getting into the white frosting.
- Always crumb coat the cake first, chill, then add the final layer of frosting for the cleanest finish.
- To make ahead for holidays, bake layers up to 2 days in advance, wrap tightly, and refrigerate or freeze, then frost the day before serving.
- Store the frosted cake covered in the refrigerator for up to 4 days and let slices sit at room temperature for about 20 to 30 minutes before serving.
- Leftover slices can be frozen; freeze on a tray until solid, then wrap well and store for up to 1 month.
- Approximate nutrition per serving (1 of 12): 560 calories, 31 g total fat, 16 g saturated fat, 67 g carbohydrates, 51 g sugar, 6 g protein.
Nutrition Information:
Yield: 12 Serving Size: 1 sliceAmount Per Serving: Calories: 560Total Fat: 31gSaturated Fat: 16gTrans Fat: 1gUnsaturated Fat: 14gCholesterol: 120mgSodium: 240mgCarbohydrates: 67gNet Carbohydrates: 66gFiber: 1gSugar: 51gProtein: 6g
Nutrition values are estimates and will vary based on ingredients and brands.
Frequently Asked Questions
You’ve got questions. Red velvet has opinions. Let’s make sure you feel totally confident before you preheat that oven.
Love This Recipe? Discover More Classic Layer Cake Favorites
If this layer cake hit the spot, don’t miss The Ultimate Guide to Classic Layer Cakes where you’ll find more timeless flavors, smart frosting pairings, and easy fixes for every leaning, crumbly slice.