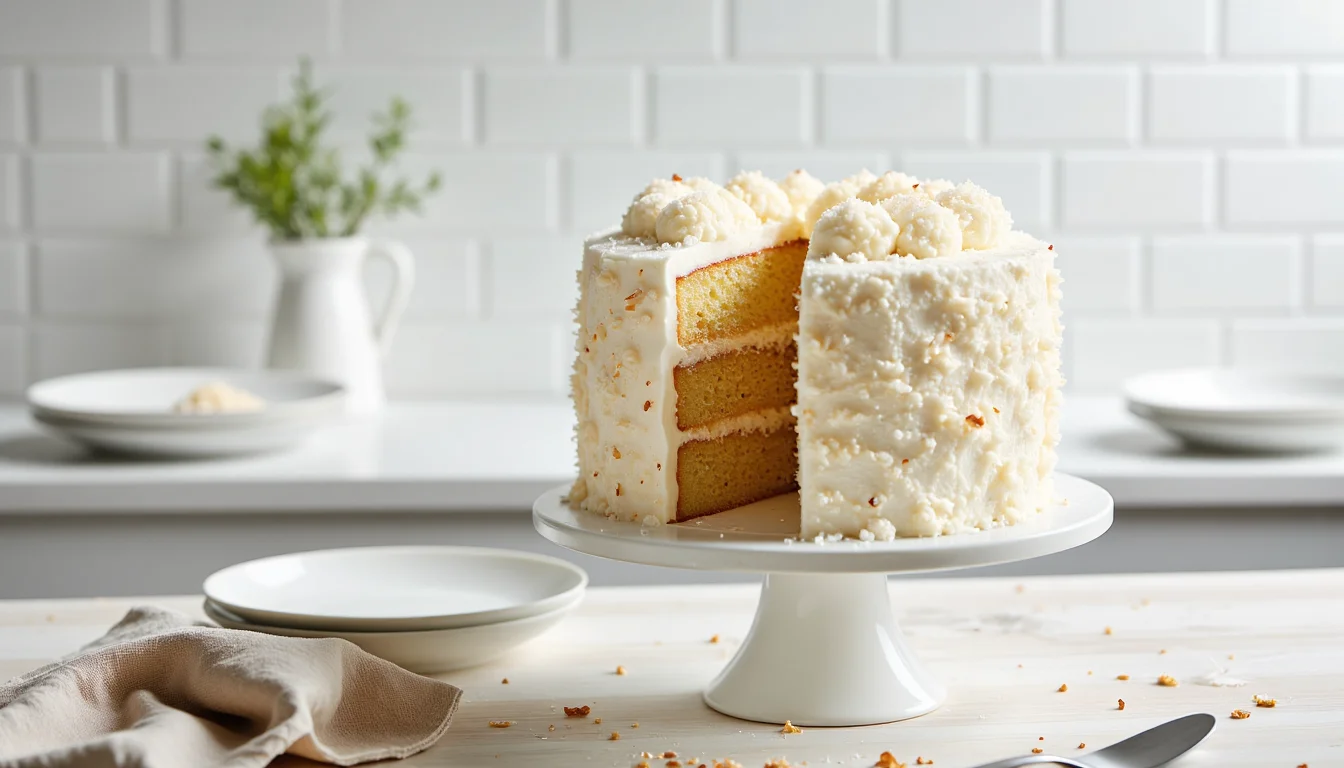
The Best Coconut Layer Cake (Moist, Fluffy & 3 Layers)
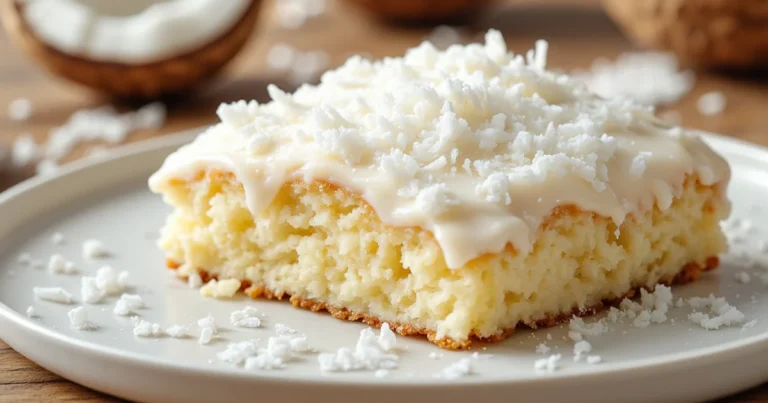
Saturday afternoon, my kitchen smelled like sugar and sunscreen, because my kids kept running in and out from the backyard while I was testing yet another coconut birthday cake. I’d already nailed the easy sheet version for potlucks. The moist poke one for summer barbecues. The famous dense Bundt for Christmas. But every time someone asked for a tall, bakery-style coconut showpiece with candles on top, I hesitated. Too many of those turn out dry and crumbly. Total heartbreak.
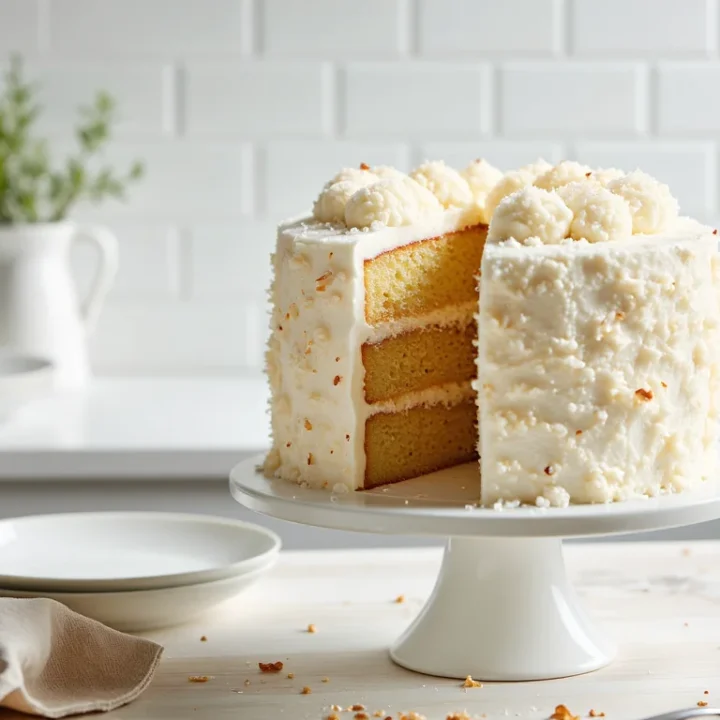
So I made it my little mission this year: a coconut celebration cake that actually lives up to the big moment. I wanted three even layers, fluffy but sturdy enough to stack, with frosting on the sides and a snowstorm of coconut all over. The kind of dessert you carry to the table and everyone goes quiet for a second. Then someone says, “Wait. You made that?”
Here’s the thing. A towering layer cake is a different commitment than a sheet or poke situation. You’re pulling out multiple pans, cooling and leveling layers, making a real frosting, and probably clearing space in the fridge. It’s not your Tuesday night dessert. It’s your Easter centerpiece, your Mom’s birthday, your “we survived the school year” cake. So it has to be worth the effort. Really worth it.
That’s why this version leans hard into moisture insurance and clear structure. We use cake flour for a soft, bakery-style crumb, a blend of butter and oil so it stays tender for days, and three forms of coconut for big flavor without making the texture heavy. And we’ll talk about the un-glamorous but critical stuff too: which can of coconut milk to grab, how to divide the batter evenly, and how to crumb coat so your sides look smooth instead of shaggy.
If you’re more in a “bake it in one pan and go” mood, I’ll point you toward my favorite coconut sheet and poke cakes inside this post. But if you’re ready for the grand, stacked version that belongs in the center of the table, you’re in the right place. Let’s build your new special-occasion coconut cake from the inside out.
Craving more tall, bakery-style cakes? Head over to The Ultimate Guide to Classic Layer Cakes for step-by-step stacking tips, crumb coat secrets, and seven must-bake classics.
Why This Coconut Layer Cake Is Different
When I say this is the “fancy” coconut cake in my lineup, I mean it. This one’s tall, fluffy, and fully frosted on the sides, built to hold its shape on a cake stand without being heavy or dry. It’s the dessert cousin that actually dresses up, not the one that shows up in leggings and a messy bun.
First, the texture. We’re using cake flour, which has less protein than all-purpose flour, so the crumb stays soft and light instead of bready. Then I stack moisture insurance on top: sour cream for richness, plus a blend of butter and oil. Butter brings that classic bakery flavor. Oil keeps the crumb tender even on day two and three. I stuck the leftovers in a covered container in the fridge and my husband was still sneaking forkfuls straight from the cold slices. No dry edges.
Flavor-wise, this is a triple coconut situation. You get canned full-fat coconut milk in the batter, a hit of coconut extract to sharpen the flavor without tasting artificial, and sweetened shredded coconut folded in for little chewy bits. So you’re not relying on just one coconut product and hoping for the best. It tastes like coconut from the first bite to the last crumb.
The frosting is a coconut cream cheese buttercream, which sounds fancy but is basically cream cheese frosting that went on vacation. It’s tangy enough to cut the sweetness of the cake and all that shredded coconut, and sturdy enough to hold up on the sides of a three-layer dessert without melting off. And we’ll talk about getting that perfect “not too soft, not too stiff” consistency, because that part can be sneaky.
Finally, this recipe has a very specific job in your coconut cake family. When you need quick, minimal dishes, I’ll send you to my coconut sheet cake or one of the easy poke-style options. But when you want height, clean slices, crumb coat and all, this is the one you pull out. The celebration cake.
Ingredients You’ll Need
Before you preheat the oven, it helps to see everything in one place. You don’t need anything wild or bakery-only, but a few choices really matter here, especially the flour and the coconut products. I like to pull all of this out on the counter while the kids are doing homework so I’m not digging for the baking powder mid-mix.
For the Coconut Cake Layers
Here’s what you’ll need for three tall 8-inch layers:
- Cake flour – 3 cups (about 360 g), spooned and leveled. This is what keeps the crumb soft and fluffy instead of dense.
- Baking powder – 2 teaspoons.
- Baking soda – 1/2 teaspoon.
- Fine salt – 1 teaspoon.
- Unsalted butter, softened – 3/4 cup (170 g). Room temp so it actually creams.
- Neutral oil – 1/2 cup (120 ml). Think canola, vegetable, or light-tasting olive oil.
- Granulated sugar – 2 cups (400 g).
- Large eggs – 4, at room temperature. Cold eggs don’t mix in as smoothly.
- Canned full-fat coconut milk – 1 cup (240 ml), well shaken. Not the carton in the fridge section.
- Sour cream – 1/2 cup (120 g), room temperature. Adds moisture and a little tang.
- Vanilla extract – 2 teaspoons.
- Coconut extract – 1 teaspoon. Boosts the coconut flavor without needing more fat.
- Sweetened shredded coconut – 1 cup (about 100 g), to fold into the batter.
If your kitchen is chilly, set the butter, eggs, sour cream, and coconut milk out about 30 minutes before you start so everything blends into one smooth batter instead of curdling.
For the Coconut Cream Cheese Frosting
This is enough to fill, crumb coat, and generously frost the top and sides of a 3-layer cake:
- Cream cheese (brick style) – 8 oz (226 g), slightly softened but still cool.
- Unsalted butter – 1 cup (226 g), softened.
- Powdered sugar – 5 to 6 cups, sifted if lumpy. Start with 5 and add more to thicken.
- Coconut milk or heavy cream – 1 to 2 tablespoons, just to loosen the frosting.
- Vanilla extract – 1 teaspoon.
- Coconut extract – 1/2 teaspoon.
- Fine salt – a pinch, to balance the sweetness.
You can mix the frosting a little thicker if you love sharp edges and piping, or a touch softer for swoopy, rustic sides. Both work.
For Decoration
- Sweetened shredded coconut – 2 to 3 cups, for pressing onto the sides and sprinkling on top. You can leave it soft and sweet or toast part of it for a golden, toasty finish.
I usually pour the shredded coconut into a big shallow bowl so it’s easy to grab and press against the frosted cake later. Messy, yes. Worth it.
Coconut Ingredient Dictionary (Read This Before You Shop)
This part is crucial. There are three lookalike coconut products that behave totally differently in baking:
- Canned coconut milk: This is what we want. It’s usually in the Asian or international aisle. Full fat, a little thick, sometimes separated into cream and liquid in the can. Shake it well.
- Coconut cream: Thicker and richer than coconut milk, mostly the fatty part. Great for some desserts, but too heavy here and can throw off the texture.
- Cream of coconut: Sweet, syrupy, and used for cocktails like piña coladas. Brands like Coco Lopez. This is not for our batter.
And then there’s carton coconut milk, the drinkable kind in the refrigerated section. That one is mostly water with gums and stabilizers. Fine in coffee, but it won’t give this cake the structure or flavor we’re after. For this recipe, grab one can of full-fat coconut milk and you’re set.
Step-by-Step: How to Make Coconut Layer Cake
Once everything’s measured and the oven’s warming up, you’re halfway there. The rest is just following the order and not rushing the batter. I like to do this part when the house is quietish, because every time I skip a step or get distracted, I regret it later when I cut into the cake.
Prep & Batter
Start by preheating your oven to 350°F (175°C). Grease three 8-inch round cake pans, line the bottoms with parchment, then grease and lightly flour the parchment too. Don’t skip the parchment. Layer cakes love to cling to the pan at the worst possible moment.
In a medium bowl, whisk together the cake flour, baking powder, baking soda, and salt until everything looks light and blended. This little whisking moment keeps you from getting random pockets of baking powder in the finished crumb.
In the bowl of a stand mixer (or a large bowl with a hand mixer), beat the softened butter, oil, and granulated sugar together on medium-high speed. Let it go for about 3 to 4 minutes, scraping down the bowl once or twice, until the mixture looks very pale and fluffy. If it still looks grainy and heavy, keep beating. This is where we build air into the cake.
Add the eggs one at a time, mixing well after each addition and scraping down the bowl as needed. The batter might look a bit looser now. Mix in the sour cream, vanilla, and coconut extract until smooth. It should look creamy and a little thick at this point.
Turn the mixer to low. Add about one-third of the flour mixture, then half of the coconut milk. Repeat with another third of flour, the remaining coconut milk, and finish with the last of the flour. Mix just until you don’t see dry streaks. Overmixing here can make the layers tougher than they need to be. Finally, use a spatula to gently fold in the shredded coconut.
Baking & Doneness Cues
Divide the batter evenly among the three pans. The easiest way to do this is by weighing the filled pans on a kitchen scale so each has roughly the same amount. If you’re eyeballing it, get as close as you can. Uneven layers bake unevenly.
Bake the cakes for about 30 to 35 minutes, rotating the pans once if your oven has hot spots. The tops should look lightly golden and set. When you gently press the center of a layer with a fingertip, it should spring back instead of leaving a dent. A toothpick inserted in the center should come out with a few moist crumbs, not wet batter.
Let the cakes cool in their pans on a wire rack for 15 to 20 minutes. Then run a thin knife around the edges, flip each layer out onto the rack, peel off the parchment, and let them cool completely. Warm layers + frosting = sliding, melting chaos. So give them time.
How to Assemble a Coconut Layer Cake
This is the part that used to scare me more than the baking. But once you break it into steps, stacking and frosting feels way less like a Food Network challenge and more like a fun little project. I usually assemble while the house is quieter in the evening, after the layers have cooled and everyone’s distracted by a movie.
Leveling & Layer Prep
First, make sure your cake layers are completely cool. If they’re even slightly warm, pop them into the fridge for 30 minutes. Cold layers are sturdier and crumble less.
If your cakes domed in the oven, use a long serrated knife to gently saw off the rounded tops so each layer is flat. Go slowly and turn the cake as you cut instead of trying to slice straight across in one pass. You can snack on the trimmings or crumble them over yogurt later. Baker’s treat.
At this point, you can wrap each layer in plastic and chill for a few hours or even overnight. For super clean stacking, I like to chill the wrapped layers for at least an hour, or freeze them for about 20 to 30 minutes. Slightly firm cake is so much easier to move around without cracking.
Set one cooled layer on your serving plate or cake board. If you have a turntable, this is its moment. If not, you can spin the plate on a damp dish towel to help it turn more smoothly.
Filling, Stacking & Crumb Coat
Start by adding a small dab of frosting in the center of the plate before you put down the first layer. It acts like glue so the cake doesn’t slide around while you work.
Now pipe or spread a “dam” of frosting around the edge of the first layer: a ring of frosting about 1/2 inch tall, circling the outer edge. You can do this with a piping bag or just with an offset spatula, building up a little wall. This keeps the filling from squishing out when you add the next layer.
Spread a generous layer of frosting inside that dam, smoothing it almost to the top of the ring. Gently place the second cake layer on top, upside down so the bottom (flatter side) faces up. Press very lightly to settle it without squeezing out the filling. Repeat with the dam and filling, then top with the third layer, also upside down.
Once everything is stacked, check from the side to see if the cake is leaning. If it is, nudge the layers back into alignment now, before you frost the outside. It won’t be perfect. That’s ok.
For the crumb coat, spread a thin layer of frosting over the top and sides of the stacked cake. You’re not trying to make it pretty here. You’re just gently trapping all the little crumbs in a light jacket of frosting. Scrape off any excess so it’s a very thin, sheer layer.
Chill the crumb-coated cake in the fridge for at least 30 minutes, or up to an hour. This sets the frosting and locks the crumbs in place so your final coat goes on smooth instead of speckled.
After chilling, add your final layer of frosting. Start with the top, then work down the sides, using an offset spatula or bench scraper to smooth things out as you turn the cake. You can go for sharp edges and polished sides, or keep it soft and swoopy. Either way, you now have a tall, frosted coconut cake ready for its coat of shredded coconut.
Coconut Cream Cheese Frosting Tips
Let’s talk frosting, because this is where a lot of coconut cakes tip over into either too sweet or too floppy. The goal here is a creamy, tangy frosting that’s sturdy enough to cling to the sides of a tall cake, but still soft enough to swoop and swirl. I once rushed this part on a warm day and watched a perfectly good cake slowly slouch to one side on the counter. Not fun.
Start with the right temperatures. Your cream cheese should be slightly softened but still cool to the touch. If it’s very soft or even a little warm, it can turn loose and soupy once you start mixing. Your butter, on the other hand, should be properly room temperature: soft enough to press a finger into, but not greasy or shiny. If you bend the stick and it almost snaps, it’s still too cold.
Beat the butter first until it’s smooth and creamy, then add the cream cheese and beat just until fully combined and lump-free. Don’t whip the cream cheese within an inch of its life. Overbeating can make it too loose. Scrape down the bowl well so you don’t end up with sneaky cream cheese pockets.
When you add the powdered sugar, do it slowly on low speed so you don’t cover your whole kitchen in sugar dust. Add about a cup at a time, mixing until it’s incorporated before adding more. Start with 5 cups, then check the consistency. At this point it should be thick, smooth, and just a bit stiffer than you want for your final coat. You can always add more sugar to thicken, or a splash of coconut milk or cream to loosen.
Stir in the vanilla, coconut extract, and a pinch of salt at the end. The salt is tiny but mighty. It keeps the frosting from tasting flat or cloyingly sweet. If your kitchen is warm or you’ve been working near the oven, pop the bowl of frosting into the fridge for 10 to 15 minutes before you start decorating. A short chill helps it hold its shape, especially for the crumb coat and any piping.
If at any point the frosting feels too soft and slides off your spatula instead of holding a peak, don’t panic. Chill it briefly, then re-whip on low speed until it’s smooth again. On the flip side, if it’s too thick and stiff to spread, add coconut milk or cream a teaspoon at a time. It’s easier to adjust slowly than to rescue a frosting you’ve drowned in liquid.
Variations & Decorating Ideas
Once the cake is stacked and frosted, you get to play a little. This is where it goes from “nice” to “oh wow, what is that?” on the table. I usually clear a corner of the counter, slide the cake onto a sheet of parchment to catch stray coconut, and then just embrace the mess.
Toasted Coconut Topping
If you want that golden, toasty look (and a deeper flavor), toasting part or all of the shredded coconut is totally worth the extra 5 to 10 minutes.
For the oven method, spread the sweetened shredded coconut in a thin, even layer on a baking sheet. Bake at 325°F (160°C), stirring every couple of minutes, until it’s just turning golden in spots. It will go from perfect to scorched pretty fast, so don’t wander off. Let it cool completely before pressing it onto the frosting.
For a skillet version, add the coconut to a large dry pan over medium-low heat. Stir constantly until it turns lightly golden and smells nutty. Pull it off the heat right away and transfer to a plate to cool so it doesn’t keep browning in the hot pan.
You can coat the whole cake in toasted coconut for a cozy, golden “snowball,” or mix half toasted and half plain for contrast. I like to press the coconut into the sides by the handful, then sprinkle a thicker halo around the top edge.
Flavor Twists
If you’re making this for a holiday or big birthday, a little filling between the layers makes it feel extra special. Just remember to use that frosting “dam” so nothing oozes out the sides.
- Lemon or lime curd: Spread a thin layer of curd inside the frosting ring between layers for a bright, tart contrast to all the coconut. It’s very “spring dessert” energy.
- Pineapple twist: A thin layer of well-drained crushed pineapple (patted dry) mixed with a bit of frosting gives a piña colada feel without turning this into a poke cake situation.
- Jam swirl: Raspberry, strawberry, or apricot jam works beautifully. Keep the layer thin so it doesn’t make the cake slide.
On top, you can keep it simple with just coconut, or add a few little flourishes: some piped rosettes around the edge, a ring of toasted coconut with the center left white, or even a few fresh berries for color. Nothing has to be bakery-perfect. Once the cake is tall, frosted, and covered in coconut, it already looks like a celebration.
Storage, Freezing & Make-Ahead Timeline
Here’s the honest truth: a tall coconut layer cake is so much easier if you don’t try to do everything in one day. The good news is that this recipe actually gets better with a little rest. The flavors meld, the crumb relaxes, and you’re not frantically frosting while guests are pulling into the driveway. Learned that one the hard way.
Because we’re using cream cheese in the frosting, this dessert does need the fridge. Once the cake is fully assembled and frosted, chill it uncovered for about 30 minutes to set the frosting. After that, you can loosely cover it with plastic wrap or a cake dome and keep it in the refrigerator for 3 to 4 days. Let slices sit at room temperature for 20 to 30 minutes before serving so the texture softens and the flavors bloom again.
If you want to get ahead, freezing the layers is your secret weapon. After the baked cakes are completely cool, wrap each layer tightly in plastic wrap, then in a layer of foil. Label them so you remember what’s what. Lay them flat in the freezer and they’ll keep well for up to 2 months. When you’re ready to decorate, transfer the wrapped layers to the fridge to thaw overnight, then unwrap and let them sit at room temperature for about 20 to 30 minutes before assembling. Slightly chilled layers are actually easier to stack and crumb coat.
Here’s a simple timeline I like for holidays or big birthdays:
- Day 1 (Evening): Bake the cake layers, cool completely, wrap, and refrigerate or freeze.
- Day 2 (Morning/Afternoon): Make the frosting, level the cakes, stack, crumb coat, and chill.
- Day 2 (Later): Add the final coat of frosting, press on the coconut, and chill until serving.
If life happens and you need to stretch it, you can even bake the layers a couple of weeks in advance and keep them frozen, then just handle the frosting and assembly the day before the party. Future you will be very grateful.
Coconut Layer Cake Printable Recipe Card
The Best Coconut Layer Cake
A tall, moist coconut layer cake with a soft, bakery-style crumb, triple coconut flavor, and a rich coconut cream cheese frosting, perfect for birthdays and holidays.
Ingredients
For the Coconut Cake Layers:
- Cake flour 3 cups (about 360 g), spooned and leveled
- Baking powder 2 teaspoons
- Baking soda 1/2 teaspoon
- Fine salt 1 teaspoon
- Unsalted butter, softened 3/4 cup (170 g)
- Neutral oil (canola or vegetable) 1/2 cup (120 ml)
- Granulated sugar 2 cups (400 g)
- Large eggs, room temperature 4
- Canned full-fat unsweetened coconut milk, well shaken 1 cup (240 ml)
- Sour cream, room temperature 1/2 cup (120 g)
- Vanilla extract 2 teaspoons
- Coconut extract 1 teaspoon
- Sweetened shredded coconut 1 cup (about 100 g)
For the Coconut Cream Cheese Frosting:
- Cream cheese, brick style, slightly softened 8 oz (226 g)
- Unsalted butter, softened 1 cup (226 g)
- Powdered sugar 5 to 6 cups, sifted if lumpy
- Coconut milk or heavy cream 1 to 2 tablespoons
- Vanilla extract 1 teaspoon
- Coconut extract 1/2 teaspoon
- Fine salt 1 pinch
For Decoration:
- Sweetened shredded coconut 2 to 3 cups (plain or toasted)
Instructions
- Preheat the oven to 350°F (175°C); grease three 8-inch round cake pans, line the bottoms with parchment rounds, then grease and lightly flour the parchment and sides.
- In a medium bowl, whisk together the cake flour, baking powder, baking soda, and salt until well combined and fluffy.
- In a large mixing bowl or stand mixer, beat the softened butter, neutral oil, and granulated sugar on medium-high speed for 3 to 4 minutes, until very pale and fluffy, scraping down the bowl as needed.
- Add the eggs one at a time, beating well after each addition and scraping the bowl so everything is evenly mixed.
- Mix in the sour cream, vanilla extract, and coconut extract until the mixture looks smooth and creamy.
- Turn the mixer to low speed and add about one-third of the flour mixture, then half of the coconut milk; repeat with another third of flour, the remaining coconut milk, and finish with the last third of flour, mixing just until no dry streaks remain.
- Turn off the mixer and gently fold in the sweetened shredded coconut with a spatula, being careful not to overmix the batter.
- Divide the batter evenly among the three prepared pans, smoothing the tops, and use a kitchen scale if you want perfectly even layers.
- Bake the cakes for 30 to 35 minutes, or until the tops are lightly golden, the centers spring back when gently pressed, and a toothpick inserted in the center comes out with a few moist crumbs.
- Cool the cakes in the pans on a wire rack for 15 to 20 minutes, then run a thin knife around the edges, carefully invert each cake onto the rack, peel off the parchment, and let cool completely.
- While the cakes cool, make the frosting by beating the softened butter in a large bowl on medium speed until smooth and creamy.
- Add the slightly softened cream cheese and beat just until combined and smooth, scraping the bowl well and avoiding overbeating.
- Gradually add the powdered sugar, about a cup at a time, mixing on low speed until incorporated before adding more, and adjust until the frosting is thick but spreadable.
- Stir in the vanilla extract, coconut extract, and a pinch of salt, then beat on medium speed until the frosting is smooth and fluffy; add a little coconut milk or cream if needed to loosen, or more powdered sugar to thicken.
- If the frosting feels too soft, chill it in the refrigerator for 10 to 15 minutes, then re-whip briefly on low speed before using.
- Once the cake layers are completely cool, level any domed tops with a long serrated knife so the layers are flat, and optionally wrap and chill the layers for 30 to 60 minutes for easier handling.
- Place a small dab of frosting in the center of a cake board or serving plate and set the first cake layer on top to anchor it.
- Pipe or spread a ring of frosting (a “dam”) around the edge of the first layer, then spread a generous layer of frosting inside the ring, smoothing it evenly.
- Set the second cake layer on top upside down so the flat bottom faces up, press very gently to settle it, and repeat with another frosting dam and filling.
- Add the third layer on top, also upside down, and check from the side to make sure the cake is stacked straight, adjusting the layers before frosting the outside if needed.
- Spread a thin layer of frosting over the top and sides of the cake to create a crumb coat, scraping off excess so this layer is very thin, then chill the cake for at least 30 minutes to set.
- After chilling, add the final coat of frosting, spreading it over the top and sides and using an offset spatula or bench scraper to smooth the frosting or create rustic swoops.
- Press handfuls of sweetened shredded coconut (plain or toasted) onto the sides of the cake while the frosting is still slightly soft, then sprinkle more coconut over the top.
- Chill the finished cake for at least 30 minutes to help the frosting and coconut set, then keep it refrigerated until serving and let slices stand at room temperature for 20 to 30 minutes for the best texture.
Notes
- Use canned full-fat unsweetened coconut milk from the shelf-stable aisle, not refrigerated carton coconut milk or sweetened cream of coconut, which will change the texture of the cake.
- Because the frosting contains cream cheese, store the finished cake in the refrigerator and avoid leaving it at room temperature for more than 2 hours.
- For a cake flour substitute, measure 3 cups of all-purpose flour, remove 6 tablespoons, and replace them with 6 tablespoons of cornstarch, then whisk well before using.
- To toast the coconut for decoration, spread it on a baking sheet and bake at 325°F, stirring every few minutes, until just golden, or cook in a dry skillet over medium-low heat, stirring constantly, then cool completely.
- For a make-ahead option, bake and cool the cake layers, then wrap each layer tightly in plastic wrap and foil and refrigerate overnight or freeze for up to 2 months.
- Slightly chilled or partially frozen layers are easier to stack and crumb coat without crumbling or sliding.
- To freeze leftover cake, wrap individual slices tightly in plastic wrap and place in an airtight container or freezer bag; thaw in the refrigerator, then bring to room temperature before serving.
- To turn this into cupcakes, divide the batter into lined muffin pans, filling each cup about two-thirds full, and bake at 350°F for 18 to 22 minutes, then frost and decorate as desired.
- If the cake sinks in the middle, it may have been underbaked or the oven door may have been opened too early; as long as the cake is fully baked, you can level the top and still use it in the layer cake.
Nutrition Information:
Yield: 14 Serving Size: 1 SliceAmount Per Serving: Calories: 650Total Fat: 30gSaturated Fat: 20gCarbohydrates: 85gSugar: 60gProtein: 6g
Nutrition values are approximate and will vary based on ingredients, brands, and serving size. Nutrition values are estimates and will vary based on ingredients and brands.
Coconut Layer Cake FAQ
Love This Recipe? Discover More Classic Layer Cake Favorites
If this layer cake hit the spot, don’t miss The Ultimate Guide to Classic Layer Cakes where you’ll find more timeless flavors, smart frosting pairings, and easy fixes for every leaning, crumbly slice.