Authentic Smith Island Cake Recipe (Maryland’s State Dessert)
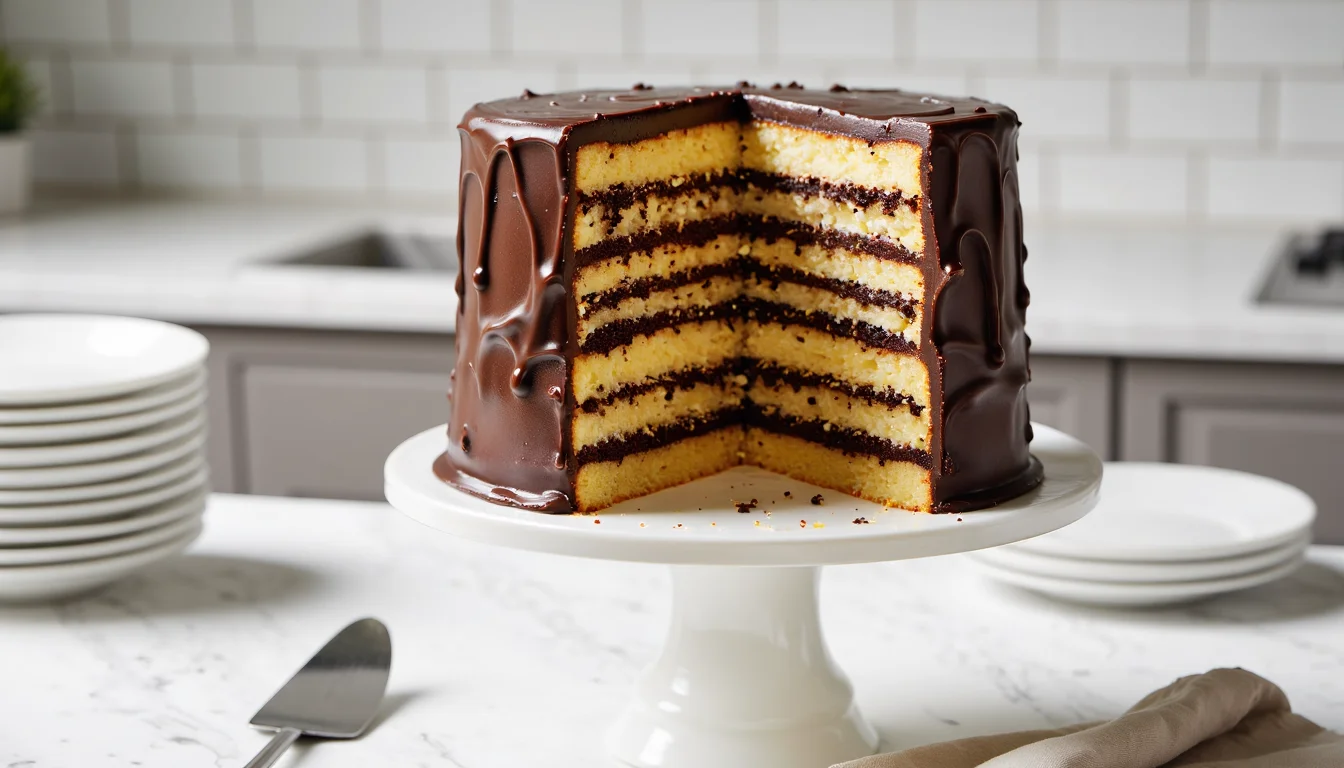
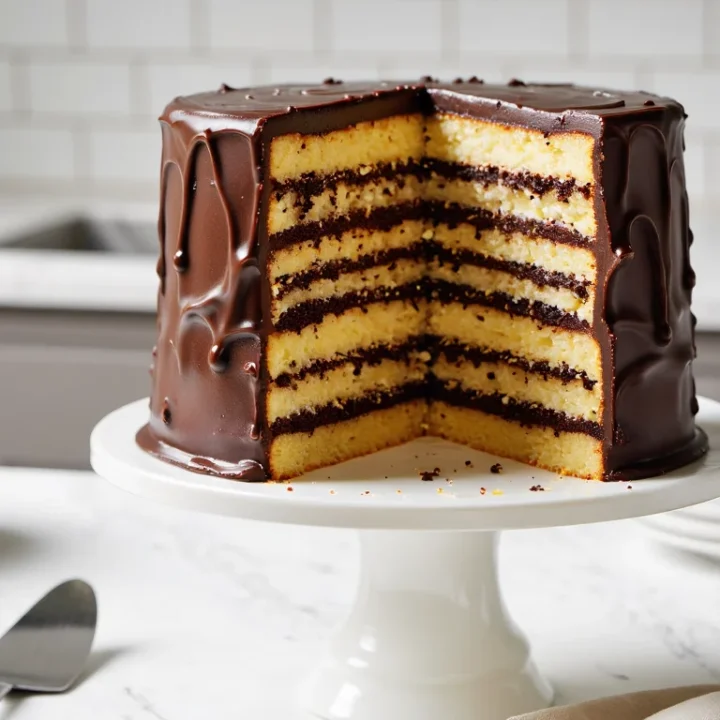
The first time I sliced into a real Smith Island cake, everyone at the table went quiet and just stared at the layers. Eight… nine… maybe ten skinny yellow bands, all glued together with shiny fudge frosting. It looks like something you’d only find in a Maryland bakery case, not on a Tuesday in your kitchen.
I know it has a reputation as an “all day project,” the kind of cake you only bake once. But with a smart pan rotation and a forgiving fudge icing, it’s a lot more doable than it looks. You’ll get that classic Maryland state dessert vibe: tender, custardy yellow cake, thin as pancakes, stacked high and covered in old-fashioned chocolate fudge. I’ll walk you through my exact workflow so you can pull this off without needing ten pans or a pastry degree.
Craving more tall, bakery-style cakes? Head over to The Ultimate Guide to Classic Layer Cakes for step-by-step stacking tips, crumb coat secrets, and seven must-bake classics.
What is Smith Island Cake?
Smith Island cake is a very tall, very thin-layered yellow cake covered in old-fashioned cooked chocolate fudge frosting. It’s the official state dessert of Maryland, born on a tiny island in the Chesapeake Bay.
Instead of the usual two or three layers, you’re aiming for 8 to 10 ultrathin rounds, each about as thick as a pancake. Every layer gets a swipe of glossy fudge, so when you slice it, you see those dramatic stripes all the way down the knife. It’s a little retro, a little extra, and totally worth the effort.
What makes a Smith Island Cake unique?
Two things: the layers and the frosting. The layers are extremely thin, baked quickly so they stay soft and almost custardy in the center. That means the crumb doesn’t dry out, even after all that oven time.
Then there’s the frosting. Not buttercream. Not ganache. A cooked chocolate fudge icing made with evaporated milk, sugar, butter, and unsweetened chocolate. It starts pourable, then sets into a slightly crackly shell that still stays fudgy underneath. And because you use it between every layer, the cake soaks up a bit of that moisture and chocolate flavor.
Why does Smith Island Cake have so many layers?
Historically, this cake was packed up by women on Smith Island to send out with oystermen working long days on the water. Multiple thin layers with fudge in between held moisture better than one big slab of cake. It traveled well. It sliced neatly. It stayed delicious for days.
More layers also meant more surface area for fudge. Practical and indulgent at the same time. Now the standard is usually 8 to 10 layers, but you’ll still see family versions that proudly go even higher.
What does Smith Island Cake taste like?
Imagine the best yellow birthday cake you’ve had, but finer-crumbed and extra buttery, with a hint of tang from buttermilk. Each bite is mostly cake, but every layer is brushed with soft chocolate fudge, so you get a deep cocoa flavor without it feeling like a heavy chocolate cake.
The texture is what surprises people. Tender, almost pancake-soft layers, a bit of chew from the set fudge, and that tall slice that somehow doesn’t feel dense. One forkful and you get cake, frosting, cake, frosting, all the way down. It’s comfort food dressed up in its Sunday best.
A short history of Smith Island Cake
Before it was Instagram-famous, Smith Island cake was just a practical dessert baked in tiny kitchens on a tiny Chesapeake Bay island. Women would send these tall cakes out with oystermen heading off for days at a time. The thin layers and fudge icing weren’t about being fancy. They were about helping dessert survive long, bumpy boat rides without drying out.
Over time, the cake became a proud island tradition for church suppers, community fundraisers, and family celebrations. Eventually Maryland claimed it as the official state dessert, and the rest of us fell in love with those dramatic stripes and the cozy backstory. Simple ingredients, smart technique, big payoff.
Why is it called Smith Island Cake?
Pretty straightforward: it’s named after Smith Island, a small, marshy island village in the Chesapeake Bay that you can only reach by boat. The cake was passed down through island families long before it showed up in cookbooks or on tourism brochures. When people off the island tasted it and asked, “What is this?”, the answer was just, “Oh, that’s our Smith Island cake.”
Is Smith Island Cake a Maryland thing?
Yes. This cake is deeply tied to Maryland and to the watermen culture on Smith Island. In 2008, Maryland officially named Smith Island cake the state dessert, which pretty much sealed its status. You’ll find it in Maryland bakeries, seafood restaurants, and roadside markets, often served in towering slices that lean a little on the plate.
Of course, you don’t have to live anywhere near the Chesapeake to make it. But when you do, you’re baking a little piece of Maryland history in your own oven.
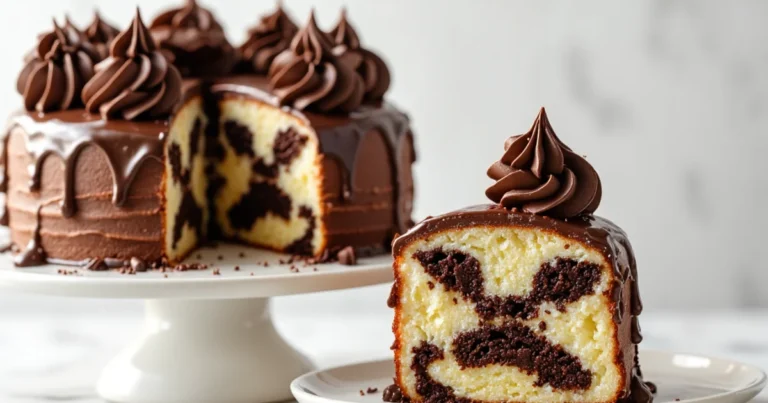
Smith Island Cake vs. Doberge cake
Doberge cake (from New Orleans) and Smith Island cake look like cousins at first glance: lots of thin layers, tall slice, big wow factor. But the inside story is different. Doberge usually has a custard or pudding-style filling between its layers and often gets covered in poured icing or ganache.
Smith Island cake sticks to a simple yellow cake with cooked chocolate fudge icing between every layer and all over the outside. No custard, no pastry cream. Just cake and fudge, repeated again and again. Same drama on the plate, totally different personality.
Ingredients & easy swaps
This is a “simple but specific” ingredient situation. Everything is basic pantry stuff, but the details really affect the texture. Room temperature matters. So does using the right flour and milk.
If you’ve ever had a dry, crumbly version of this cake, it was probably because the layers were overbaked or the batter was made with evaporated milk instead of something richer. We’re fixing that.
Yellow cake layers
For these thin yellow layers, you want a batter that’s sturdy enough to spread but bakes up soft and tender. Here’s what you’ll need:
- Butter: 1 ½ cups unsalted butter (3 sticks, 339 g), softened. Real butter gives flavor and structure.
- Sugar: 2 cups granulated sugar (400 g) for sweetness and browning.
- Eggs: 5 large eggs, at room temperature, to build structure in those skinny layers.
- Vanilla: 2 teaspoons pure vanilla extract for that old-fashioned bakery flavor.
- Flour:
- Best: 3 ¼ cups cake flour (390 g), spooned and leveled.
- Or: 3 cups all-purpose flour (360 g), sifted, if that’s what you have.
- Baking powder: 2 teaspoons for lift.
- Salt: ½ teaspoon fine sea salt to balance the sweetness.
- Buttermilk: 1 ½ cups (360 ml), room temperature. Adds moisture and a little tang so the cake stays custardy, not dry.
Classic chocolate fudge frosting
This is the shiny cooked fudge icing that sets up into a soft shell. No shortcuts here.
- Sugar: 2 ½ cups granulated sugar (500 g).
- Evaporated milk: 1 cup (240 ml). This is non-negotiable for the right texture.
- Unsweetened chocolate: 6 ounces (170 g), chopped or in squares. Deep cocoa flavor, no extra sweetness.
- Butter: ½ cup unsalted butter (1 stick, 113 g), cut into pieces.
- Vanilla: 1 ½ teaspoons vanilla extract.
- Salt: A pinch, to keep it from tasting flat.
It will look thin when it first cooks. That’s normal. It thickens as it cools.
Substitutions & metric measurements
You can absolutely use all-purpose flour instead of cake flour. Just sift it well and don’t pack it into the cup. If you only have regular milk, you can “fake” buttermilk by stirring 1 ½ tablespoons of vinegar or lemon juice into each 1 ½ cups (360 ml) milk and letting it sit 5–10 minutes.
I’ve given approximate grams so you can bake by weight if you prefer: it’s the easiest way to keep all 8–10 layers consistent. And if you’re nervous, weigh the first pan of batter, then match that amount for each pan going forward. Tiny baker’s trick.
Equipment you actually need
Good news: you don’t need a stack of ten fancy cake pans. You just need a few basics and a little patience. The “wow” factor here comes from the workflow, not the gadgets.
Here’s what I recommend having ready before you start mixing batter:
- 3 or 4 round cake pans (8-inch or 9-inch):
Three is plenty. Four is luxurious. You’ll bake in rounds, rotating the pans through the oven until you’ve used all the batter. - Parchment paper:
Absolutely essential. Cut rounds to fit the bottoms of your pans so those ultra-thin layers pop right out. No sticking, no tears. - Cooling racks:
At least one, ideally two. The layers need to come out of the pans and cool quickly so you can reuse the pans for the next round. - Offset spatula (small/angled):
This is your secret weapon for spreading a tiny amount of batter into a super thin, even layer. Also perfect for smoothing the fudge between layers. - Mixing bowls & electric mixer:
A stand mixer makes the long creaming step easy, but a hand mixer works just fine. You just want enough power to beat the butter and sugar until very fluffy. - Medium saucepan:
For the cooked fudge frosting. Choose one with a heavy bottom so the sugar and chocolate don’t scorch. - Heatproof spatula or wooden spoon:
Something sturdy for stirring the frosting as it cooks and thickens.
Nice-to-have but not required:
- Kitchen scale: to weigh your flour and divide the batter evenly.
- Cake turntable: makes stacking and frosting easier, but you can definitely assemble right on a plate or cake stand.
If you can line pans, spread batter, and stir a pot, you’ve got what you need. No special Smith Island-only equipment hiding in a catalog.
How to make Smith Island Cake from scratch
This isn’t hard, it’s just a little repetitive. Once you get into the rhythm of mix, bake, cool, repeat, it actually feels kind of relaxing. Like a cake-building assembly line.
You’ll go through four main phases: batter, baking/rotation, cooked fudge frosting, and stacking. Don’t rush the early steps. They pay you back later.
Phase 1: Make the batter
- Prep the oven and pans.
Preheat your oven to 350°F (175°C). Grease 3 or 4 round pans with butter or baking spray, then line the bottoms with parchment rounds. Lightly grease the parchment too. - Cream butter and sugar.
In a large bowl, beat the softened butter and sugar on medium-high speed for a full 4–5 minutes. It should turn very pale, fluffy, and almost billowy. This aeration keeps those thin layers from being dense. - Add eggs and vanilla.
Beat in the eggs one at a time, scraping the bowl as needed, until the mixture looks smooth and thick. Mix in the vanilla. If it looks a bit curdled, don’t panic. The flour will pull it together. - Combine dry ingredients.
In a separate bowl, whisk together the flour, baking powder, and salt. - Alternate dry ingredients and buttermilk.
Add about one-third of the dry ingredients to the butter mixture and mix on low just until combined. Pour in half the buttermilk and mix again. Repeat with another third of the flour, the remaining buttermilk, and finish with the last flour. Stop as soon as the batter is smooth. No long mixing here.
You’re looking for a batter that’s thick but spreadable, like soft pudding.
Phase 2: Bake the thin layers (3-pan rotation method)
This is where people usually stress out, so let’s make it simple.
- Divide the batter.
Scoop a scant ¾ to 1 cup of batter into each prepared pan (closer to ¾ cup for 9-inch, closer to 1 cup for 8-inch). If you’re using a scale, weigh the batter in the first pan, then match it for the rest. - Spread it thin.
Use your offset spatula to push the batter all the way to the edges in a very thin, even layer. You’ll probably see the pan through the batter in spots. That’s fine. Don’t be gentle here. - Bake the first round.
Bake 3 pans at a time for about 8–10 minutes. The tops should look set and just barely golden at the edges. If you touch the center lightly, it should spring back. No browning. - Cool and rotate.
Let the layers rest in the pans for 2–3 minutes, then run a knife around the edges and flip onto a cooling rack. Peel off the parchment while they’re still warm. - Reset the pans.
Re-grease and re-line the pans with fresh parchment. Add more batter, spread it thin, and bake the next round. Repeat this rotation until you have 8–10 layers cooling on racks.
It feels like a lot at first. But after the second or third round, you’ll be in the groove.
Phase 3: Cook the fudge frosting
You can start the frosting once your last batch of layers is in the oven, or right after everything is baked.
- Combine sugar and evaporated milk.
In a medium heavy-bottomed saucepan, stir together the sugar and evaporated milk. Warm over medium heat, stirring, until the sugar dissolves. - Add chocolate and butter.
Stir in the chopped unsweetened chocolate and butter. Cook, stirring constantly, until everything is melted and the mixture comes to a gentle boil. - Simmer until slightly thickened.
Lower the heat a bit and let it simmer for about 8–10 minutes, stirring often. It will still look a little thin, like chocolate sauce. That’s okay. - Finish and cool.
Remove from the heat, stir in the vanilla and a pinch of salt, and let the frosting sit at room temperature for about 20–30 minutes. Stir every few minutes.
You want it to reach the texture of warm hot fudge or a loose pudding. Thick enough to coat a spoon, thin enough to pour and spread. If it gets too stiff to spread, gently rewarm the pan over low heat or set it over a pot of barely simmering water to loosen it back up.
Phase 4: Assemble the 10-layer cake
Now for the fun part. Time to stack.
- Choose your base.
Set your serving plate or cake stand on the counter. Dab a tiny spoonful of frosting in the center to “glue” the first layer in place. - First layer + frosting.
Place one cake layer down, browned side up or down, your choice. Spread a thin layer of warm fudge frosting over the top, pushing it almost to the edges. - Repeat, repeat, repeat.
Add the next layer and more frosting, stacking as evenly as you can. Don’t worry if the sides look a bit uneven. The final coat of frosting will hide a lot. - Finish the top and sides.
Once all 8–10 layers are stacked, pour or spread the remaining frosting over the top of the cake and let it drip down the sides. Use your offset spatula to smooth it into a fudgy shell. - Let it set.
Leave the cake at room temperature for at least 1 hour so the frosting can firm up and the layers can settle together.
You’ll know it’s ready when the outside feels set but not rock hard, and a sharp knife slides through with just a little resistance. Then you can slice into that tower and show off all those gorgeous stripes.
Expert tips for success
Smith Island cake is all about tiny details that add up. Thin batter layers, quick bakes, and frosting with a mind of its own. These tips keep everything in the “fun challenge” zone instead of “why did I do this” territory.
Tips for perfect thin layers
- Start with truly room-temperature ingredients.
Cold butter won’t cream properly, and cold eggs can make the batter curdle and bake unevenly. If the butter still has a chill, your layers will rise weirdly and crack. - Really cream the butter and sugar.
Set a timer for that 4–5 minutes. Fluffy mixture = lighter, more even layers that don’t feel dense. - Spread the batter aggressively.
Don’t baby it. Use your offset spatula to push the batter all the way to the edges in a super thin sheet. It should feel like you’re “dragging” it into place. - Rotate pans in the oven if needed.
If your oven has a hot spot, swap and spin the pans halfway through. These layers are thin, so even a small hot spot can over-brown one side. - Pull them early, not late.
As soon as the center is set and springs back, they’re done. Fully golden = already too dry.
Troubleshooting the cooked fudge icing
- If it’s grainy:
It likely boiled too hard or sugar crystals formed on the sides. Next time, wipe down the pan sides with a damp pastry brush while it cooks, and keep the heat at a steady, gentle simmer. - If it’s too thin:
Let it sit longer. It thickens a lot as it cools. Give it 5–10 more minutes and stir again. - If it turns too thick to spread:
Pop the pan back over low heat or set it over a pot of barely simmering water. Stir until it loosens to that warm hot-fudge consistency. Don’t add extra milk unless you absolutely have to. - Work from a “frosting station.”
I like to keep the pot of frosting set over a bowl of warm water while I stack. It buys you more time before the icing sets.
How to slice those tall layers cleanly
- Chill, then serve at room temp.
For the cleanest slices, chill the whole cake in the fridge for 30–45 minutes so the frosting firms up. Then let it sit out a bit before serving so the texture is perfect. - Use a long, sharp knife.
A big chef’s knife or carving knife works best. Tiny serrated knife? Total mess. - Hot knife method.
Run the knife under very hot water, wipe it dry, then make your first cut in one smooth motion. Wipe and reheat the knife between slices. It feels fussy, but it gives you those perfect stripey wedges. - Slice narrower pieces.
This cake is tall and rich. Thin slices look dramatic on the plate and are easier to cut without squishing all the layers.
Variations & shortcuts
Once you’ve nailed the classic, you can absolutely play. Or, let’s be honest, some days you just want the look without quite so much effort. Here’s how to bend the rules without losing that Smith Island soul.
Smith Island cake with cake mix (doctored mix)
If you want to shave off time, a yellow cake mix can stand in for the from-scratch sponge. You’ll still bake it in thin layers and finish it with the same cooked fudge frosting, so it tastes and looks very close to the original.
Use this as a guide for most standard 15.25 oz yellow cake mixes:
- 1 box yellow cake mix
- 1 extra large egg (so 4 eggs total if the box calls for 3)
- Replace the oil with melted butter in the same amount
- Use whole milk instead of water for the liquid
Mix just until smooth, then divide into your prepared pans and bake in thin layers as directed (they may bake 1–2 minutes faster, so keep a close eye). You’ll still get that tall layered look, with a slightly softer, more boxed-cake crumb.
Other flavor ideas (coconut, lemon, peanut butter)
Once you understand the method, you can change the personality with a few tweaks:
- Coconut Smith Island cake:
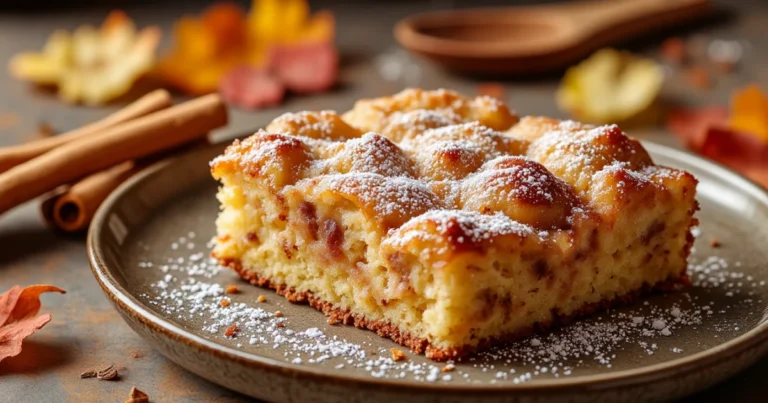
Add coconut extract to the cake batter, fold sweetened shredded coconut between some of the layers, and top the frosted cake with a sprinkle of toasted coconut. - Lemon Smith Island cake:
Swap some of the vanilla for lemon extract, add fresh lemon zest to the batter, and use a bright lemon icing or a lemon-fudge hybrid frosting. Think sunshine meets stripes. - Chocolate peanut butter twist:
Keep the yellow layers as-is, but swirl a little creamy peanut butter into the warm fudge frosting, or add a thin smear of peanut butter between every few layers.
If you fall in love with one of these, it’s worth giving it its own dedicated recipe later. But for now, this classic chocolate-fudge version is your base camp.
Storage, freezing & make-ahead
One of the perks of this cake: all those thin layers and fudge in between actually help it age well. It doesn’t dry out overnight like some layer cakes. You can bake it ahead and let the flavors settle in.
Do you have to refrigerate Smith Island cake?
Because the frosting is made with evaporated milk and butter, I recommend storing the finished cake in the fridge for food safety and for longer shelf life. It’ll keep well, covered, for about 4–5 days.
That said, it tastes best at room temperature. So bring the cake (or individual slices) out of the fridge 30–45 minutes before serving so the fudge softens and the crumb relaxes again. Cold cake = firm and sliceable. Room temp cake = soft, fudgy, perfect fork feel.
How to store leftovers
- Whole cake: Cover the cake loosely with plastic wrap or a cake dome. Refrigerate, then let it sit at room temp before serving.
- Individual slices: Place slices in an airtight container, layering with parchment if needed so they don’t stick together. Chill, then soften at room temp when you’re ready to eat.
Can you freeze Smith Island cake?
Yes, it freezes surprisingly well. The fudge frosting protects those thin layers.
- For a whole cake, chill it first until the frosting is firm. Wrap tightly in plastic wrap, then in a layer of foil. Freeze for up to 2 months.
- For slices, freeze them on a parchment-lined baking sheet until solid, then transfer to a freezer bag or airtight container.
To serve, thaw in the fridge overnight, then let come to room temperature before slicing or eating. The stripes will still look gorgeous, and the texture stays moist and fudgy.
Smith Island Cake Printable Recipe Card
Authentic Smith Island Cake (Maryland State Dessert)
A tall, classic Smith Island cake with 8–10 ultra-thin yellow layers and a shiny cooked chocolate fudge frosting. Impressive to serve, easier than it looks with a simple pan rotation method.
Ingredients
For the cake layers:
- Unsalted butter – 1 1/2 cups (3 sticks, 339 g), softened
- Granulated sugar – 2 cups (400 g)
- Large eggs – 5, at room temperature
- Pure vanilla extract – 2 teaspoons
- Cake flour – 3 1/4 cups (390 g), spooned and leveled (or 3 cups / 360 g sifted all-purpose flour)
- Baking powder – 2 teaspoons
- Fine sea salt – 1/2 teaspoon
- Buttermilk – 1 1/2 cups (360 ml), at room temperature
For the fudge frosting:
- Granulated sugar – 2 1/2 cups (500 g)
- Evaporated milk – 1 cup (240 ml)
- Unsweetened chocolate – 6 oz (170 g), chopped
- Unsalted butter – 1/2 cup (1 stick, 113 g)
- Vanilla extract – 1 1/2 teaspoons
- Fine sea salt – pinch
Instructions
- Preheat the oven to 350°F (175°C). Grease 3 or 4 round 8-inch or 9-inch cake pans and line the bottoms with parchment rounds. Lightly grease the parchment.
- In a large mixing bowl, beat the softened butter and sugar together on medium-high speed for 4–5 minutes, until very pale, fluffy, and creamy.
- Add the eggs one at a time, beating well after each addition and scraping down the bowl as needed. Mix in the vanilla extract.
- In a separate bowl, whisk together the cake flour (or sifted all-purpose flour), baking powder, and salt until well combined.
- With the mixer on low speed, add one third of the dry ingredients to the butter mixture and mix just until combined. Pour in half of the buttermilk and mix again. Repeat with another third of the flour, the remaining buttermilk, and finish with the last third of the flour, mixing only until the batter is smooth.
- Scoop a scant 3/4 to 1 cup of batter into each prepared pan, depending on pan size. Use an offset spatula to spread the batter into a very thin, even layer, pushing it all the way to the edges.
- Bake 3 pans at a time for 8–10 minutes, until the tops look set and the edges are just barely golden. The center should spring back lightly when touched.
- Cool the layers in the pans for 2–3 minutes, then run a knife around the edges and carefully invert onto a cooling rack. Peel off the parchment while the layers are still warm.
- Re-grease and re-line the pans with fresh parchment, add more batter, spread thinly, and repeat the baking and cooling process until you have 8–10 layers.
- Once the last batch of layers is in the oven or cooling, make the fudge frosting. In a medium heavy-bottomed saucepan, combine the sugar and evaporated milk and cook over medium heat, stirring, until the sugar is dissolved.
- Add the chopped unsweetened chocolate and butter to the pan. Stir continuously until the chocolate and butter are melted and the mixture comes to a gentle boil.
- Reduce the heat slightly and simmer for about 8–10 minutes, stirring often, until slightly thickened. It will still look like a loose chocolate sauce.
- Remove the pan from the heat and stir in the vanilla extract and a pinch of salt. Let the frosting cool at room temperature for about 20–30 minutes, stirring occasionally, until it reaches the consistency of warm hot fudge.
- To assemble, place a small dab of frosting in the center of your serving plate or cake stand. Set the first cake layer on top to anchor it.
- Spread a thin layer of warm fudge frosting over the first layer, pushing it almost to the edges. Top with a second layer of cake and repeat the frosting process.
- Continue stacking and frosting until all 8–10 layers are used, keeping the frosting warm and spreadable. If it thickens too much, gently rewarm it over low heat or over a pan of hot water.
- Pour or spread the remaining frosting over the top of the cake, letting it drip down the sides. Use an offset spatula to smooth the top and coat the sides evenly.
- Let the cake stand at room temperature for at least 1 hour, or until the frosting has set and the layers have settled together, before slicing and serving.
Notes
- For the most tender layers, make sure the butter, eggs, and buttermilk are at true room temperature before you start.
- Cake flour gives the softest crumb, but sifted all-purpose flour also works if that’s what you have on hand.
- Keep an eye on the layers in the oven; they bake quickly and should not brown deeply or they may turn dry.
- If the frosting starts to set too quickly, keep the pan over a bowl of warm water and stir often to maintain a spreadable texture.
- For clean slices, chill the assembled cake for 30–45 minutes, then slice with a long, sharp knife warmed under hot water and wiped dry.
- The finished cake keeps well, covered, in the refrigerator for 4–5 days; bring to room temperature before serving for the best texture.
- To freeze, chill the cake until firm, wrap tightly in plastic wrap and foil, and freeze for up to 2 months; thaw in the fridge overnight and then bring to room temperature.
- For a quick shortcut version, you can use a yellow cake mix doctored with an extra egg, melted butter instead of oil, and milk instead of water, then bake in thin layers and finish with the same fudge frosting.
Nutrition Information:
Yield: 16 Serving Size: 1 sliceAmount Per Serving: Calories: 520Total Fat: 25gSaturated Fat: 15gCarbohydrates: 70gSugar: 55gProtein: 7g
Nutrition values are estimates and will vary based on ingredients and brands.
Frequently asked questions
Love This Recipe? Discover More Classic Layer Cake Favorites
If this layer cake hit the spot, don’t miss The Ultimate Guide to Classic Layer Cakes where you’ll find more timeless flavors, smart frosting pairings, and easy fixes for every leaning, crumbly slice.