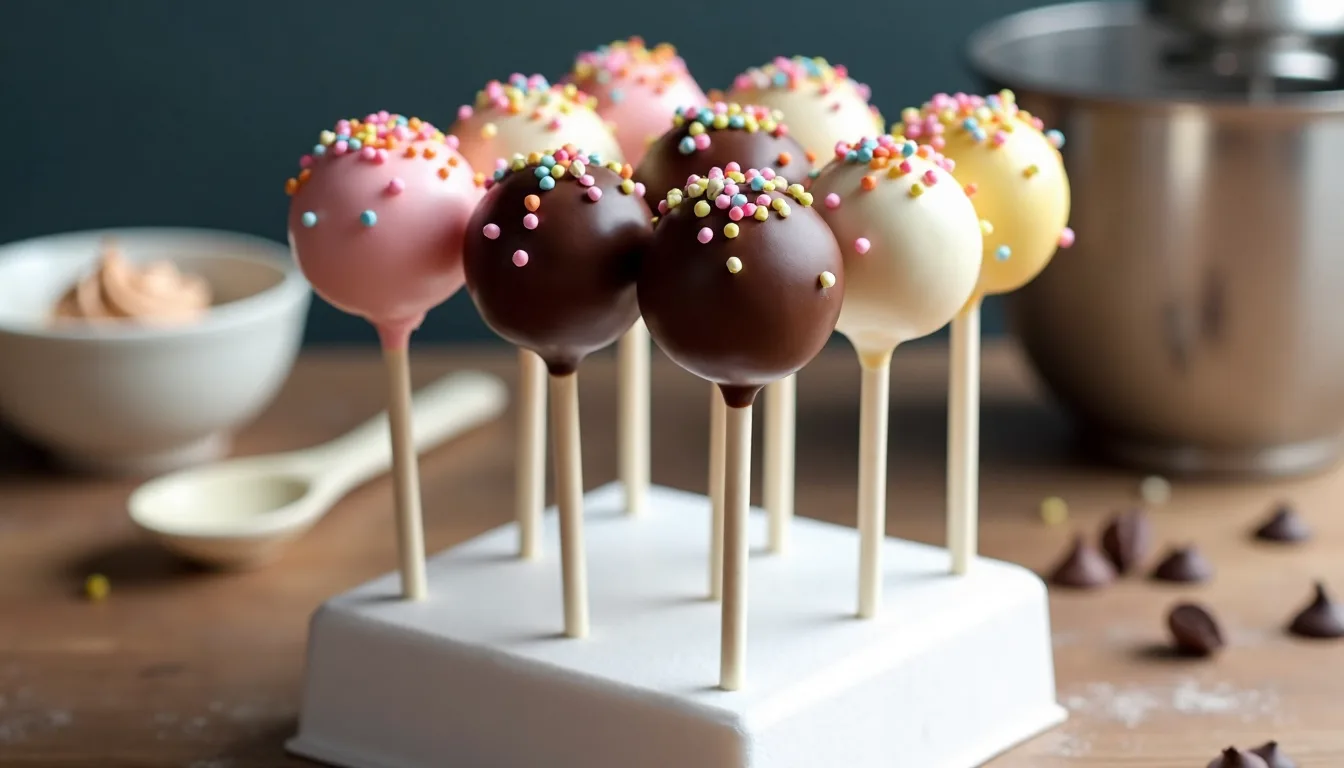
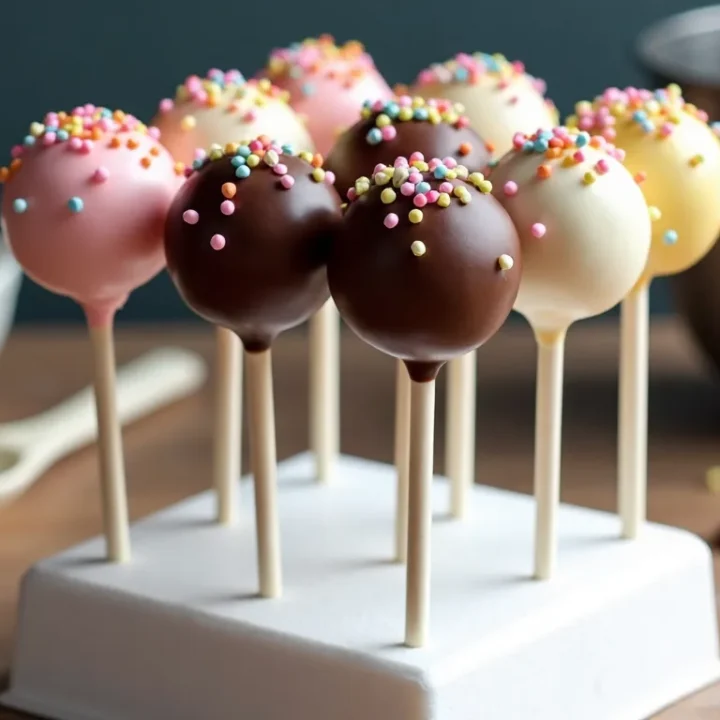
Easy Cake Pop Recipe with Cake Mix or Homemade Cake
Craving smooth, bakery-style cake pops without the hassle? This easy cake pop recipe shows you how to make perfect pops using either a box cake mix or a homemade cake — and just the right amount of frosting. Whether you’re planning birthday treats or just want to impress at your next bake sale, we’ll walk you through step-by-step instructions, flavor variations (like Starbucks-style and chocolate), and tips for a smooth dip and crack-free shell. No fancy mold or special tools needed — just cake, frosting, and chocolate. Let’s make pops that actually pop.
Quick 4 step snapshot
- Bake/Cool one 9 inch cake (or use leftover chocolate cake).
- Crumble & Bind with frosting until clay like.
- Shape balls & Chill, insert sticks, 20 min.
- Coat & Set with melted chocolate done!
Troubleshooting: smooth, crack-free cake pops
- What is the secret to smooth cake pops? Thin the coating with ½ tsp coconut oil and dip at 86–88 °F (30–31 °C).
- Why are my cake pops cracking when I put the stick in? The cake is too cold; let balls rest 5 min at room temp before inserting sticks.
- Why are cake pops so hard to make? Most fails come from too-warm cake or too-cold coating—follow the chill/dip temps above.
What Ingredients Do You Need for Cake Pops? (With Cake Mix & Frosting)
Cake Pop Ingredients Overview (Cake, Frosting & Coating)
Before you can make cake pops that actually hold together and taste delicious, you need a solid base. Whether you’re going for a vanilla cake pops vibe or a deep chocolate cake feel, this list keeps things simple. You can start with a homemade cake or use a box cake mix and canned frosting. Both paths lead to a perfectly round cake ball it just depends on how much time you’ve got.
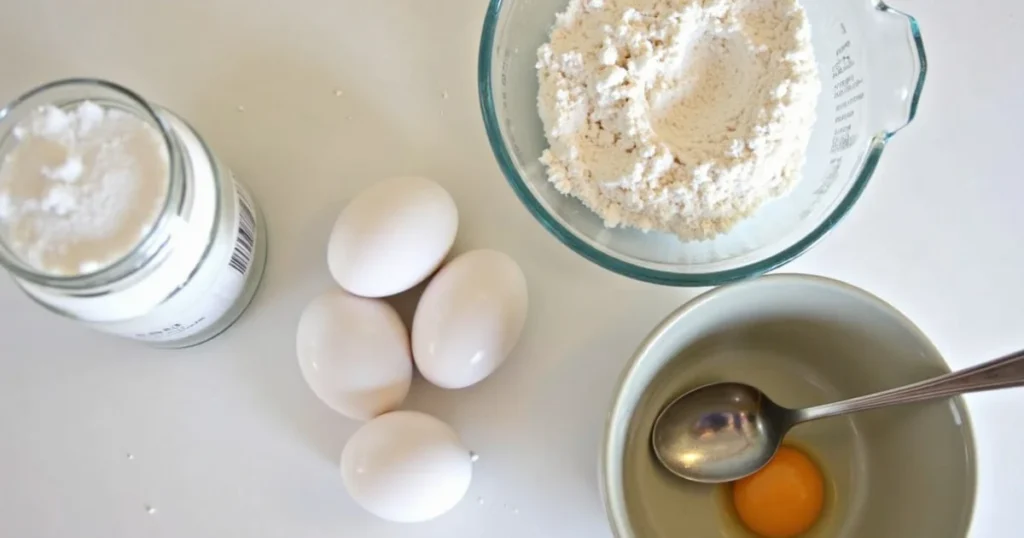
For the Cake Pop Base (Cake & Frosting Mix):
- 1 full cooled cake (use box cake mix or make the cake from scratch)
- ⅓ to ½ cup frosting (homemade frosting or cream cheese frosting)
- Optional flavor additions: vanilla extract, crushed cookies, fruit zest
You can make the frosting yourself or use a ready-made tub. If using box cake mix or canned frosting, make sure your cake is fully cooled before crumbling — that’s key to avoiding a mushy cake mixture. Want the best cake pops? Let the cake cool completely before mixing.
Pro Tip: Use chocolate fudge cake + cream cheese frosting for a tangy twist. It’s basically what Starbucks cake pops dream of being.
For the Chocolate Shell:
- 16–32 oz melted chocolate (choose from:
- white chocolate
- dark chocolate
- candy melts
- or use chocolate chips or almond bark)
- Popsicle mold (for cakesicles)
- Popsicle or cake pop sticks
If you’re using melted chocolate for dipping instead of molds, remember: you’ll need to dip the cake ball, not just coat it. Insert the pop stick into the melted chocolate, then place the cake balls into the shell. Want less mess? Cakesicle molds eliminate dripping excess chocolate and keep your cake pop upright.
Want to Make Chocolate Cake Pops?
Use chocolate cake and dip in melted dark chocolate for an extra rich version. Add chocolate sprinkles for a triple-chocolate treat.
What kind of cake mix is best for cake pops?
Honestly, any cake mix works — but for flavor and stability, go with Duncan Hines or Betty Crocker. Chocolate fudge for depth, or red velvet if you’re feeling dramatic (yes, red velvet cake makes stunning pops).
Can You Make Cake Pops Without Frosting?
Yes! If you’re using a super moist cake like chocolate fudge or a boxed mix, it may bind well on its own. Start mixing the crumbs first—if the texture feels like sticky dough, you may not need frosting at all. But if it’s crumbly, gradually add 1–2 tablespoons of frosting until it holds.
How to Make Cake Pops Step-by-Step (With Cake Mix or Homemade Cake)
Making cake pops doesn’t have to feel like juggling sugar grenades. Here’s how to make your cake balls firm, flavorful, and fuss-free — whether you’re using a box cake mix or going full homemade cake pop from scratch. These instructions walk you through everything: from how to bake the cake, crumble the cake, make the frosting, and shape the cake ball — to the final dip the cake pop moment.
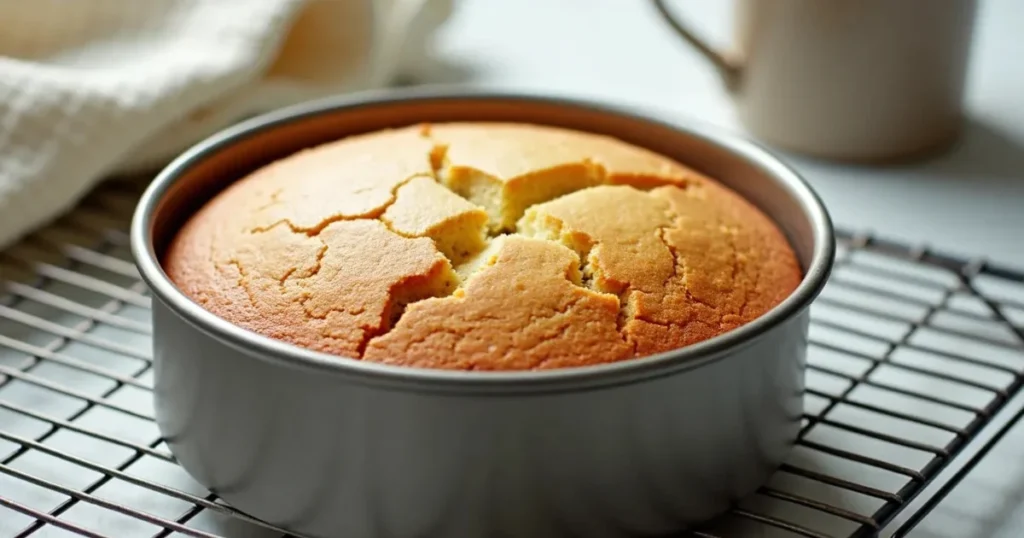
Step 1: Bake & Cool the Cake
- Follow the instructions on your box cake mix (or make the cake from scratch).
- Use milk instead of water and add a spoon of instant pudding mix for a moist cake.
- Once baked, allow the cake to cool completely before continuing.
Don’t rush this! Trying to mix or shape a warm cake is a recipe for gooey disaster.
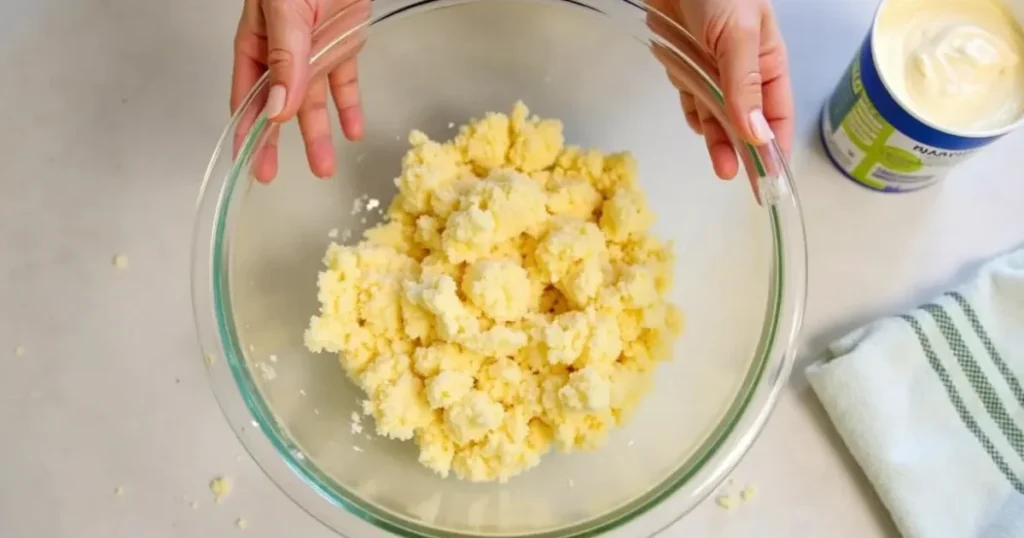
Step 2: Crumble & Bind with Frosting
- Crumble the cooled cake into a large mixing bowl.
- Add ⅓ to ½ cup of frosting (store-bought or homemade frosting).
- For extra tang, use cream cheese frosting.
- Mix until you get a dense, truffle-like cake mixture.
How Much Frosting Do You Really Need for Cake Pops?
Start with ⅓ cup and mix until the texture feels like dense, sticky dough. Add more only if the mixture is dry or crumbly. Too much frosting makes cake pops soggy or greasy. Most batches only need ⅓ to ½ cup total — no more.
You want it sticky but not wet. Too much frosting, and you’ll ruin the texture. Too little, and the pops crumble.
This cake and frosting combo is what makes the center of the cake pop melt-in-your-mouth good.
Can I use canned frosting for cake pops?
Yes. Canned frosting works; just start with ⅓ cup and add more only if the mixture feels dry. Too much store bought frosting = mushy pops.
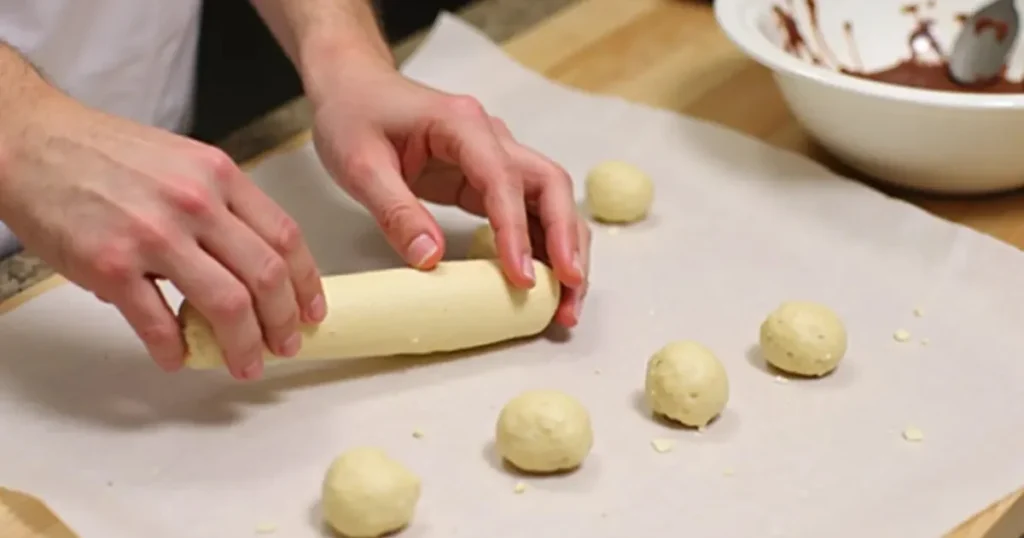
Step 3: Shape Perfect Cake Balls
What’s the Trick to Perfectly Round Cake Pops?
Getting smooth, round cake balls isn’t just about scooping. It’s all in the pressure. Gently roll the mixture between your palms without squeezing — too much force will crack the coating later. Chill the shaped balls before dipping for a polished, bakery-style finish.
- Scoop about 1 tablespoon of the cake mixture and roll it into a ball.
- Focus on forming a perfectly round cake ball gently roll between palms.
- Place the cake balls on a lined tray.
You’ll want to chill the cake balls in the refrigerator for at least 30 minutes. Cake balls are too cold? Let them sit for 5–10 minutes before dipping.
This stage is when the center of the cake ball firms up enough to coat properly.
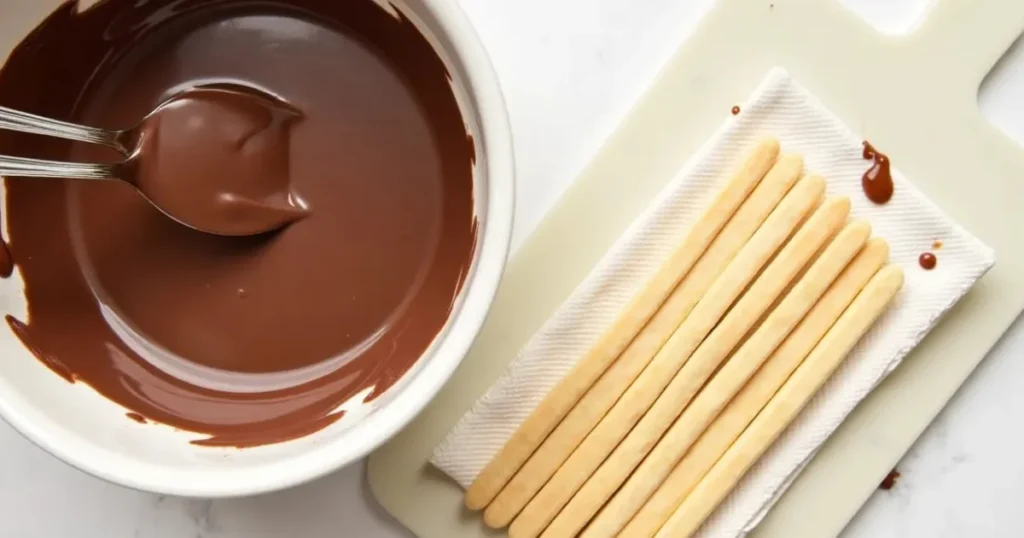
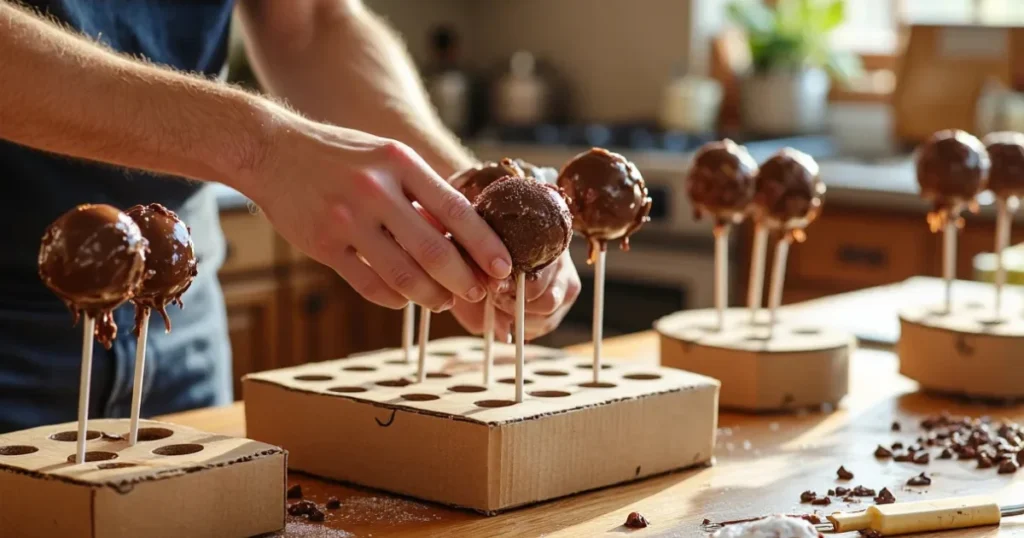
Step 4: Anchor the Stick in Chocolate
Why Anchor the Stick Before Dipping?
Anchoring the stick first prevents slipping, spinning, or falling off later. When the chocolate sets around the base of the stick, it forms a secure grip — essential for smooth dipping and clean presentation. Skipping this step is the #1 reason cake pops break off during coating.
- Melt the chocolate (dark, white, or candy melts) in 30 second bursts in the microwave.
- Stick into the melted chocolate, then press halfway into the cake ball.
- Let them set upright. This step anchors your cake pop stick securely.
Pop stick into the melted chocolate = no wobbly pops later.
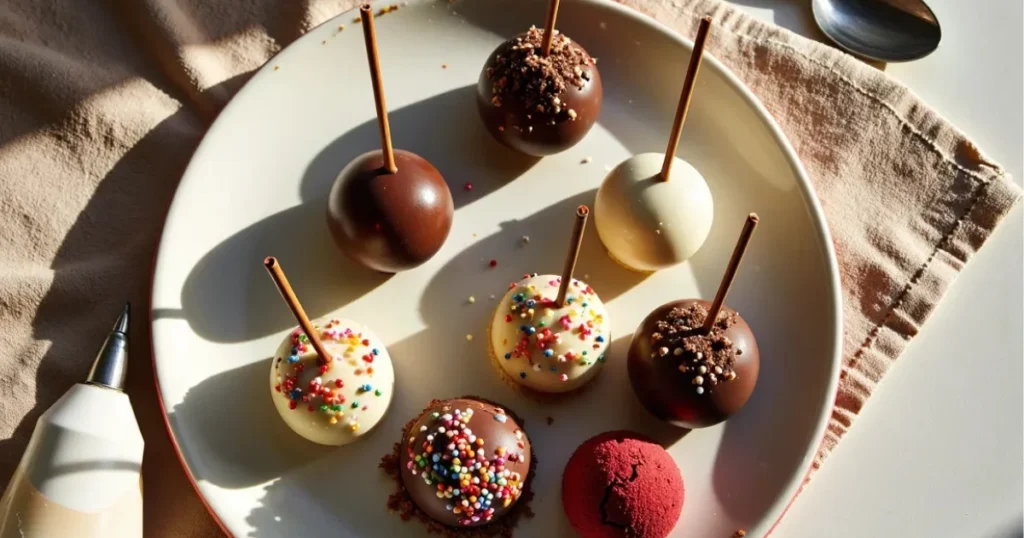
Step 5: Dip, Coat & Set
How Do You Dip Cake Pops Without Cracking or Melting?
Cracks and melting usually mean your cake pops were too cold or your chocolate too hot. Let cake pops rest at room temp for 5–10 minutes after chilling, and let your melted coating cool slightly before dipping. Temperature control is the secret to a smooth, crack-free shell.
- Gently dip the cake pop into the chocolate coating — not too fast, or you’ll lose it.
- Tap off excess chocolate while rotating slowly.
- Place the cake pop upright in a styrofoam block or drying stand.
Remember to coat the cake balls fully and let them harden at room temp — not the fridge, unless using candy melts.
What is the trick to making cake pops?
It’s not just about the recipe, technique matters. The biggest mistakes people make? Freezing cake pops, skipping the anchor step, or dipping when they’re too cold. Here’s what actually works.
Common Cake Pop Mistakes (and How to Fix Them)
Chill, but Not Too Much
- After shaping your cake balls, place the cake balls in the refrigerator for 30–60 minutes.
- Don’t dip the cake ball right out of the fridge. Cake balls are too cold? They’ll expand and crack your melted chocolate shell.
- Let them rest 5–10 minutes at room temp before dipping.
Timing keeps your cake pop smooth, shiny, and crack-free.
Support the Stick Like a Pro
- Always stick into the melted chocolate first, then insert the cake pop stick halfway into the cake ball where it meets the center.
- Let it firm up before dipping. This adds grip and avoids droopy pops.
Want pops that don’t fall apart? This is how you make your cake balls stable.
Avoid Ruining the Coating
- Use high-quality white chocolate, dark chocolate, or candy melts.
- If reusing chocolate, don’t overheat — or your melted chocolate will seize.
- Always melt the chocolate slowly and stir between bursts.
Uneven heating is how you get grainy coating — no thanks.
Balance Your Frosting Ratio
- Too much frosting = mushy mess. Too little = dry cake ball.
- Start small and adjust. For ultra-smooth texture, blend in a stand mixer.
- Cake mix and canned frosting are fast but may need chilling to firm up.
Clean Your Dips
- After dipping, spin gently and tap off excess chocolate.
- Let the shell set fully before adding sprinkles or drizzle.
- Never rush drying in a cold room — moisture ruins the shine.
Pro Tip: Want Smooth, Bakery-Style Pops?
Perfect timing, chilled balls, and thinned-out chocolate are the real secrets…
Cake Pop Variations: Chocolate and Themed Designs
If you’ve mastered the base cake pop recipe, it’s time to get creative. From classic chocolate cake versions to vibrant vanilla cake pops, themed designs, and even seasonal flavors — you can make cake pops that match any mood, holiday, or craving.
Classic Flavors That Always Win
- Chocolate Cake Pops: Deep, rich, and crowd-pleasing. Use a box cake mix with fudge flavor or make the cake with cocoa and espresso powder for intensity.
- Red Velvet Cake Pops: Bold color and soft tang, especially with cream cheese frosting.
- White Cake Pops: Light and versatile. Perfect with sprinkles or fruit-flavored drizzle.
These are the best cake pops to gift or bring to a party — familiar but always polished.
Creative and Themed Cake Pops
- Unicorn or Galaxy Pops: Swirl white chocolate with color drops.
- Holiday Pops: Think snowmen, pumpkins, or spooky Halloween cake-pops with candy eyes and orange drizzle. Ready to get spooky?👉 Check out the full Halloween cake pops tutorial for step-by-step decorating tips.
- Cakesicles (aka cake pop popsicles): Use silicone molds instead of shaping by hand. Easier to coat the cake balls, and they place the cake pop perfectly flat while drying.
These variations are ideal when making cake pops completely from scratch or for events like birthdays and showers.
Chocolate Cake Pop Recipe (Rich & Moist Version)
Use chocolate cake mix, pair it with cream cheese frosting, and dip in dark chocolate or candy melts. Add chocolate sprinkles for triple-chocolate cake pops.
What are Starbucks cake pops made of?
They typically use crumbled cake (usually vanilla or chocolate), blended with frosting, shaped into a cake ball, then dipped in melted chocolate. Yep, you can replicate that Starbucks cake vibe at home for way less.
Starbucks-Inspired Birthday Cake Pops
Craving the iconic pink-coated birthday cake pop? Use a vanilla cake base with cream cheese frosting and dip in melted white chocolate with pink sprinkles. Or, try our Starbucks Cake Pop Recipe for the full copycat method.
Easy Cake Pop Recipe (Printable Card)
Easy Cake Pop Recipe (No Mold, No Frosting) with Cake Mix
These easy chocolate cake pops are moist, rich, and coated in smooth melted chocolate. Whether you use a cake mix or homemade cake and frosting, they’re fun, freezer-friendly, and party-perfect every time.
Ingredients
Cake Pop Base
- 1 full cake, cooled completely (box mix or homemade)
- ⅓ to ½ cup frosting (homemade or canned)
- 1 tsp vanilla extract (optional)
- 2 tbsp crushed cookies or fruit zest (optional)
Chocolate Coating
- 16 to 32 oz melted chocolate (white, dark, or candy melts)
- 1 tbsp coconut oil (optional, to thin chocolate)
Instructions
<li><strong>Bake the Cake</strong><br/>Bake the cake according to your box or homemade recipe. Let it cool completely before crumbling.</li><li><strong>Make the Cake Pop Mixture</strong><br/>Crumble the cooled cake into a large bowl.<br/>Add â…“–½ cup of frosting and mix until the texture is dense and smooth, like truffles.</li><li><strong>Shape the Cake Balls</strong><br/>Scoop about 1 tbsp of mixture and roll into balls.<br/>Chill in the fridge for 30–60 minutes to firm up.</li><li><strong>Melt Chocolate & Prep Sticks</strong><br/>Melt chocolate in short microwave bursts.<br/>Dip one end of each stick in chocolate, then press into the cake ball. Let set 10 minutes.</li><li><strong>Coat the Cake Pops</strong><br/>Dip each chilled pop into melted chocolate.<br/>Tap off excess and set upright in a stand to dry.</li><li><strong>Optional Decoration</strong><br/>Once set, decorate with sprinkles, drizzle, or edible pens.</li><li><strong>Storage</strong><br/>Store in an airtight container at room temp (3 days) or fridge (up to 1 week).</li>
Notes
Nutrition Information:
Yield: 24 Serving Size: 1 PopAmount Per Serving: Calories: 175Total Fat: 9gSaturated Fat: 5gTrans Fat: 0gUnsaturated Fat: 4gCholesterol: 22mgSodium: 95mgCarbohydrates: 23gNet Carbohydrates: 22.5gFiber: 0.5gSugar: 15gProtein: 1.5g
Nutrition information is estimated based on standard ingredients and serving size. For the most accurate data, consult your nutrition app or tools.
Frequently Asked Questions About Cake Pops
These are the questions most first-time (and even repeat) bakers ask when trying to make the best cake pops. Here’s what you need to know before that next cake ball disaster strikes.
Nutrition for Homemade Cake Pops (Per Serving & Calories)
The calorie count for a single cake pop depends on your ingredients, but here’s a ballpark based on a standard 1-ounce serving using box cake mix and canned frosting plus a thin layer of melted chocolate.
- Calories: 150–200 per pop
- Fat: 7–11g
- Carbs: 18–25g
- Sugar: 12–18g
- Protein: 1–2g
Using homemade frosting or trimming the amount of chocolate coating can shave off a few calories. Want a slightly lighter version? Try vanilla cake pops with Greek yogurt-based frosting instead of buttercream.
Also note, cakesicles — which are larger and thicker than a typical cake pop — will naturally have a higher calorie range, especially if you use chocolate with higher cocoa content or add fillings like caramel or cookie butter.
Final Thoughts on Making the Best Homemade Cake Pops
Let’s be honest — learning how to make cake pops isn’t just about dessert. It’s about that moment when a kid lights up at a chocolate cake pop, or when your guests ask, “Wait… you made these?” It’s about turning leftover cake into magic, transforming a cake ball into a smile.
Whether you used a homemade cake or a box mix, paired with frosting and chocolate, what matters is that you tried. Maybe you got some excess chocolate on your hands. Maybe one cake pop stick wobbled a bit. That’s part of the charm.
Now you know how to make the best cake pops, keep them from cracking, and even style them as cakesicles for more wow-factor. The recipe makes a full batch, so share them or freeze them for later. They’re party-ready, giftable, and honestly — addictive.
So go ahead. Place the cake pop on the stand, stand back, and admire what you made from scratch (or almost). Because these aren’t just easy cake pops — they’re tiny, sweet proof that you nailed it.
If you loved this tutorial, print the recipe card, leave a comment, or tag your best-looking cake and chocolate creation online. Let’s see your spin on the perfect cake pops!
More Fun & Creative Cake Recipes to Try Next
Looking for more playful, show-stopping treats? These recipes are perfect for birthdays, bake sales, or fun weekend bakes:
- How to Make Starbucks Cake Pops: The Only Recipe You’ll Need
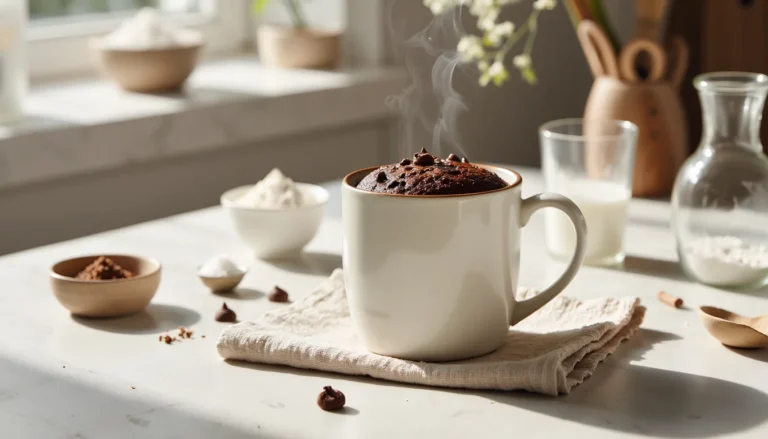
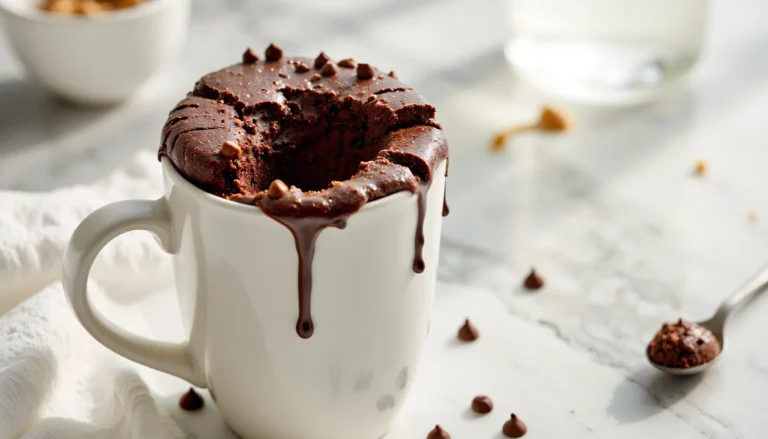
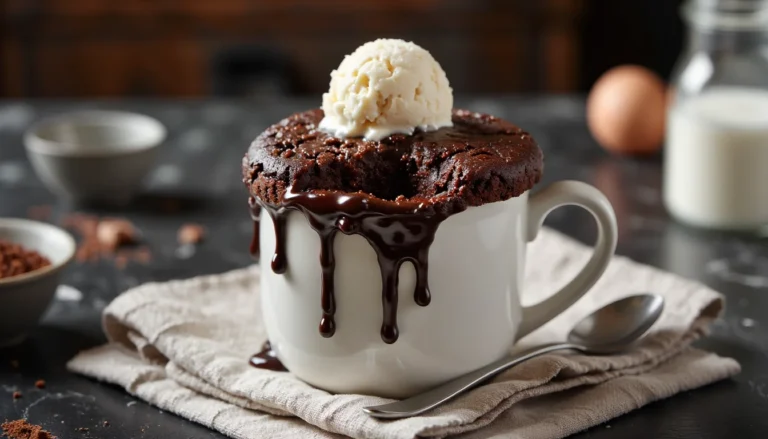
Dive deeper into the Starbucks-style cake pops with classic birthday cake flavor, cookies & cream variation, and expert coating tips. - Easy Oreo Mug Cake Recipe – 2 Ingredient Minute Oreo Mug Cake You’ll Love
Short on time? This 2-minute Oreo mug cake is the ultimate quick fix—rich, gooey, and made with pantry staples. - Ultimate Chocolate & Vanilla Soccer Ball Cake Recipe Tutorial (Replace with actual URL)
Want to impress a sports fan? Learn how to make an edible soccer ball using chocolate cake and clever carving techniques. - Easy Halloween Chocolate Cake – Layer Cake Recipe (Replace with actual URL)
This spooky yet fun cake layers bright colors and silky frosting for a Halloween showstopper kids will love.
These creative cakes are a hit with both kids and adults—and they’re easier to make than they look!