The Ultimate Vegan Mug Cake: One Base, 6 Flavors (Ready in 2 Minutes!)
Why you’ll love this vegan mug cake
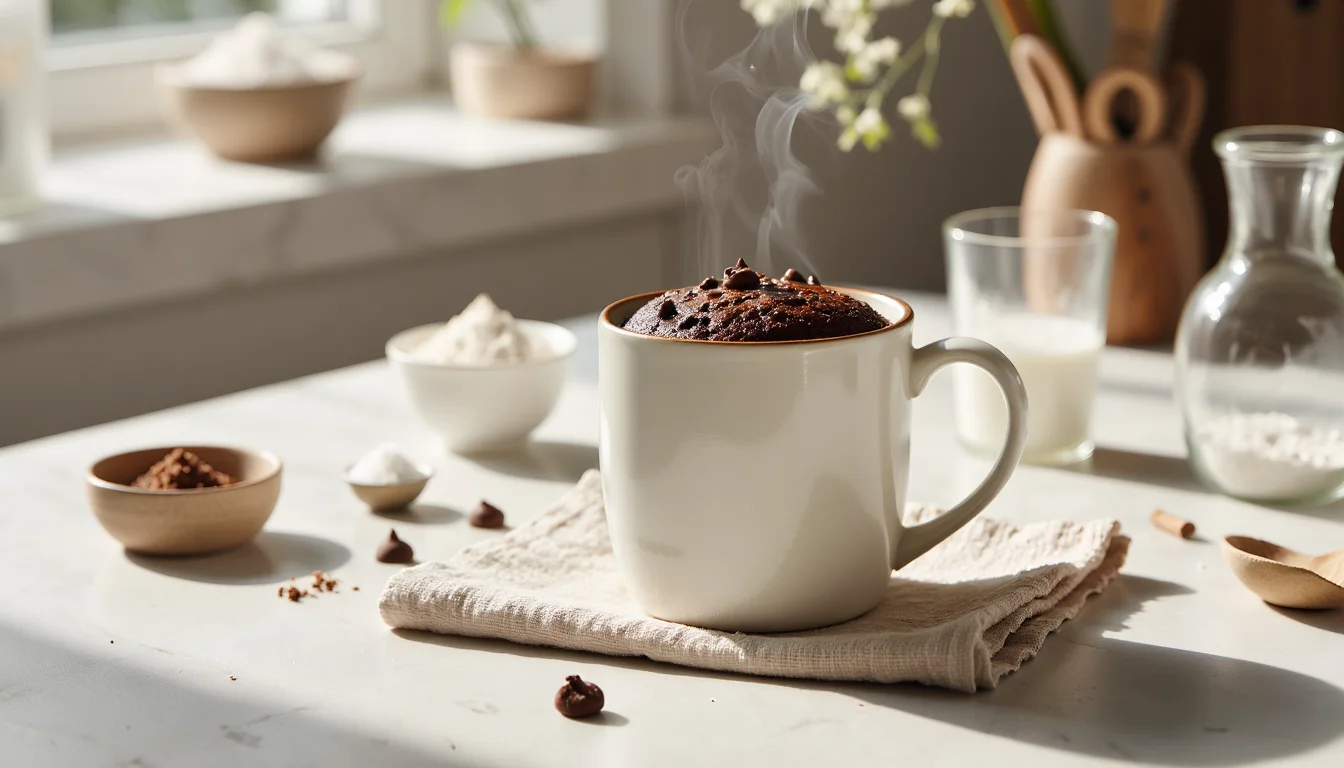
It’s 10 p.m., the kitchen’s “closed,” and suddenly you’re craving cake. Not a whole layered masterpiece. Just a warm, soft little treat you can eat with a spoon while your show buffers. That’s exactly when I make this vegan mug cake for myself. One mug. One fork. About 90 seconds in the microwave. Done.
You don’t need flax eggs, weird starches, or a pantry full of specialty flours. Just the same basics you’d use for pancakes. And yes, it actually turns out fluffy, not like a rubber stress ball in a mug. Promise.
Craving more cozy single-serve desserts? Head over to The Ultimate Guide to Mug Cakes for flavor ideas, timing tricks, and troubleshooting all in one place.
The “master base” concept (one batter, endless flavors)
Instead of memorizing five different mug cake recipes, you’ll learn one simple base batter. Then you can decide in the moment: chocolate, vanilla, funfetti, peanut butter, cookie-ish, or lemony. I usually start whisking before I’ve fully decided and choose when I’m adding the mix-ins. Very on brand for late-night baking.
The base never changes much: a few tablespoons of flour, sugar, plant milk, and oil. From there you swap cocoa for a bit of flour, stir in sprinkles, or swirl in peanut butter. Same texture every time. New flavor mood whenever you want.
And you’re making it right in the mug, so no bowls to wash. Just rinse and you’re done.
How to finally avoid rubbery mug cakes
If you’ve ever microwaved a cute little cake and ended up with a bouncy hockey puck, you are not alone. That happens when we overmix the batter and then blast it too long in a high-powered microwave. Double whammy.
In this recipe I’ll show you exactly how much to stir (hint: stop when the streaks disappear) and how to match the cook time to your microwave’s wattage. My own 1100W microwave needs just about 60 seconds, or it goes from fluffy to tire-texture fast. Yours might be different.
You’ll also get simple visual cues: what the top should look like, how it should spring back, and when a slightly gooey center is actually perfect. Soft, steamy, spoonable cake. Not rubber.
Ingredients & substitutions
Let’s talk about what actually goes into your midnight cake. The good news: it’s all normal stuff. If you’ve got pancake ingredients, you’re mostly there. No flax egg, no yogurt, nothing that requires a special grocery run.
Five basic pantry staples
Here’s the core combo I use for the base batter:
- All-purpose flour: Just regular white flour for the fluffiest texture. It gives the cake structure so it rises tall instead of turning into sludge.
- Sugar: Two to three tablespoons, depending how sweet you like it. Granulated sugar keeps things light; brown sugar makes it a little deeper and cozier, especially for chocolate.
- Baking powder: This is your lift. A flat 1/2 teaspoon is plenty. More will just make it overflow and taste metallic.
- Pinch of salt: Tiny, but huge for flavor. Especially helpful in chocolate versions.
- Plant milk + oil: A few tablespoons of soy, oat, or almond milk and one tablespoon of neutral oil or melted vegan butter. Oil gives the softest, squishiest crumb. Butter adds rich, buttery flavor. I often do half-and-half when I’m being extra.
A little vanilla extract ties everything together and makes even the plain vanilla version taste like actual cake, not bread in a mug.
Gluten-free & oil-free options
Need it gluten-free? Use a 1:1 gluten-free baking blend instead of regular flour. Those blends are designed to mimic all-purpose flour, so the texture stays close. Avoid straight coconut flour here; it’s too thirsty and you’ll get a dry sponge.
For an oil-free vegan mug cake, swap the tablespoon of oil for the same amount of unsweetened applesauce or very ripe mashed banana. The cake will be a bit more moist and pudding-y, but still delicious. Just don’t overcook; fruit-based cakes dry out faster in the microwave.
Choosing the right mug size
This part is weirdly important. Use a microwave-safe mug that holds at least 10–12 ounces. Anything smaller and your cake will try to escape over the sides like a volcano. I usually grab my biggest chipped coffee mug, fill the batter about halfway, and watch it puff up.
If you only have smaller mugs, divide the batter between two. Extra mug cake. Zero regrets.
How to make vegan mug cake (step-by-step)
Once you’ve done this once or twice, you’ll be able to make it almost on autopilot. It’s basically: stir, microwave, eat. But there are a couple of tiny details that make the difference between fluffy cake and rubbery hockey puck.
Mix the batter in the mug (fork vs whisk)
Grab your microwave-safe 10–12 oz mug and add all the dry ingredients first: flour, sugar, baking powder, salt, and cocoa if you’re doing chocolate. Use a fork to stir everything together so there are no big flour clumps hiding at the bottom.
Pour in the plant milk, oil (or applesauce/banana), and vanilla right on top. Gently whisk with the same fork until the batter looks mostly smooth. A few tiny lumps are fine. You don’t want to beat it like whipped cream.
The goal: mix just until you don’t see dry streaks of flour anymore. That’s it. Overmixing = extra gluten = chewy texture. I literally count to 20 in my head and stop.
Now’s the time for goodies. Sprinkle in chocolate chips, rainbow sprinkles, or a spoonful of peanut butter and lightly swirl them through the batter.
Microwave cook-time strategy by wattage (with quick chart)
Microwaves are chaos machines. Yours is probably stronger or weaker than mine, so the exact seconds matter. Start with these times, then adjust next time based on how your cake turned out.
| Microwave wattage | Start with this time |
|---|---|
| 700–800W | 80–90 seconds |
| 900–1000W | 70–80 seconds |
| 1100–1200W | 60–70 seconds |
Cook on High and watch through the door the first time you make it. The cake will rise up, maybe dome a little, then stop climbing. If it starts to overflow, hit stop, let it settle for a few seconds, then finish in 5–10 second bursts.
When in doubt, undercook slightly. You can always add another 5–10 seconds, but you can’t un-dry a mug cake.
How to tell when your mug cake is done
Look at the top: it should look set and matte around the edges, with maybe a slightly shiny or soft-looking spot in the very center. That’s perfect. If it’s still wet and sloshy all over, give it another 5–10 seconds.
Gently tap the surface with your fingertip or the back of a spoon. It should spring back but still feel soft. If it feels firm like a muffin, you’ve gone too far this round. Still tasty, just a bit drier.
Let the mug cake sit on the counter for 2–3 minutes before digging in. It keeps cooking from the residual heat and the crumb sets up so it’s tender instead of gummy. Then grab a spoon and go for that first steamy, fluffy bite.
6 delicious flavor variations
Once you know the base, the fun really starts. You can make a different “personality” of cake every night without memorizing six separate recipes. Same mug, same quick mix, tiny tweaks. Dangerous.
For all of these, start with the basic batter from above, then follow the little add-on instructions here. Cook times stay about the same, but remember: your microwave is the boss, so use the wattage chart as your guide.
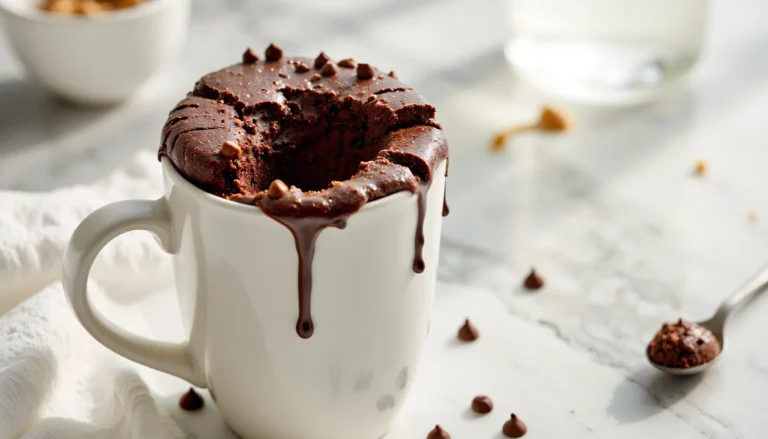
1. Rich chocolate fudgy style
For a chocolate vegan mug cake, scoop 3 tablespoons flour + 1 tablespoon cocoa powder instead of all flour. I like to use brown sugar here for extra caramel flavor. Stir a small handful of chocolate chips into the batter and sprinkle a few on top.
Microwave toward the shorter end of the time range so the middle stays a little gooey, like a baby lava cake. If the top looks set but the center still looks slightly shiny, you nailed it.
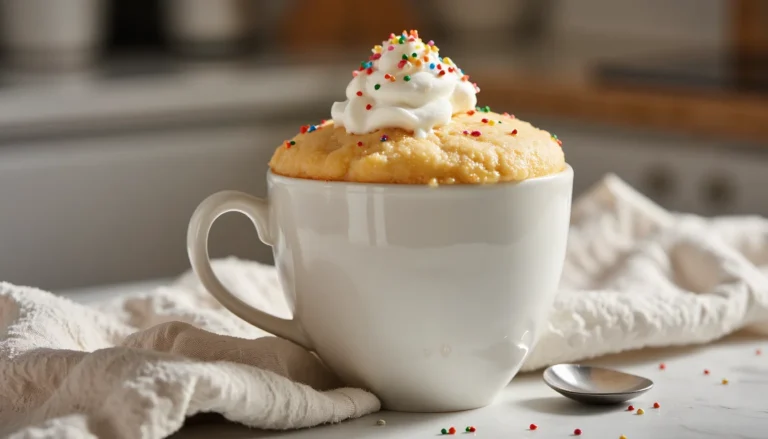
2. Classic vanilla / funfetti
Skip the cocoa and use the full 4 tablespoons of flour. Add an extra splash of vanilla and, if you like things sweeter, bump the sugar up by a teaspoon. Very bakery-style.
For funfetti, fold in a spoonful of vegan rainbow sprinkles right at the end, plus a few on top after cooking. They’ll melt into little bursts of color. This one is a kid magnet. Also a grown-up magnet.
3. Peanut butter swirl
Make either the vanilla or chocolate version, then dollop 1–2 teaspoons creamy peanut butter on top of the batter. Use a knife or toothpick to swirl it down into the mug, leaving thick streaks.
Because nut butter thickens the batter, you may need an extra 5–10 seconds of cook time. The top should look marbled and just set. Finish with a tiny pinch of flaky salt if you’re feeling fancy.
4. Snickerdoodle (cinnamon sugar)
Stir 1/4 teaspoon ground cinnamon into the dry ingredients. Before microwaving, mix a teaspoon of sugar with a pinch more cinnamon and sprinkle it all over the surface of the batter.
As it cooks, that topping turns into a crackly cinnamon-sugar crust. The inside stays soft and buttery-tasting, especially if you used melted vegan butter instead of oil. Cozy in a mug.
5. Chocolate chip “cookie” mug cake
Use the vanilla base, but swap half (or all) of the white sugar for brown sugar. Fold in a small handful of mini vegan chocolate chips. The batter will look like soft cookie dough, just looser.
Cook on the short side so it stays gooey in the middle, like a just-baked chocolate chip cookie. If it’s still very wet on top, give it one quick 5–10 second burst and stop there.
6. Bright lemon poppyseed
For a fresh, tangy twist, stir 1 teaspoon finely grated lemon zest and 1/4–1/2 teaspoon poppy seeds into the dry mix. Replace about 1 tablespoon of the plant milk with lemon juice, then add the rest of the wet ingredients as usual.
The batter will smell like lemon cake already. Microwave until the top is just set; citrus cakes dry out faster, so don’t overdo it. Dust with powdered sugar or add a tiny spoonful of dairy-free yogurt on top, and you’ve got a sunny little dessert in under five minutes.
Troubleshooting common problems
Mug cakes are tiny, but they still have Opinions. If yours turned out a little weird, let’s fix it so round two is perfect.
Why is my mug cake dry or hard?
The two big culprits: too long in the microwave and too little moisture. In a tiny cake like this, even 10 extra seconds can change the texture.
If your cake comes out dry, try:
- Shaving 10–15 seconds off the cook time next round.
- Using the higher end of the plant milk amount in the recipe.
- Swapping a teaspoon of sugar for brown sugar, which holds more moisture.
Also watch the top. As soon as it looks set around the edges with a slightly soft or shiny center, stop cooking. It will keep firming up as it rests. If you wait until it looks totally dry in the middle, it will taste overbaked.
And one more thing: don’t beat the life out of the batter. Overmixing builds gluten, which makes the crumb chewy instead of tender. Stir just until combined. Then drop the fork.
Why did it overflow?
Overflow usually means one of three things:
- The mug is too small.
- You filled it too high.
- You used too much baking powder.
Make sure you’re using at least a 10–12 oz mug and only filling it about halfway with batter. The cake needs room to rise. If your mug is on the small side, divide the batter between two mugs and cook them separately.
Measure that baking powder with a level 1/2 teaspoon, not a heaping scoop. Extra doesn’t make it fluffier, it just makes it erupt like a volcano and taste a bit metallic.
If you ever see it start to climb over the rim, hit stop, let it fall for a few seconds, then finish in short bursts.
Can I bake this in an oven (or air fryer)?
Short answer: yes, you can. It won’t be quite as instant, but it works if you don’t have a microwave or just prefer the oven texture.
For the oven:
- Preheat to 350°F (175°C).
- Pour the batter into an oven-safe mug or small ramekin.
- Bake for about 15–20 minutes, until the top looks set and a toothpick comes out with a few moist crumbs.
For the air fryer:
- Use an oven-safe ramekin that fits in your basket.
- Air fry at 320–330°F for roughly 10–14 minutes, checking around the 10 minute mark.
In both cases, let it cool for a few minutes so it finishes setting. Then dig in like it still came from the microwave.
Storage, serving & toppings
Mug cake is very much a “make it, eat it, forget the dishes till morning” kind of dessert. It’s not meant to hang around for days like a full cake, but you do have a few options if you somehow don’t finish it. Rare, but it happens.
Best way to enjoy right away
Honestly, the perfect moment is 2–3 minutes after cooking. The cake has set enough not to collapse, but it’s still warm, soft, and steamy. That’s when the crumb tastes the most tender and the chocolate is still melty.
Eat it straight from the mug with a spoon. No transferring. No extra dishes. And if you’re going for a gooey chocolate version, that slightly underdone center is basically built to be eaten warm.
If the top feels too hot, just give it another minute or two. Burning the roof of your mouth on mug cake is a very specific kind of regret.
Short-term storage and reheating
If you only make it halfway through, let the mug cool completely, then cover the top tightly with plastic wrap or a small plate. You can keep it in the fridge for up to 1 day. Longer than that and it starts to dry out.
To reheat, uncover and microwave in 5–10 second bursts just until the cake is barely warm again. Don’t walk away; it dries out fast on the second cook. You can also eat it cold, kind of like a soft snack cake. Not traditional, but still tasty.
I don’t recommend making the batter ahead and letting it sit. The baking powder starts working as soon as it hits the liquid, so if it waits too long, you lose some of that rise. Mix, cook, eat. Simple.
Easy vegan topping ideas
Now for the fun part. A plain mug cake is good. A decorated mug cake is next level. Try:
- A scoop of dairy-free ice cream on a warm cake. Instant sundae.
- Coconut whipped cream and fresh berries for the vanilla or lemon versions.
- A drizzle of peanut butter or almond butter over chocolate or cookie-style cake.
- Chocolate sauce or melted vegan chocolate on anything. Obviously.
- Crushed cookies, nuts, or extra sprinkles for crunch.
And if you’re truly keeping it minimal, even a dusting of powdered sugar on top makes it feel more like a “real” dessert and less like a late-night science experiment in a mug.
Vegan Mug Cake Printable Recipe Card
The Best Vegan Mug Cake (Chocolate or Vanilla)
A fluffy, moist vegan mug cake you can make in minutes, with one master base batter and easy options for chocolate, vanilla, or funfetti.
Ingredients
For the master vegan mug cake base:
- 4 tablespoons (30 g) all-purpose flour
- 2 to 3 tablespoons granulated or light brown sugar
- 1/2 teaspoon baking powder
- Pinch of fine salt
- 4 tablespoons unsweetened soy, oat, or almond milk
- 1 tablespoon neutral oil or melted vegan butter
- 1/4 teaspoon vanilla extract
- 2 tablespoons vegan chocolate chips or rainbow sprinkles, optional
For the chocolate version:
- Replace 1 tablespoon of the flour with 1 tablespoon unsweetened cocoa powder
For gluten-free:
- Use a 1:1 gluten-free all-purpose baking blend instead of regular flour
For oil-free:
- Replace the oil with 1 tablespoon unsweetened applesauce or mashed banana
Instructions
- Use a 10–12 ounce microwave-safe mug and add the flour, sugar, baking powder, salt, and cocoa powder if making the chocolate version
- Stir the dry ingredients with a fork until well combined and no big lumps remain
- Pour in the plant milk, oil or melted vegan butter, and vanilla extract
- Gently mix with the fork just until the batter looks mostly smooth and you no longer see dry streaks of flour
- Fold in chocolate chips, sprinkles, or other mix-ins, keeping the batter about halfway up the mug
- Microwave on High according to your microwave wattage, starting with 60–70 seconds for 1100–1200W, 70–80 seconds for 900–1000W, or 80–90 seconds for 700–800W
- Stop the microwave as soon as the cake has risen, the edges look set, and the top is mostly matte with a slightly soft or shiny center
- Let the mug cake cool on the counter for 2–3 minutes so the crumb sets, then serve warm straight from the mug with your favorite toppings
Notes
- For a fudgy chocolate vegan mug cake, use brown sugar and slightly undercook so the center stays gooey
- For a classic vanilla or funfetti version, skip the cocoa, keep all 4 tablespoons of flour, and fold in vegan rainbow sprinkles
- To avoid a rubbery texture, do not overmix the batter and always err on the shorter side of the cook time, adding 5–10 second bursts only if needed
- If your cake keeps overflowing, use a larger mug, fill it only halfway with batter, and make sure your baking powder is a level 1/2 teaspoon
- You can bake the batter in an oven-safe mug or ramekin at 350°F (175°C) for 15–20 minutes, or air fry at 320–330°F for about 10–14 minutes
- Mug cake is best enjoyed fresh, but leftovers can be cooled, covered, and refrigerated for up to 1 day, then gently reheated in very short microwave bursts
Nutrition Information:
Yield: 1 Serving Size: 1 mug cakeAmount Per Serving: Calories: 400Total Fat: 17gSaturated Fat: 3gCarbohydrates: 60gSugar: 35gProtein: 6g
Nutrition values are estimates and will vary based on ingredients and brands.
FAQs
Love This Recipe? Discover More Mug Cake Favorites
If this mug cake hit the spot, don’t miss The Ultimate Guide to Mug Cakes. Inside you’ll find small-batch classics, over-the-top flavor combos, and quick fixes for every rubbery or overflowed mug moment. From brownie-style chocolate to bright lemon and gooey cookie dough, there’s a microwave treat for every craving.