The Ultimate Keto Mug Cake Recipe (Chocolate, Vanilla & Snickerdoodle)
It always hits me right after I swear I’m “done eating” for the night. The house is quiet, the kitchen’s finally clean, and suddenly all I can think about is chocolate cake. Problem: keto. And honestly, I’m not about to drag out six bowls and preheat an oven at 10:30 pm.
That’s where this little mug situation comes in. In about 90 seconds, you get a real, forkful-of-cake moment that doesn’t wreck your carbs or your kitchen. No weird diet texture. No sad, rubbery sponge. Just a warm, fudgy, single-serving cake you can make in your favorite oversized mug.
I tested this base batter what feels like a million times (including one mug that overflowed all over my microwave… fun). Worth it. Because now you get the easy version.
Craving more cozy single-serve desserts? Head over to The Ultimate Guide to Mug Cakes for flavor ideas, timing tricks, and troubleshooting all in one place.
Why this is the best keto mug cake recipe
Let me be blunt: a lot of “healthy” mug cakes taste like sweet scrambled eggs. You know that faint sulfur smell when you crack open the microwave? Hard pass.
I built this one to dodge that completely. You get a real cake crumb, not rubbery egg puff. Moist, a little fudgy in the middle, with just enough structure so it doesn’t collapse into goo.
The trick is the ratio. Plenty of fat (butter or coconut oil) plus superfine blanched almond flour for a soft, bakery-style texture. No gritty almond meal. No coconut-flour sawdust. Just a tender bite that actually feels like dessert.
Sweetener matters too. Allulose keeps it soft and brownie-ish, while erythritol or monk fruit blends work if that’s what you have. I’ll walk you through how each one behaves so you’re not surprised by a cooling aftertaste or crunchy top later.
And because it cooks in the same mug you eat from, there’s one fork and one mug to wash. That’s it. I literally make this while my kids are brushing their teeth. Cake is ready before they’ve finished arguing over which toothpaste flavor is “gross.”
You also get options. One base batter turns into a chocolate, vanilla, snickerdoodle, or peanut butter swirl situation just by changing a couple ingredients. So you’re not stuck with the same exact keto mug cake every night.
But my favorite part? I tested it across different microwave wattages and wrote the times right into the recipe, plus a simple touch test. So instead of guessing and ending up with a dry, bouncy puck, you can stop the microwave at that perfect, just-set stage.
Ingredients & substitutions
You only need pantry-ish basics here. Nothing weird, nothing you have to special order at midnight.
We’ll talk amounts in the recipe card, but here’s what each ingredient is doing for you and how you can safely swap.
Almond flour & coconut flour
For the base, we’re using superfine blanched almond flour. Key word: superfine. It blends smoothly into the batter so you get a soft, tight crumb instead of little nutty pebbles. Almond meal (with skins) makes the cake gritty and heavy, so skip that bag for this recipe.
Coconut flour is much more absorbent, so you can’t swap it 1:1. If you try, you’ll end up with a dry sponge. If you absolutely need a nut-free version, use just 1 tablespoon coconut flour plus a splash or two of extra liquid (almond milk or cream) until the batter is thick but spoonable. Different texture, but still tasty.
Fats: butter vs coconut oil (dairy-free)
Melted butter gives the cake that classic bakery smell and a richer flavor. It also helps keep the crumb moist.
If you’re dairy-free, use refined coconut oil instead. Refined has the coconut flavor removed, so your cake won’t taste like sunscreen. Same amount, same method: melt it right in the mug first.
Sweeteners: allulose, erythritol, monk fruit
You can use your favorite granulated keto sweetener. I like:
- Allulose for the softest, most “real cake” texture. It keeps the crumb moist and doesn’t get crunchy as it cools.
- Erythritol or monk fruit blends for a budget option. Just know they can have a slight cooling effect and may firm up the cake a bit as it sits.
If your sweetener is extra strong (like pure monk fruit drops), reduce the amount and follow the brand’s conversion chart. Too much will make the cake weirdly sweet and can throw off the texture.
The egg (and egg-free option)
One large egg is our binder and our lift. It sets the structure so you can actually peel off a forkful of cake instead of pudding.
Hate eggy mug cakes? Same. That’s why the ratios here lean heavier on flour and fat, plus vanilla and salt to balance the flavor.
Need an egg-free version? You can try 1 tablespoon ground flaxseed mixed with 2½ tablespoons water (flax “egg”). It works, but the texture is more brownie/pudding than fluffy cake. Still good for a quick fix.
Baking powder, vanilla & salt
A little baking powder helps the batter puff in the microwave so it doesn’t stay dense. Make sure yours is fresh; old baking powder = flat cake.
Vanilla extract is non-negotiable in the base and the vanilla version. It masks any egg notes and makes the whole mug smell like a real bakery.
And finally, a pinch of salt. Tiny, but powerful. It cuts the sweetener aftertaste and makes the chocolate or cinnamon pop. Leave it out and the cake tastes oddly flat.
How to make a keto mug cake (step-by-step)
This all happens right in your mug. No mixing bowl, no mixer, no drama.
First, grab a microwave-safe mug that holds at least 12 ounces. Bigger is fine; tiny espresso cups are not. Spray it lightly with nonstick spray if your mug tends to cling to everything.
Melt 1 tablespoon butter or coconut oil in the mug, about 10 to 15 seconds. It should be melted and warm, not sizzling. If it starts popping, it’s too hot. Let it cool for 20 seconds so it doesn’t scramble the egg.
Whisk in the egg and vanilla with a fork until the mixture looks smooth and a little frothy on top. Really go for it here; this is your “air” in the cake.
Next, add the almond flour, sweetener, baking powder, salt, plus cocoa or cinnamon if you’re making one of the flavored versions. Stir, scrape the sides and bottom, then stir again. There should be no dry pockets hiding at the bottom. The batter will be thick but pourable. Fold in chocolate chips or peanut butter now if you’re using them.
Gently tap the mug on the counter to level the top. You’re ready to cook.
Microwave method (touch test + times by wattage)
Every microwave is a tiny mystery box, so we’re going by both time and feel.
- 1000W+ microwave: Start with 60 seconds on high.
- 700–900W microwave: Start with 75–90 seconds on high.
When the timer stops, the top should look mostly set and dry around the edges but still a bit soft and shiny in the very center. Lightly tap the surface with your fingertip:
- If it feels wet and batter-like, microwave in 5–10 second bursts.
- If it springs back but feels very firm, it’s slightly overdone; next time shave off 5–10 seconds.
Remember, the cake keeps cooking as it sits. So it’s better to stop when it’s a touch underdone than risk a rubbery sponge. Let it rest 1 minute before digging in.
Oven method (for no-microwave kitchens)
No microwave? You can still have cake.
Pour the batter into a greased oven-safe ramekin or small baking dish. Bake at 350°F (175°C) for about 10–15 minutes, depending on the size of your dish.
You’re looking for the same cues: the edges set and lightly pulling away, the center just barely springy when you tap it. If you stick a toothpick in, a few moist crumbs are perfect.
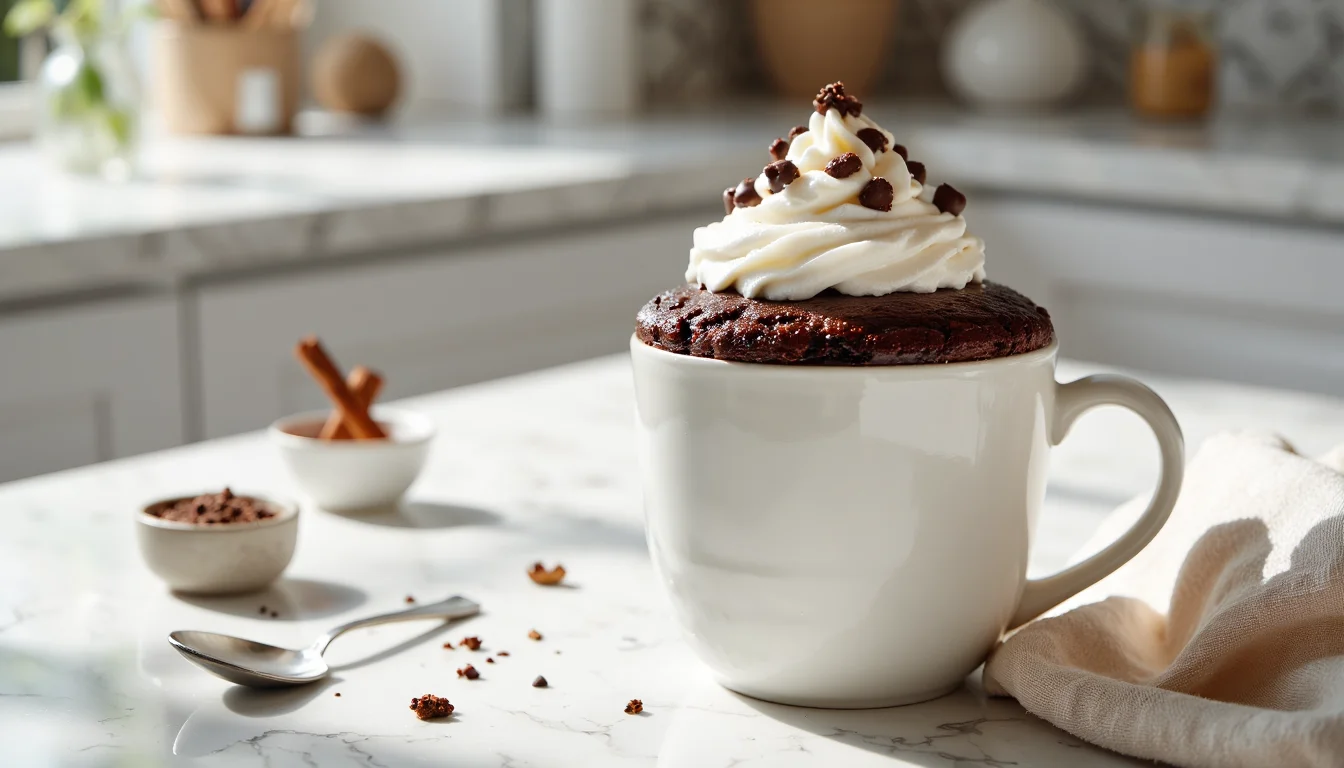
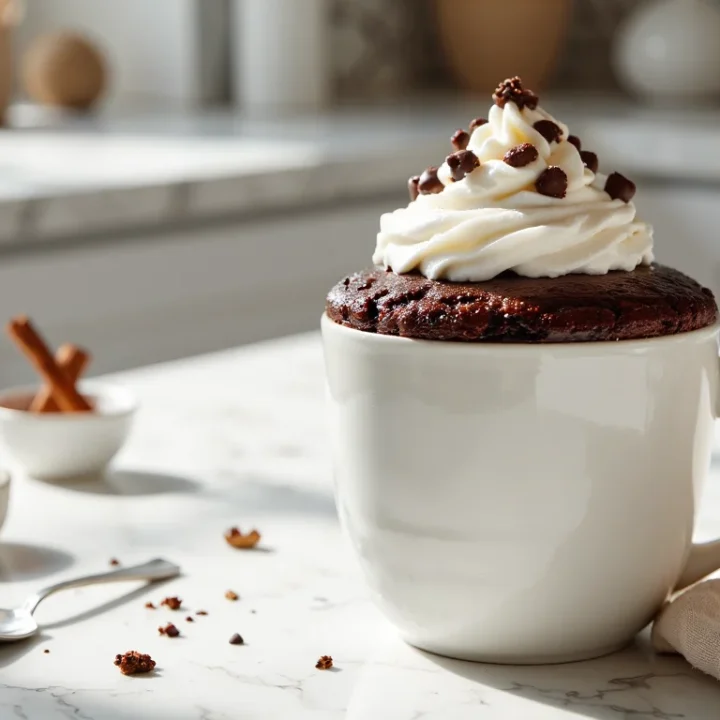
Cool for a couple of minutes, add a dollop of whipped cream, and enjoy while it’s still warm and soft.
4 delicious flavor variations
Once you’ve memorized the base batter, you can basically play dessert dress-up every night. Same steps, tiny tweaks, totally different mood.
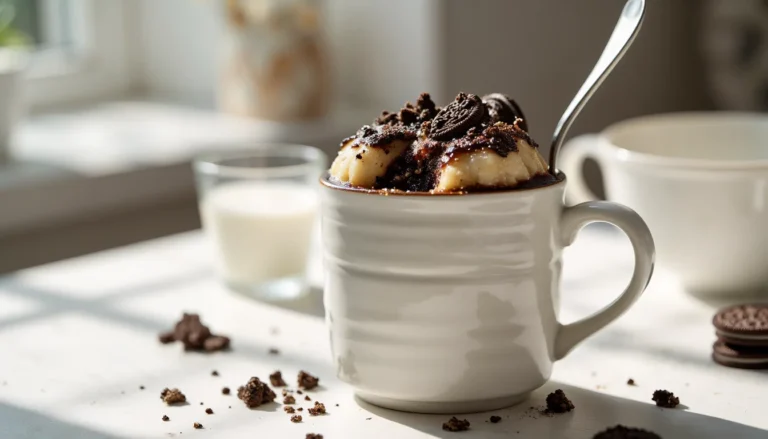
Classic chocolate keto mug cake
For the chocolate version, whisk everything as usual, then add:
- 1 tablespoon unsweetened cocoa powder
- 1 teaspoon water or unsweetened almond milk (this keeps it moist)
Stir until the cocoa is fully blended and the batter looks like thick brownie batter. If you want it extra indulgent, fold in 1 tablespoon sugar-free chocolate chips.
Microwave using the wattage guide, and watch that center. Slightly underdone tastes like a warm, gooey brownie. So good.
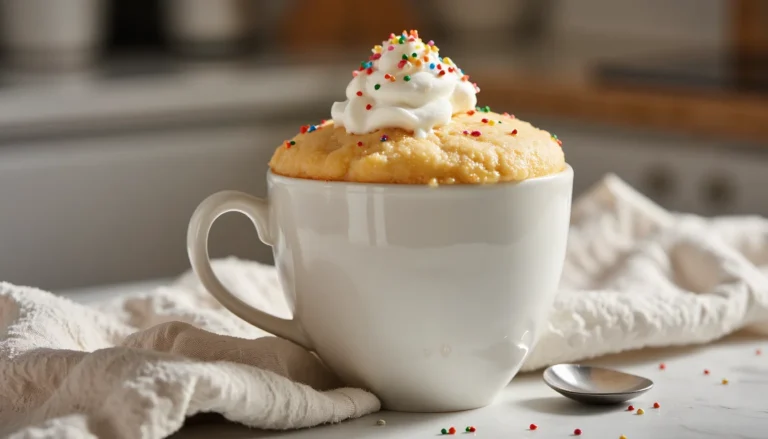
Fluffy vanilla keto mug cake
Vanilla is the “plain” flavor that somehow never feels plain. For the vanilla version, skip the cocoa and:
- Use ½ to 1 teaspoon vanilla extract for a strong bakery vibe.
- Add a tiny splash of heavy cream or almond milk if the batter feels too thick.
This one bakes up a little lighter and more sponge-cake-like. I love it topped with a dollop of whipped cream and a couple of raspberries. Simple. Perfect.
Snickerdoodle cinnamon-sugar mug cake
For cozy fall-in-a-mug energy, use the vanilla base and:
- Stir ¼ teaspoon ground cinnamon into the batter.
- In a tiny bowl, mix a pinch of granulated keto sweetener with another pinch of cinnamon. Sprinkle it over the top of the batter before cooking.
As it cooks, that cinnamon “sugar” melts into a little crust on top. It smells like a cinnamon roll and tastes like snickerdoodle cookie cake. Total comfort.
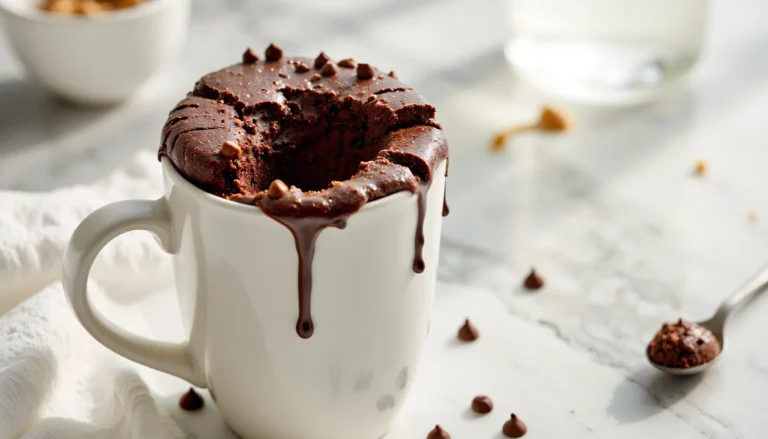
Peanut butter swirl keto mug cake
Start with either the chocolate or vanilla base. Once the batter is mixed, warm 1 tablespoon natural peanut butter until just pourable.
Dollop it on top of the batter and use a knife or toothpick to gently swirl it through, leaving visible ribbons. Don’t overmix or it disappears.
Microwave as usual. You’ll get pockets of melty peanut butter in every bite. Add a sprinkle of sugar-free chocolate chips on top if you want the whole peanut butter cup experience.
Baking tips for success
Keto mug cakes are fast, but they’re also a little dramatic. Tiny changes make a big difference. Here’s how to make yours amazing every time.
1. Know your microwave wattage.
If you’re not sure, check the label inside the door or google the model number. A “60-second cake” in a 1200W microwave is not the same as 60 seconds in an older 700W one. Use this as a starting point:
- 700W: 90 seconds
- 800–900W: 75–85 seconds
- 1000–1200W: 55–65 seconds
Always start on the low end, then add time in 5–10 second bursts.
2. Don’t overcook. Seriously.
Microwave cakes keep cooking as they sit, so if yours looks completely dry and very firm in the center, it’s already gone too far. That’s when it turns into a rubbery sponge. Stop when the edges are set and the center is just barely soft and shiny. It will finish setting as it rests.
3. Mug shape matters.
A wide, shorter mug or ramekin cooks more evenly than a super tall, skinny mug. Tall mugs tend to overcook the edges while the center is still gooey. If all you have is a tall mug, lower the power to 70–80% and tack on an extra 10–15 seconds.
4. Mix thoroughly, but don’t beat it to death.
You want every bit of almond flour and sweetener incorporated, especially at the bottom of the mug. Dry pockets equal weird texture. But once it’s smooth, stop stirring; overmixing can make it tougher.
5. Eat it while it’s warm.
Mug cakes are at their best in the first 5–10 minutes. After that, any erythritol in your sweetener can start to re-crystallize and the crumb firms up. Warm, spoonable, slightly fudgy in the middle? Perfect moment. Grab your spoon.
Storage, freezing & mug cake meal prep
Here’s the honest truth: mug cakes are designed to be eaten right away. Warm, soft, slightly fudgy in the middle. That’s the sweet spot.
But if you’re a planner (or just want to make future-you very happy), you can absolutely prep parts of this ahead.
Short-term storage (already cooked):
If you’ve made the cake and can’t finish it, let it cool, then cover the mug and refrigerate for up to 1 day. Before eating, splash in 1–2 teaspoons of cream, almond milk, or water over the top and microwave in 10–15 second bursts just until warm. It won’t be quite as perfect as fresh, but still good.
Freezing the cooked cake:
Let the mug cake cool completely. Run a knife around the edge and gently pop it out onto a small plate. Wrap it well in plastic wrap, then place in a freezer bag. Freeze up to 1 month.
To reheat, unwrap, place in a microwave-safe dish, drizzle with a little cream or almond milk, and warm in 15–20 second bursts until just heated through. Don’t overdo it or you’ll undo all that lovely moisture.
The best option: “mug cake mix” meal prep
My favorite hack is prepping individual dry mixes:
- In small jars or snack bags, combine the almond flour, sweetener, baking powder, salt, and any dry flavorings (cocoa, cinnamon, etc.).
- Label the bag with what to add: “+ 1 egg, 1 tbsp butter, ½ tsp vanilla, 1 tsp water.”
Store these dry mixes at room temperature for up to a month. When a craving hits, dump one into a mug with the wet ingredients, stir, and cook as directed. Instant mug cake kit.
You still get that freshly-cooked, soft texture, but all the measuring is already done. Late-night you will be very impressed with past you.
Keto Mug Cake Printable Recipe Card
The best keto mug cake (chocolate, vanilla & snickerdoodle)
A super moist keto chocolate mug cake you can whip up in just a few minutes. Rich, fudgy, and topped with a cloud of whipped cream, it cures dessert cravings without breaking your carbs. Perfect for late-night treats or whenever you need a fast single-serving dessert.
Ingredients
For the Base Vanilla Keto Mug Cake:
- 1 tablespoon unsalted butter, melted (or refined coconut oil for dairy-free)
- 1 large egg
- 1/2 teaspoon vanilla extract
- 3 tablespoons superfine blanched almond flour, lightly packed
- 1 to 1 1/2 tablespoons granulated keto sweetener (allulose or erythritol/monk fruit blend)
- 1/2 teaspoon baking powder
- Pinch of fine salt
For the Chocolate Keto Mug Cake:
- Add 1 tablespoon unsweetened cocoa powder
- Add 1 teaspoon water or unsweetened almond milk
- Optional: 1 tablespoon sugar-free chocolate chips
For the Snickerdoodle Mug Cake:
- Add 1/4 teaspoon ground cinnamon to the batter
- Topping: pinch of granulated keto sweetener mixed with a pinch of cinnamon
For the Peanut Butter Swirl Mug Cake:
- 1 tablespoon natural peanut butter, warmed until pourable
Optional Toppings:
- Sugar-free whipped cream
- Fresh berries
- Extra cinnamon
- Sugar-free chocolate chips or shavings
Instructions
- Lightly grease a microwave-safe mug that holds at least 12 ounces, if needed.
- Add the butter or coconut oil to the mug and microwave for 10 to 15 seconds, just until melted.
- Let the fat cool for about 20 seconds so it is warm, not hot.
- Whisk in the egg and vanilla with a fork until the mixture is completely smooth and slightly frothy.
- Add the almond flour, sweetener, baking powder, salt, and any dry add-ins (cocoa or cinnamon), and stir until the batter is thick, smooth, and no dry pockets remain.
- For the chocolate version, stir in the 1 teaspoon water or almond milk and fold in chocolate chips, if using.
- For the snickerdoodle version, stir the cinnamon into the batter and sprinkle the cinnamon “sugar” over the top.
- For the peanut butter swirl version, dollop warmed peanut butter on top of the mixed batter and gently swirl it through with a knife or toothpick.
- Tap the mug once or twice on the counter to level the batter.
- Microwave on High using these starting times: 90 seconds for 700W, 75 to 85 seconds for 800 to 900W, or 55 to 65 seconds for 1000 to 1200W.
- If the center is still wet and liquid, continue microwaving in 5 to 10 second bursts until the top is mostly set with a slightly soft center.
- Let the mug cake stand for 1 minute to finish setting and cool slightly before eating.
- Serve warm with your favorite keto toppings.
Notes
- Microwave wattage varies, so always start with the shorter cook time and add more only in small bursts.
- The cake will continue to cook as it stands, so pull it from the microwave when the center is just barely set to avoid a dry, rubbery texture.
- Superfine blanched almond flour gives the best, most cake-like crumb; almond meal will make the mug cake heavier and gritty.
- Allulose keeps the cake softer as it cools, while erythritol or monk fruit blends can make it firmer or slightly crunchy after a few minutes.
- Mug cakes are best eaten within 5 to 10 minutes of cooking; they dry out quickly as they cool, especially if made with erythritol.
- For a lava-style center, press a small square of sugar-free chocolate into the middle of the batter before cooking.
- To make a dairy-free mug cake, use refined coconut oil instead of butter and top with coconut whipped cream or nut butter.
- For a quick prep option, pre-mix the dry ingredients in small jars or bags, then just add the egg, fat, and vanilla before cooking.
Nutrition Information:
Yield: 1 Serving Size: 1 Mug CakeAmount Per Serving: Calories: 320Total Fat: 27gSaturated Fat: 9gUnsaturated Fat: 18gCholesterol: 220mgSodium: 280mgCarbohydrates: 12gNet Carbohydrates: 4gFiber: 3gSugar: 1gSugar Alcohols: 5gProtein: 10g
Nutrition values are estimates and will vary based on ingredients, sweeteners, and brands used.
Frequently asked questions
Love This Recipe? Discover More Mug Cake Favorites
If this mug cake hit the spot, don’t miss The Ultimate Guide to Mug Cakes. Inside you’ll find small-batch classics, over-the-top flavor combos, and quick fixes for every rubbery or overflowed mug moment. From brownie-style chocolate to bright lemon and gooey cookie dough, there’s a microwave treat for every craving.