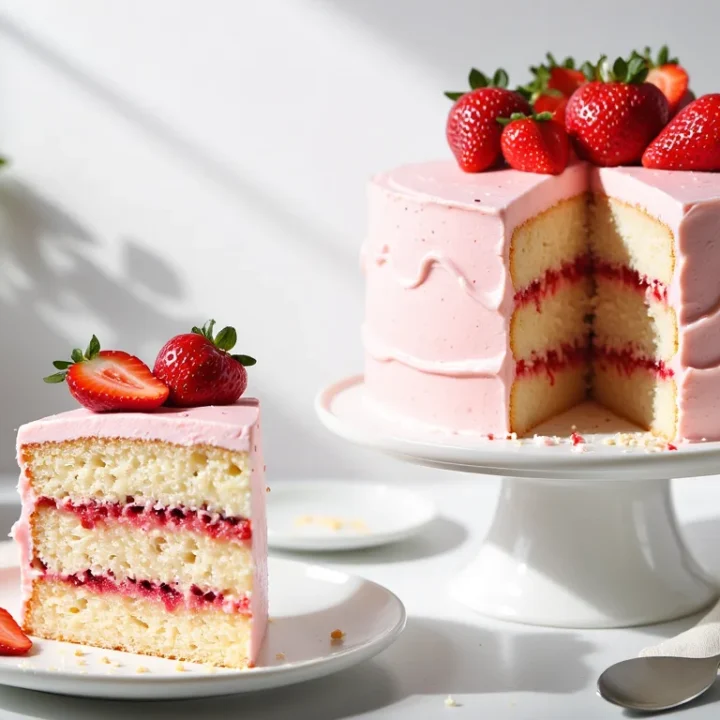
The Best Fresh Strawberry Layer Cake (From Scratch & No Jell-O!)
Why this strawberry layer cake actually tastes like real fruit
Picture this: you slice into a pretty pink birthday cake, everyone leans in, you take a bite…and it just tastes like sugar and food coloring. No berries. Total letdown. I’ve been there, standing in my kitchen with a plate of “strawberry” cake that might as well be vanilla in a pink coat.
Here’s the problem. Fresh strawberries are mostly water. When you just mash them and toss them into batter, that extra liquid weighs everything down. The cake can bake up dense, a little gummy in the center, and somehow still not taste strongly of berries. And sometimes the crumb turns a weird beige or gray, which is honestly tragic after you used beautiful red fruit.
So instead of adding raw puree, we treat the berries like a flavor project. You’ll blend them smooth, then simmer them down on the stove until the mixture is thick, glossy, and reduced by at least half. It smells like warm jam in the best way. By the time it’s ready, you’ve turned a big pile of strawberries into a concentrated, spoonable paste that’s all flavor and barely any water.
That concentrated puree is the heart of this Strawberry Layer Cake. A good portion goes straight into the batter, so the flavor is baked right into the crumb instead of just sitting between the layers. The rest gets saved for the frosting, so every bite, top to bottom, has that real berry taste. No Jell-O. No artificial aftertaste.
And the color? That’s where the reduction plus a tiny bit of help really shines. The natural strawberry hue, a touch of lemon juice to keep it bright, and a small drop or two of pink gel if you want that bakery-perfect look. Soft, rosy layers instead of dull brownish ones. My sister literally asked if I’d used a boxed “pink velvet” mix the first time she saw it.
End result: a cake that smells like a bowl of fresh berries, feels plush and tender when you cut it, and tastes like actual strawberries in every crumb. Exactly what you wanted when you went looking for a homemade strawberry cake in the first place.
Craving more tall, bakery-style cakes? Head over to The Ultimate Guide to Classic Layer Cakes for step-by-step stacking tips, crumb coat secrets, and seven must-bake classics.
Why this recipe works
You know that feeling when you want a light, fluffy strawberry showstopper but you’re low-key afraid it’ll bake up dense or gummy? This whole method is built to avoid that. Every part of the formula is doing a specific job, so you’re not just hoping for a good cake, you’re basically stacking the deck in your favor.
Real strawberry reduction, no Jell-O
Instead of relying on boxed mixes or flavored gelatin, you’re packing real fruit into the batter. The catch is that strawberries are watery. So we cook them down first, slowly, until they’re thick and syrupy. That reduces the liquid and concentrates the flavor, so your cake tastes like strawberries without turning heavy or wet in the middle.
Because the puree is cooked, it behaves more like a thick ingredient (think Greek yogurt or jam) instead of sloshing around like juice. Less risk of collapsing layers. More control over the texture. And since you’re also using that same reduction in the frosting, the berry flavor isn’t just in the filling; it’s everywhere.
Egg whites only for a pink crumb
Whole eggs add richness, but the yolks also bring color. Yellow plus red can lean…peach. Or even a strange beige. Using all egg whites keeps the crumb lighter in both texture and appearance, which lets the strawberry color (and any little boost from gel coloring) show through.
The result is a soft, plush crumb that slices cleanly and looks genuinely pink, not orange. And you’re not wasting the yolks. I usually scramble them the next morning with a little cheese while the cake layers are cooling in the fridge. Win-win.
Cake flour for a soft, bakery-style texture
Cake flour is lower in protein than all-purpose flour, which means it develops less gluten. Less gluten equals a finer, more tender crumb. That’s especially important in a fruit-heavy cake, where you’re already asking the batter to carry extra moisture and weight.
So between the cake flour and the careful mixing method, you get something that feels like it came from a bakery case: soft, moist, but still sturdy enough to stack in tall layers without slumping.
Room temperature ingredients for a smooth batter
Cold milk + cold egg whites + soft butter is the fastest way to a curdled-looking batter. I’ve dumped fridge-cold dairy into nicely creamed butter before and watched it turn into little buttery curds. It bakes up okay, but you lose some lift.
Bringing your butter, egg whites, and dairy to room temperature lets everything emulsify smoothly. The batter traps air more evenly, which means better rise, a more even crumb, and less chance of a dense or gummy center. And all you really have to do is pull ingredients out of the fridge before you preheat the oven.
Ingredients & substitutions
Let’s talk about what’s actually going into your Strawberry Layer Cake and where you can flex a little. This is the spot where I usually pull everything out on the counter, realize I’m almost out of one thing, and start negotiating with my pantry. You too? Same.
Strawberries: fresh vs frozen and how to prep each
You can use either fresh or frozen berries here, and the good news is they both work beautifully once they’re cooked down. Fresh is great in peak season when they’re sweet and fragrant. Frozen is perfect in the middle of January when the store strawberries taste like water.
For fresh: hull them, slice if they’re huge, then blend until smooth. For frozen: thaw completely, drain off any icy liquid, then puree. That extra water from thawing can throw off your reduction time, so starting with drained berries keeps things predictable.
If your berries aren’t very sweet, that little spoonful of sugar in the reduction helps coax out their juices and flavor. And the lemon juice isn’t just for taste. It helps keep the color brighter and less brownish as everything cooks.
Flour: cake flour vs all-purpose (plus cornstarch hack)
Cake flour is the gold standard here. It’s softer and gives you that tender, almost velvety crumb you want in a pretty pink layer cake. But if you’re mid-bake and realize you only have all-purpose, don’t panic.
You can DIY it: for every cup of cake flour, use 1 cup all-purpose flour, remove 2 tablespoons, and replace those with 2 tablespoons cornstarch, then whisk well. It’s not exactly the same, but it’s close enough that my neighbor couldn’t tell which version she was eating.
Fats: butter, optional oil, and sour cream / milk
Butter brings flavor and structure. It’s what lets you cream with sugar and build in air. Sour cream or whole milk adds moisture and richness. I like using sour cream for a slightly thicker batter and plush crumb, but whole milk works if that’s what you keep on hand.
If you prefer an ultra-moist, slightly more “box mix” style texture, you can swap a small portion of the butter for neutral oil (like canola or vegetable). Don’t swap it all or you’ll lose some structure. A little goes a long way.
Flavor boosters: vanilla, strawberry emulsion, lemon zest
Vanilla might sound boring, but it actually helps round out the berry flavor so it tastes more “bakery dessert” and less like straight jam. If you have strawberry emulsion, you can add a teaspoon for an extra punchy strawberry vibe without adding more liquid.
Lemon zest is optional but lovely. It doesn’t make the cake taste lemony, it just wakes up the strawberries. Think of it like turning the volume knob up one click.
Coloring: pink gel vs natural color
The reduction gives a natural pink hue, but baking always softens color. If you want that unmistakable pink cake moment, use 1–2 drops of pink gel food coloring. Gel is key here; it’s concentrated, so it adds color without watering down your batter.
You can skip the color if you’re more “natural only,” just know it’ll be a softer, more muted pink. Still pretty. Just not as bold as the cakes you see on Instagram.
Step-by-step: how to make the strawberry reduction
The strawberry reduction is the one part you don’t want to rush. I usually start this while the house is still quiet in the morning, coffee in one hand, spatula in the other. It smells like warm jam and makes the whole kitchen feel a little extra cozy.
Puree the berries
Rinse your fresh berries and hull them, or thaw your frozen strawberries completely and drain off any icy liquid. Add them to a blender or food processor and blend until completely smooth. No big chunks. You want a pourable puree, like a thick smoothie.
If your berries are bland or out of season, go ahead and add the small amount of sugar and lemon juice right into the blender. That helps jump-start the flavor and protects the color from the very beginning.
Simmer and reduce to a thick consistency
Pour the puree into a medium, heavy-bottomed saucepan. Use one that’s wide rather than super tall; more surface area means faster evaporation. Turn the heat to medium-low. Not blasting. Just a steady simmer.
Cook, stirring every couple of minutes at first and more often as it thickens. You’ll see steam escaping and the volume slowly shrinking down. If it starts to bubble like lava and spit, lower the heat. I’ve definitely decorated my stovetop in strawberry splatters before.
How to know it’s ready (visual cues)
You’re aiming for about half the original volume and a texture that’s closer to thick sauce than juice. When you scrape a spatula across the bottom of the pan, the puree should briefly hold a “trail” before it closes back up.
Another cue: drag a spoon through it and then run your finger across the back of the spoon. If the line stays mostly clean and the puree doesn’t immediately run back together, you’re in the right zone. It should feel concentrated and jammy, not watery.
Cooling the puree safely (what NOT to do)
Once it’s thick and deeply flavored, take the pan off the heat and transfer the reduction to a shallow bowl or dish. Spreading it out a bit helps it cool faster. Let it come all the way to room temperature before it goes anywhere near your cake batter or frosting.
Don’t be tempted to add warm puree to your beautifully creamed butter. Hot or even very warm puree will melt the butter, break the emulsion, and can lead to a dense, greasy cake. If you’re in a rush, you can pop the bowl into the fridge for short intervals, stirring occasionally, just don’t let it freeze or get icy around the edges. Cool, thick, and scoopable. That’s your sweet spot.
How to make the strawberry cake layers
Once your strawberry reduction is completely cool, you’re ready for the fun part. I like to think of this as the “assembly line” stage: everything prepped, mixer ready, oven humming in the background. If you’ve ever rushed this part and forgotten baking powder, consider this your gentle reminder to slow down for ten minutes.
Prep the pans and oven
Preheat your oven to 350°F (175°C). Grease three 8-inch round cake pans, line the bottoms with parchment circles, then lightly flour the sides. This combo gives you clean releases instead of torn edges.
If your oven runs hot or has a strong bottom element, place the pans on the middle rack and consider using light-colored pans. Dark ones brown the edges faster. Ask me how I know. One too many over-toasted bottoms.
Whisk the dry ingredients
In a medium bowl, whisk together the cake flour, baking powder, baking soda, and salt until everything looks evenly combined. This helps distribute the leavening so you don’t get random pockets of rise.
Set the bowl aside, but keep it nearby. You’ll be going back and forth between the dry mix and the wet ingredients in a minute.
Cream butter and sugar properly
In a stand mixer (or with a hand mixer), beat the room temperature butter and sugar on medium-high speed for 3 to 5 minutes, until the mixture looks pale and fluffy. It should almost look like frosting.
This step builds structure and air into the cake. If you just mix until combined, you lose a lot of potential lift. Scrape down the bowl once or twice so no sneaky butter clings to the bottom.
Add egg whites and flavorings
Turn the mixer to medium-low and add the egg whites one at a time, beating well after each addition. The mixture might look a little curdly at first, but it should smooth out as you go.
Mix in the vanilla and strawberry emulsion (if you’re using it), scraping down the bowl again. At this point, the batter should look glossy and cohesive, not separated.
Alternate dry ingredients with dairy
Add about one-third of the flour mixture to the bowl and mix on low just until it disappears. Then add all of the sour cream or milk and mix again on low until combined.
Repeat with another third of the flour. The key is gentle mixing. You’re trying to hydrate the flour without whipping up too much gluten. Overmixing equals tough or gummy cake.
Fold in the strawberry reduction without overmixing
Add the cooled strawberry reduction, the final third of the flour, and a drop or two of pink gel food coloring if you’re using it. Mix on low speed just until the streaks of flour are almost gone, then stop and finish folding by hand with a spatula.
The batter should be smooth, thick, and a pretty pink color. No flour pockets, but also no aggressive whipping. If it looks soupy, you either added warm puree or haven’t reduced it enough, so make a mental note for next time.
Bake times and doneness cues
Divide the batter evenly between your three prepared pans. You can eyeball it, or use a scale if you want perfectly even layers. Smooth the tops with an offset spatula.
Bake for about 28 to 32 minutes, until the tops spring back lightly when touched and a toothpick inserted in the center comes out with a few moist crumbs, not wet batter. The edges will just barely start pulling away from the sides.
Let the cakes cool in the pans for 10 to 15 minutes, then turn them out onto wire racks to cool completely. Don’t rush the cooling. Warm layers plus frosting equals sliding, slippy cake. And nobody needs that stress.
The frosting: strawberry cream cheese buttercream
This is the part where the cake suddenly turns into something you’d pay for at a bakery. The frosting is creamy, not too sweet, and has actual berry flavor instead of that weird candy note. I tested one version late at night while my kids were doing homework at the kitchen table, and they kept wandering over “just to check” the bowl.
Mixing the butter and cream cheese until smooth
Start with truly room temperature butter and brick-style cream cheese. If they’re still a little chilly, you’ll get tiny lumps that don’t want to smooth out later. Add both to your mixer bowl and beat on medium speed until the mixture looks completely uniform and creamy, scraping the bowl once or twice.
You’re not trying to whip in a ton of air at this stage, you’re just making sure there are no sneaky cream cheese bits hiding in the corners. It should look like a thick, smooth spread.
Adding powdered sugar without making it gloopy
Turn the mixer to low and add the powdered sugar gradually, about a cup at a time. Let each addition mostly incorporate before adding the next so you don’t end up in a sweet, snowy cloud. Once all the sugar is in, bump the speed up to medium and beat until it looks fluffy.
If it feels too stiff, don’t panic yet. Remember the strawberry reduction is coming, and it will loosen the texture a bit. If it’s already very soft before the berries, add a little more powdered sugar now so you don’t end up with runny frosting later.
Using the remaining strawberry reduction for flavor and color
Make sure your reserved strawberry reduction is completely cool. Then add a few spoonfuls at a time with the mixer on low. You’ll see the frosting blush a soft pink and start to smell like strawberry ice cream.
Keep an eye on consistency as you go. You want it thick enough to hold swirls and support the cake layers, but smooth enough to spread. Add vanilla and a pinch of salt to balance the sweetness. If you’d like the color a bit bolder, a tiny drop of pink gel will do it.
How to keep the frosting stable (warm weather tips)
Once your frosting is the right texture, let it sit for a couple of minutes and check it with a spatula. If it’s sliding off in big soft waves, chill the bowl in the fridge for 10–15 minutes, then beat briefly to bring it back to a spreadable consistency.
On hot days, I like to frost the cake in stages: crumb coat, chill, then final coat, popping the bowl of frosting in the fridge whenever it feels too soft. Cream cheese frosting is dreamy, but it appreciates a little temperature control. That way your strawberry cake looks as good on the table as it did in your head.
Assembly & decoration tips
This is where your strawberry layer cake actually turns into a showpiece. I like to clear a little space on the counter, grab my offset spatula, and pretend I’m working behind a bakery case for ten minutes. It makes the whole thing feel less stressful and more like play.
Leveling and stacking the layers
Make sure your cake layers are completely cool before you even think about stacking. If they’re slightly domed, use a long serrated knife to gently saw off the hump so you have flat tops. Save the scraps for snacking. Or “quality control,” as we call it here.
Place a small dab of frosting in the center of your cake board or serving plate and set the first layer on top. That little smear acts like glue so the cake doesn’t slide around while you work. Add a generous scoop of frosting and spread it out to an even layer, stopping just short of the very edge.
The buttercream dam to keep filling in place
If you want extra filling (or like a thicker layer of frosting between cake layers), pipe a ring of frosting around the outer edge of the layer before you add more in the center. This ring is your “dam.” It keeps the filling from squishing out the sides once everything is stacked.
I usually do a quick circle with a piping bag fitted with a large round tip, then fill the middle and smooth it all together. Repeat with the second layer, then top with the third, placing it upside down so you get the flattest possible top.
Crumb coat and chill time
Once your layers are stacked, spread a very thin layer of frosting over the top and sides. You’ll see crumbs. That’s the point. This is your crumb coat, the little jacket that locks everything in so your final layer goes on smooth.
Pop the whole cake into the fridge for about 20–30 minutes, just until the frosting feels firm to the touch. This short chill makes decorating a thousand times easier and helps prevent sliding layers, especially with a softer cream cheese frosting.
Final coat and simple decorating ideas
After the crumb coat is set, add your final layer of frosting, working from the top down. Smooth it with an offset spatula for clean, simple sides, or swirl it generously if you like a more rustic look. Both are pretty.
For an easy finish, pipe a border around the top edge with whatever tip you have handy, then sprinkle on a few white sprinkles or crumble a bit of leftover cake scraps for texture. Nothing complicated.
When and how to add fresh berries on top
Fresh strawberries look gorgeous on this cake, but they’re also juicy and can weep over time. Add them as close to serving as you can. Pat them dry after rinsing, then halve or slice and arrange right on top of the chilled frosting.
If you’re decorating a few hours ahead, keep the cake refrigerated once the berries are on and bring it out 20–30 minutes before serving so the frosting softens slightly. Pretty, pink, and ready for candles or a simple knife and fork moment.
Storage, freezing & make-ahead guide
Layer cakes are a bit of a project, so I like to break them up over a couple of days instead of trying to pull off “full bakery mode” on a random Tuesday night. Here’s how to give yourself some breathing room and still end up with a fresh-tasting strawberry cake.
3-day stress-free schedule (Day 1, Day 2, Day 3)
Day 1: Make the strawberry reduction.
Cook the puree down, let it cool completely, then transfer it to an airtight container. Chill it in the fridge overnight. It actually thickens a bit more as it rests, which is perfect. You can also weigh or measure what you need for the cake and frosting so you’re ready to go.
Day 2: Bake the cake layers.
Mix the batter, bake the layers, and let them cool completely. Once cool, wrap each layer tightly in plastic wrap. You can leave them at room temperature for up to a day if your kitchen isn’t hot, or refrigerate them if you’re nervous about warmth. Chilled layers are easier to level and frost anyway.
Day 3: Make the frosting and assemble.
Whip up the strawberry cream cheese buttercream, stack the layers, crumb coat, chill, then finish decorating. If you’re serving in the evening, I like to assemble in the morning so the cake has time to chill and relax in the fridge.
Freezing cake layers and how to thaw
If you want an even longer head start, you can bake the layers up to 1–2 months in advance.
Let the cakes cool completely, then wrap each one tightly in plastic wrap and again in foil or place in a large freezer bag. Label them so you remember what’s what. To thaw, move them to the fridge overnight, still wrapped, then bring them to just cool room temp before frosting.
You can also freeze extra slices the same way. Wrap, freeze, and then thaw in the fridge when you need a little “future you” dessert.
How to store the frosted cake
Because of the cream cheese in the frosting and the fresh fruit, this isn’t a counter-all-day kind of situation. Once your cake is assembled, refrigerate it. I usually chill it uncovered for about 20–30 minutes to firm up the frosting, then cover it loosely with plastic wrap or a cake dome so it doesn’t dry out.
The cake keeps well in the fridge for about 3 days. Before serving, let it sit at room temperature for 20–30 minutes so the frosting softens and the flavors don’t taste muted from the cold.
How long it keeps and when to refrigerate
If you skip fresh berries on top, your frosted cake is happiest refrigerated and eaten within 3 days. If you do add fresh strawberries as decoration, try to serve within 24 hours. They start to soften and can release juice onto the frosting after that.
Leftover slices should go back into the fridge, covered or in airtight containers. They’re still really good the next day. Especially with coffee. Or, honestly, standing at the fridge door with a fork.
Variations and pan sizes
Once you’ve nailed the classic tall layer version, you can absolutely bend this batter to fit whatever pan you need. I’ve made it as cupcakes for a school party and in a 9×13 pan when I didn’t feel like dealing with multiple layers and cake boards. Same flavor, less fuss.
Cupcake conversion: times and yield
For cupcakes, line a standard muffin pan with paper liners and fill each one about 2/3 full with batter. This recipe will usually give you about 24 cupcakes, give or take a couple depending on how generous you are with the scoop. I like using a large cookie scoop for speed and consistency.
Bake at 350°F (175°C) for about 18–22 minutes. Start checking around 17–18 minutes. The tops should spring back lightly when touched and a toothpick in the center should come out with a few moist crumbs, not wet batter. Let them cool completely before frosting.
You can pipe tall swirls of strawberry cream cheese frosting on top, or do a simple swoop with a small spatula. A tiny slice of fresh strawberry on each cupcake right before serving is a nice touch.
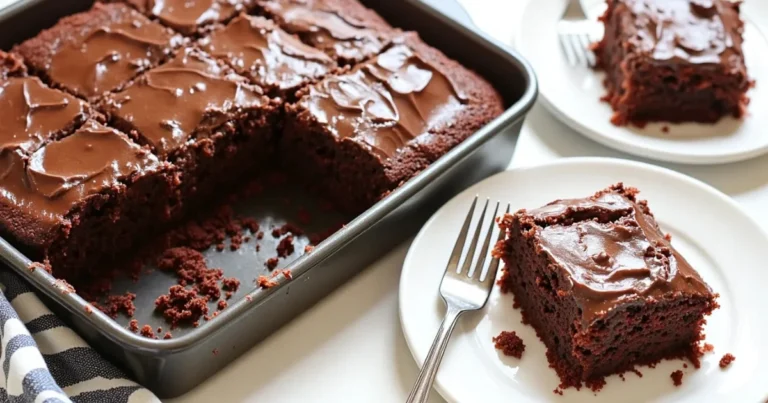
9×13 pan option and baking time
If you want more of a casual, potluck-style dessert, you can bake the batter in a greased and parchment-lined 9×13-inch pan. Pour the batter in, smooth the top, and bake at 350°F (175°C) for roughly 32–38 minutes.
You’re looking for the same doneness cues: lightly golden edges, center that springs back, and a toothpick that comes out with a few moist crumbs. Cool the cake completely in the pan, then spread a generous layer of frosting over the top. It turns into a pink, party-ready snack cake that you can serve right from the pan.
Turning it into a 2-layer 9-inch cake
If you own 9-inch pans instead of 8-inch, you’ve got options. You can divide the full batch of batter between two 9-inch pans for slightly thicker layers, or scale the recipe down a bit if you want something shorter and lighter.
For two standard 9-inch layers using the full batch, your bake time will stretch slightly, usually landing around 30–35 minutes. Keep an eye on the edges and the center as it bakes. Once they’re cooled, you can fill and frost just like the original version.
The flavor and texture stay the same across all these variations. You’re really just choosing the shape that fits your day: tall celebration cake, easy slice-and-serve tray cake, or grab-and-go cupcakes.
Strawberry Layer Cake Printable Recipe Card
Fresh Strawberry Layer Cake with Strawberry Buttercream
A moist, bakery-style strawberry layer cake made from scratch with a slow-cooked strawberry reduction and fluffy strawberry cream cheese buttercream. No Jell-O or box mix, just real berry flavor in every bite.
Ingredients
For the Strawberry Reduction:
- 2 pounds (900g) fresh or frozen strawberries, hulled
- 2 tablespoons granulated sugar (optional, for less-sweet berries)
- 1 teaspoon lemon juice
For the Strawberry Cake Layers:
- 3 cups (345g) cake flour, sifted
- 2 1/2 teaspoons baking powder
- 1/2 teaspoon baking soda
- 1/2 teaspoon fine sea salt
- 1 cup (226g) unsalted butter, softened to room temperature
- 1 3/4 cups (350g) granulated sugar
- 5 large egg whites, room temperature
- 1 tablespoon vanilla extract
- 1 teaspoon strawberry emulsion (optional, for extra flavor)
- 1/2 cup (120ml) sour cream or whole milk, room temperature
- 3/4 cup cooled strawberry reduction (from above)
- 1–2 drops pink gel food coloring (optional)
- 1–2 teaspoons finely grated lemon zest (optional, brightens flavor)
For the Strawberry Cream Cheese Buttercream:
- 1 cup (226g) unsalted butter, softened to room temperature
- 8 ounces (226g) full-fat brick-style cream cheese, softened
- 5–6 cups (600–720g) powdered sugar, sifted
- 1/4–1/2 cup cooled strawberry reduction (remaining from above)
- 1 teaspoon vanilla extract
- Pinch of fine sea salt
Instructions
- Make the strawberry reduction by pureeing the strawberries with sugar and lemon juice until completely smooth.
- Simmer the puree in a wide saucepan over medium-low heat, stirring often, until reduced by at least half and thick and jammy.
- Transfer the thick strawberry reduction to a shallow bowl and cool completely to room temperature; chill if needed until scoopable.
- Preheat the oven to 350°F (175°C) and prepare three 8-inch round cake pans by greasing, lining with parchment, and lightly flouring the sides.
- Whisk together the cake flour, baking powder, baking soda, and salt in a medium bowl until well combined.
- Beat the softened butter and granulated sugar in a mixer on medium-high speed until very pale, light, and fluffy.
- Add the egg whites one at a time, mixing well after each addition, then blend in the vanilla and optional strawberry emulsion.
- Add about one-third of the flour mixture and mix on low just until combined, then add all of the sour cream or milk and mix on low.
- Add another third of the flour mixture and mix on low just until incorporated.
- Add the cooled strawberry reduction, remaining flour, optional lemon zest, and a drop or two of pink gel coloring, then mix on low until almost combined and finish folding gently by hand.
- Divide the batter evenly among the prepared pans, smooth the tops, and bake for 28–32 minutes or until a toothpick comes out with a few moist crumbs.
- Cool the cakes in the pans for 10–15 minutes, then turn them out onto wire racks, remove parchment, and let cool completely; level the tops if needed.
- Beat the softened butter and cream cheese together until completely smooth and creamy with no lumps.
- Gradually add powdered sugar on low speed, then mix in some of the cooled strawberry reduction, vanilla, and salt, adjusting with more reduction or sugar to reach a thick but spreadable frosting.
- Place the first cake layer on a serving plate with a dab of frosting underneath, spread an even layer of frosting on top, and repeat with the second layer, then add the third layer.
- Apply a thin crumb coat of frosting over the top and sides of the cake and chill for 20–30 minutes to set.
- Add a final generous coat of frosting, smooth or swirl as desired, and decorate the top with fresh strawberry halves or slices just before serving.
Notes
- You can make the strawberry reduction up to 2 days ahead; store it covered in the refrigerator until ready to use.
- Frozen strawberries work as well as fresh; thaw completely and drain excess liquid before pureeing so the reduction cooks down properly.
- For a 3-day schedule: Day 1 make and chill the strawberry reduction, Day 2 bake and cool cake layers, Day 3 make frosting and assemble the cake.
- Baked cake layers can be wrapped tightly in plastic wrap and kept in the fridge for up to 2 days or frozen for up to 2 months; thaw in the fridge overnight before frosting.
- To bake cupcakes, divide the batter into 24 lined muffin cups, filling about 2/3 full, and bake at 350°F (175°C) for 18–22 minutes.
- For a 9x13-inch cake, bake the batter in a greased and parchment-lined pan at 350°F (175°C) for about 32–38 minutes, then cool and frost in the pan.
- If you do not have cake flour, substitute by measuring 1 cup all-purpose flour, removing 2 tablespoons, and replacing those with 2 tablespoons cornstarch for each cup.
- The pink gel food coloring is optional but helps keep the cake a pretty pink; the flavor stays the same if you leave it out.
- Because of the cream cheese and real fruit, store the frosted cake covered in the refrigerator for up to 3 days and bring to room temperature for 20–30 minutes before serving.
- Add fresh strawberries on top shortly before serving to prevent them from weeping juice onto the frosting.
- Use the lower amount of powdered sugar in the frosting for a softer, less sweet finish and the higher amount for a thicker, sweeter frosting that holds sharper edges.
Nutrition Information:
Yield: 12 servings Serving Size: 1 SliceAmount Per Serving: Calories: 680Total Fat: 32gSaturated Fat: 20gCarbohydrates: 90gSugar: 65gProtein: 7g
Nutrition values are estimates and will vary based on ingredients and brands.
Strawberry layer cake FAQ
Love This Recipe? Discover More Classic Layer Cake Favorites
If this layer cake hit the spot, don’t miss The Ultimate Guide to Classic Layer Cakes where you’ll find more timeless flavors, smart frosting pairings, and easy fixes for every leaning, crumbly slice.